Reordering Cell

시계 앱의 편집 모드에서 오른쪽에 표시되는 버튼이다.
드래그를 통해 셀의 순서를 재정의 할 수 있다.

//
//  ReorderingCellViewController.swift
//  TableViewPractice
//
//  Created by Martin.Q on 2021/10/04.
//

import UIKit

class ReorderingCellViewController: UIViewController {
	var list1 = [String]()
	var list2 = [String]()
	var list3 = ["iMac Pro", "iMac 5K", "Macbook Pro", "iPad Pro", "iPad", "iPad mini", "iPhone 8", "iPhone 8 Plus", "iPhone SE", "iPhone X", "Mac mini", "Apple TV", "Apple Watch"]

	@IBOutlet weak var tableView: UITableView!

	@objc func reload() {
		tableView.reloadData()
	}

	override func viewDidLoad() {
		super.viewDidLoad()

		tableView.setEditing(true, animated: true)

		navigationItem.rightBarButtonItem = UIBarButtonItem(title: "Reload", style: .plain, target: self, action: #selector(reload))
	}
}

extension ReorderingCellViewController: UITableViewDataSource {
	func numberOfSections(in tableView: UITableView) -> Int {
		return 3
	}
	func tableView(_ tableView: UITableView, numberOfRowsInSection section: Int) -> Int {
		switch section {
		case 0:
			return list1.count
		case 1:
			return list2.count
		case 2:
			return list3.count
		default:
			return 0
		}
	}

	func tableView(_ tableView: UITableView, cellForRowAt indexPath: IndexPath) -> UITableViewCell {
		let cell = tableView.dequeueReusableCell(withIdentifier: "cell", for: indexPath)
		switch indexPath.section {
		case 0:
			cell.textLabel?.text = list1[indexPath.row]
		case 1:
			cell.textLabel?.text = list2[indexPath.row]
		case 2:
			cell.textLabel?.text = list3[indexPath.row]
		default:
			break
		}
		return cell
	}
}

extension ReorderingCellViewController: UITableViewDelegate {

}
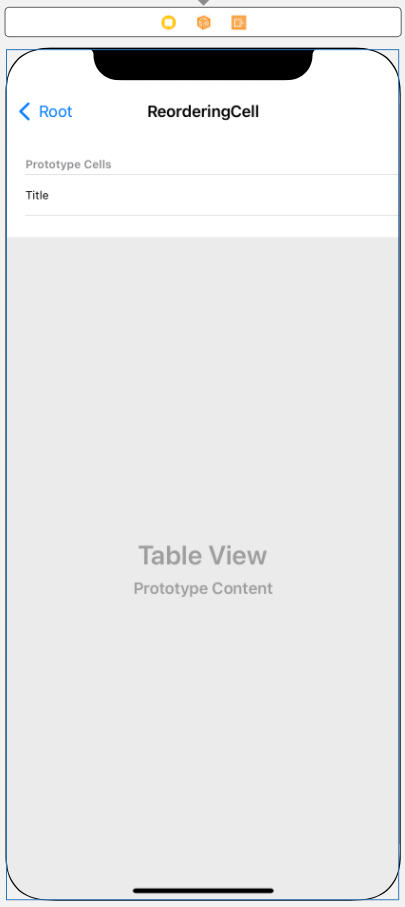
사용할 씬과 코드는 위와 같다.
왼쪽의 editingControl 버튼은 숨기고 오른쪽에 재정렬 버튼을 표시하고,
reload 버튼을 누르면 tableView의 데이터를 다시 로드한다.
func tableView(_ tableView: UITableView, canMoveRowAt indexPath: IndexPath) -> Bool {
	return true
}
dataSource에 새롭게 추가하는 tablView(canMoveRowAt:)메소드는
셀 재정렬 기능의 활성화 여부를 판단한다.
위처럼 true를 반환하는 것으로 재정렬 기능을 활성화할 수 있다.
만약 특정 셀의 재정렬을 금지하고자 한다면 두 번째 파라미터의 indexPath에 따라 true나 false를 각각 반환하도록 하면 된다.
extension ReorderingCellViewController: UITableViewDelegate {
	func tableView(_ tableView: UITableView, editingStyleForRowAt indexPath: IndexPath) -> UITableViewCell.EditingStyle {
		return .none
	}
}
editingControl 버튼을 숨기기 위해 tableView(editingStyleForRowAt:)메소드를 delegate에 추가한다.
none 스타일을 반환해 editingControl을 비활성화한다.
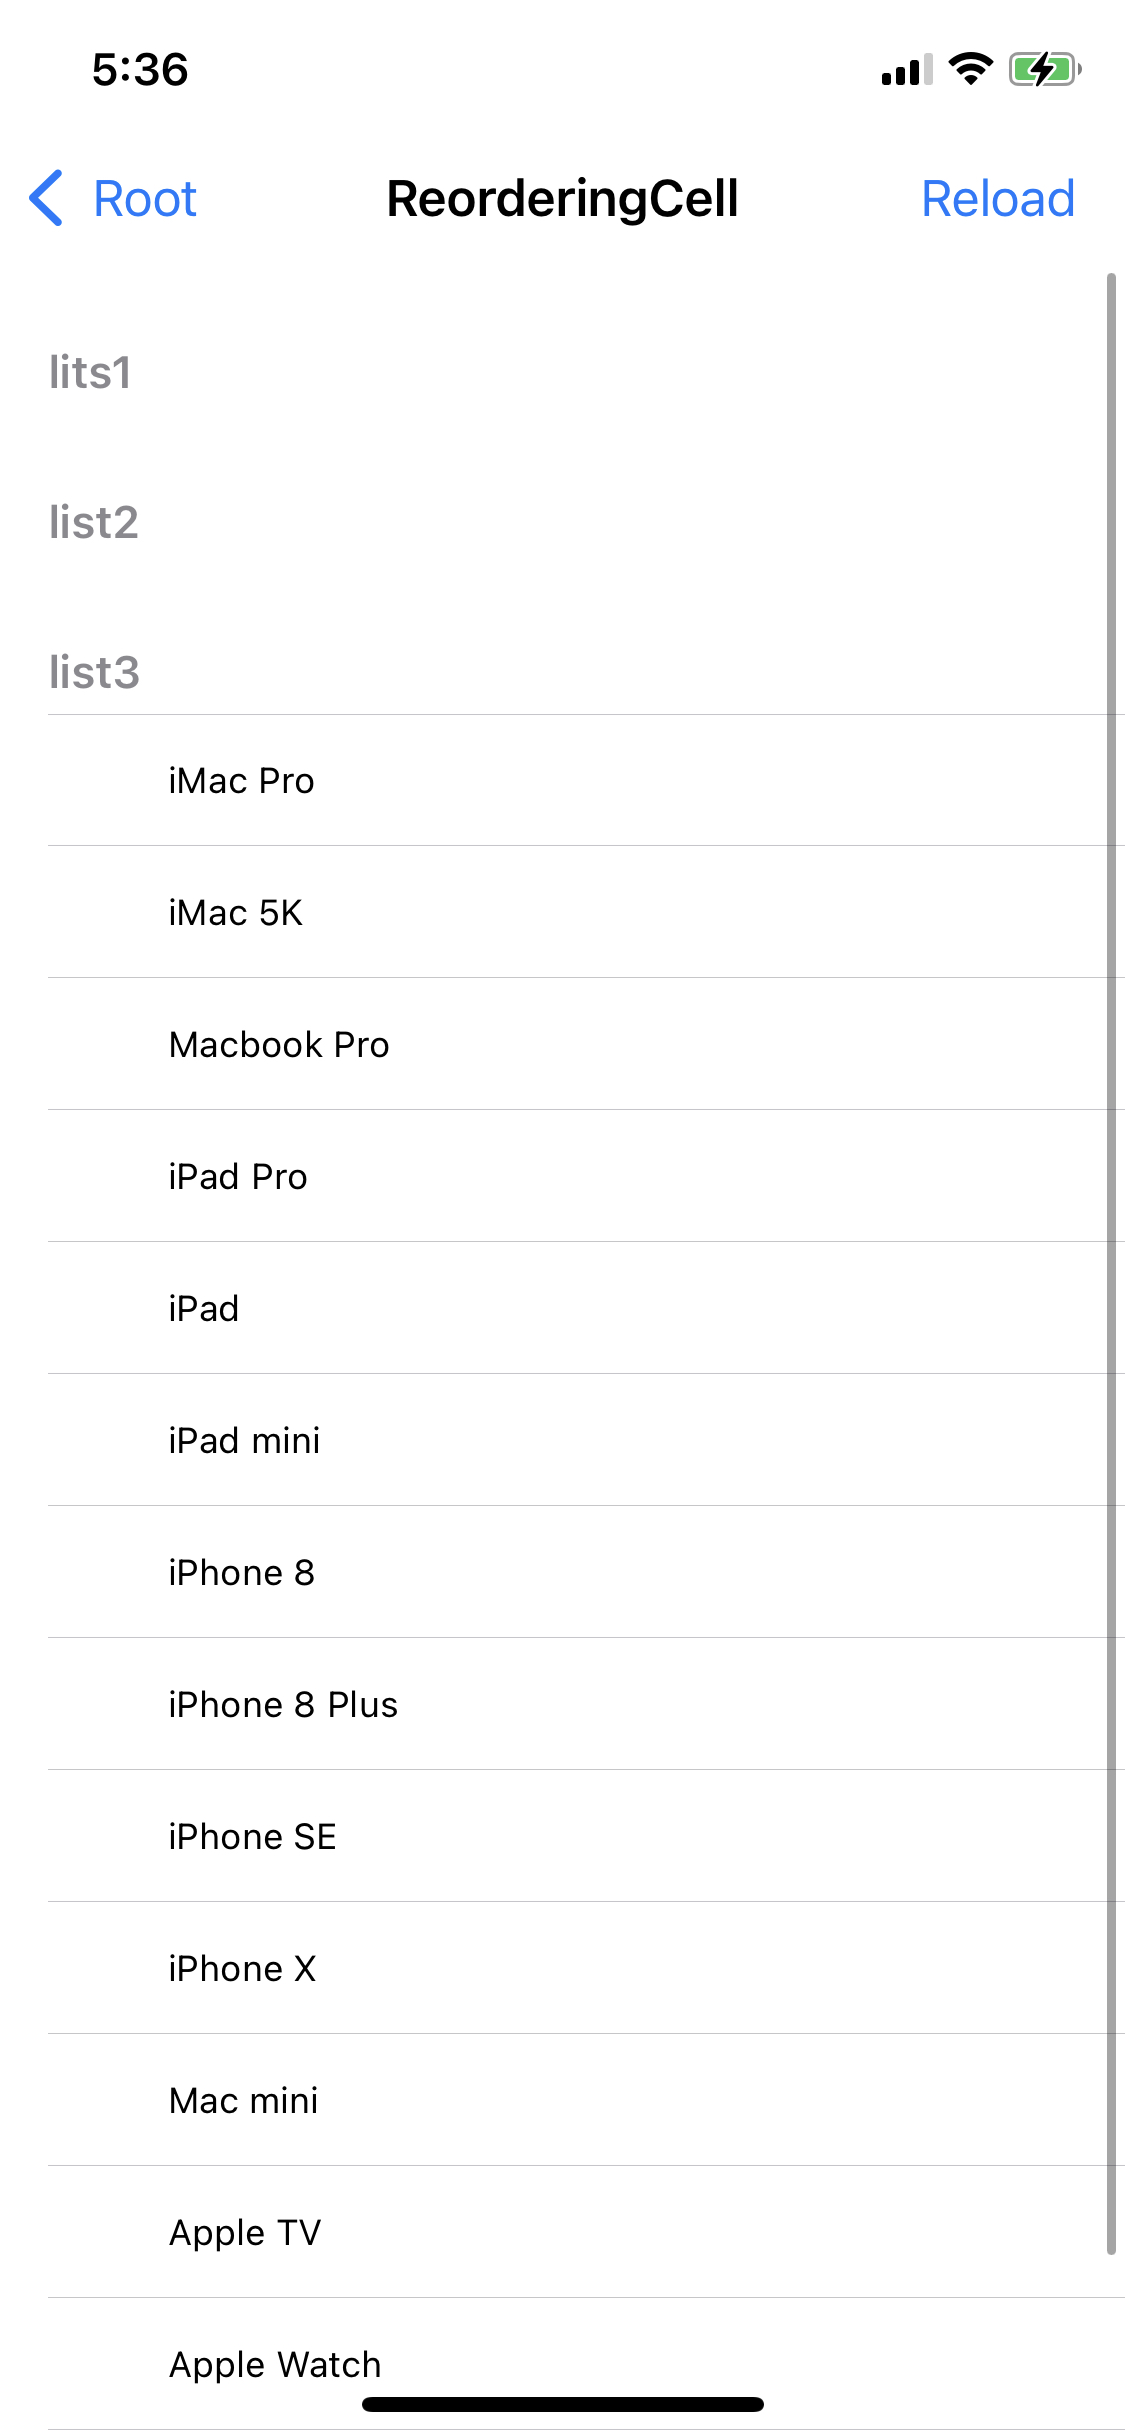
현재까지 적용된 상황을 보면 두 가지 문제를 확인할 수 있다.
- editingControl이 사라진 만큼 왼쪽에 공백이 생겼다.
- reorderingControl이 표시되지 않는다.
editingControl의 공백 없애기
tableView는 editingControl이 표시됐을 때 셀과 UI가 겹치지 않도록 좌측에 공백을 추가한다.
하지만 editingControl을 비활성화했다고 공백이 능동적으로 사라지진 않는다.
따라서 해당 공백을 직접 제거해 줘야 한다.
func tableView(_ tableView: UITableView, shouldIndentWhileEditingRowAt indexPath: IndexPath) -> Bool {
	return false
}
dataSource에서 tableView(shouldIdentWhileEditingRowAt:) 메소드를 사용해 왼쪽의 공백을 삭제한다.
reorderingControl 표시하기
deleteControl이 관련 메소드로 기능을 활성화하고 삭제는 직접 구현했던 것과 같이,
reorderingControl도 관련 메소드로 기능을 활성화 하고 정렬 기능은 직접 구현해야 한다.
func tableView(_ tableView: UITableView, moveRowAt sourceIndexPath: IndexPath, to destinationIndexPath: IndexPath) {

}
dataSource에 tableView(moveRowAt:)메소드를 추가한다.
해당 메소드는 두 번째 sourceIndexPath로 원래의 위치를 전달하고,
세 번째 destinationIndexPath로 수정될 위치를 전달한다.
내부에는 실제 데이터를 이동하는 코드를 구현한다.
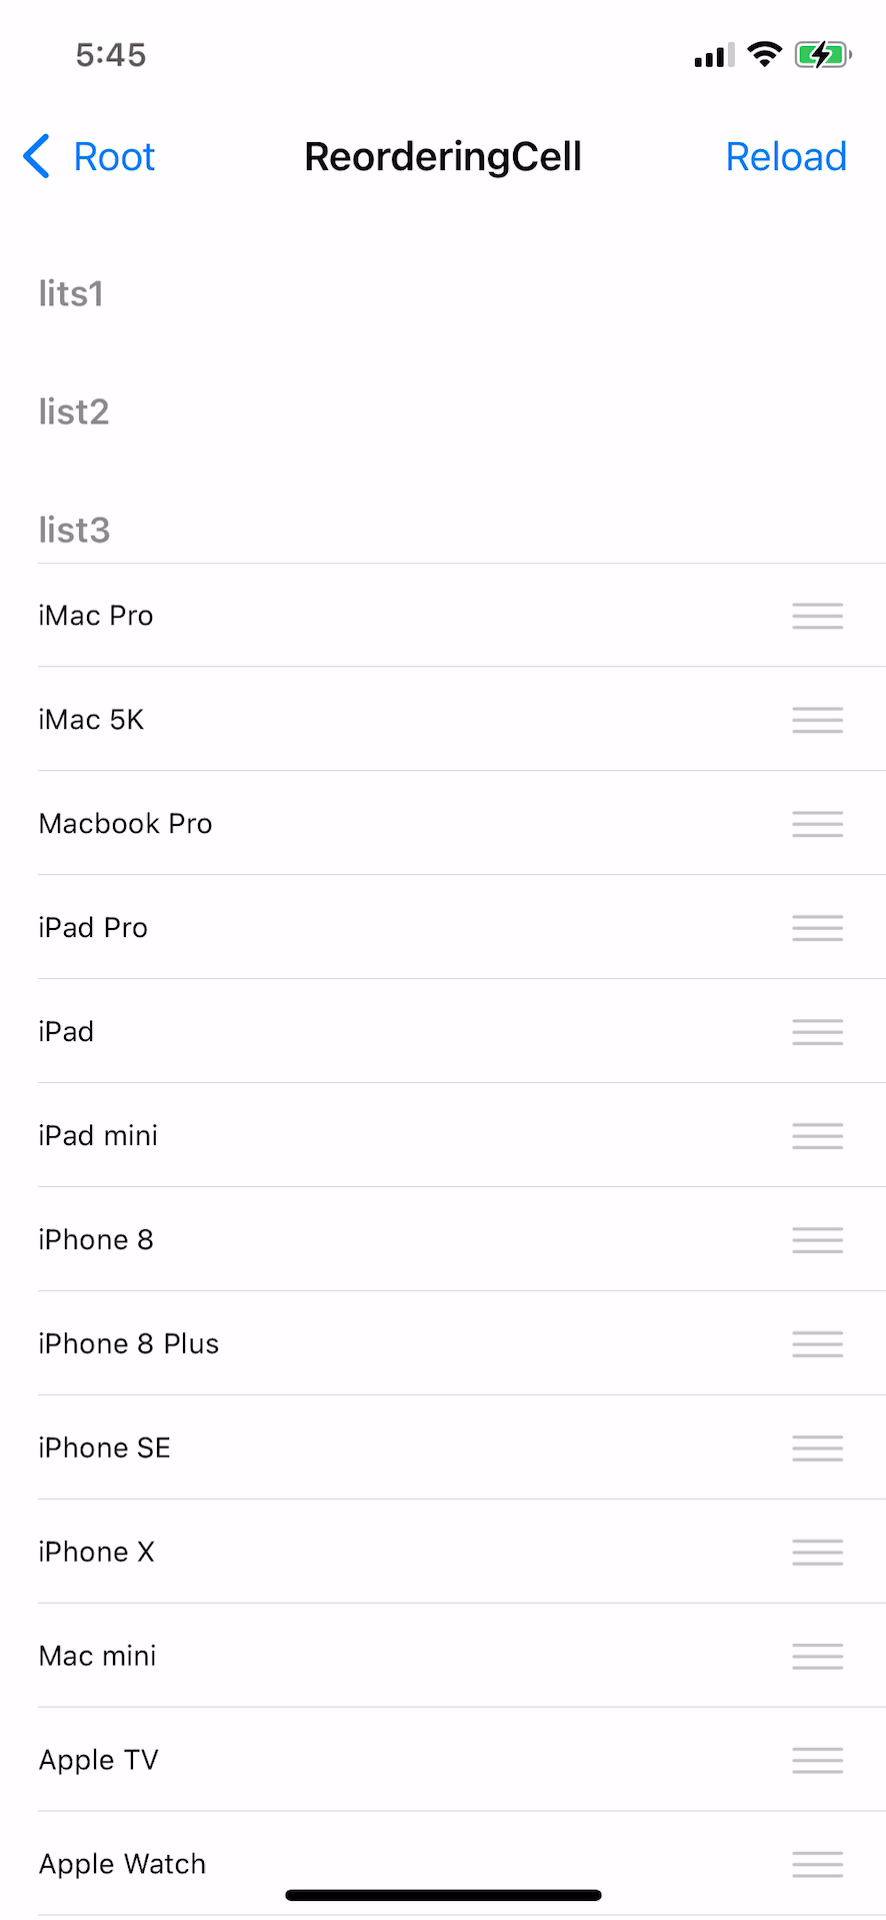

현재까지 적용된 화면을 보면 왼쪽의 여백이 사라졌고, 오른쪽에는 reorderingControl이 잘 표시되며,
실제로 드래그해 보면 셀의 순서가 바뀌는 것 같이 보인다.
하지만 이는 실제 데이터가 바뀌는 것이 아니기 때문에 reload를 통해 데이터를 다시 로드하면
다시 원래의 정렬로 돌아가는 것을 확인할 수 있다.
func tableView(_ tableView: UITableView, moveRowAt sourceIndexPath: IndexPath, to destinationIndexPath: IndexPath) {
	var target: String? = nil

	switch sourceIndexPath.section {
	case 0:
		target = list1.remove(at: sourceIndexPath.row)
	case 1:
		target = list2.remove(at: sourceIndexPath.row)
	case 2:
		target = list3.remove(at: sourceIndexPath.row)
	default:
		break
	}

	guard let bindingtarget = target else {
		return
	}

	switch destinationIndexPath.section {
	case 0:
		list1.insert(bindingtarget, at: destinationIndexPath.row)
	case 1:
		list2.insert(bindingtarget, at: destinationIndexPath.row)
	case 2:
		list3.insert(bindingtarget, at: destinationIndexPath.row)
	default:
		break
	}
}
sourceIndexPath의 section으로 각각의 배열에 분기해 데이터를 삭제하고 target에 저장한다.
이후 값이 존재하면 해당 데이터를 대상 셀의 indexPath를 참고하여 정확한 위치에 삽입한다.
배열의 저장 순서와 셀의 순서가 같아야 하기 때문에 append가 아닌 indsert(at:)을 사용한다.

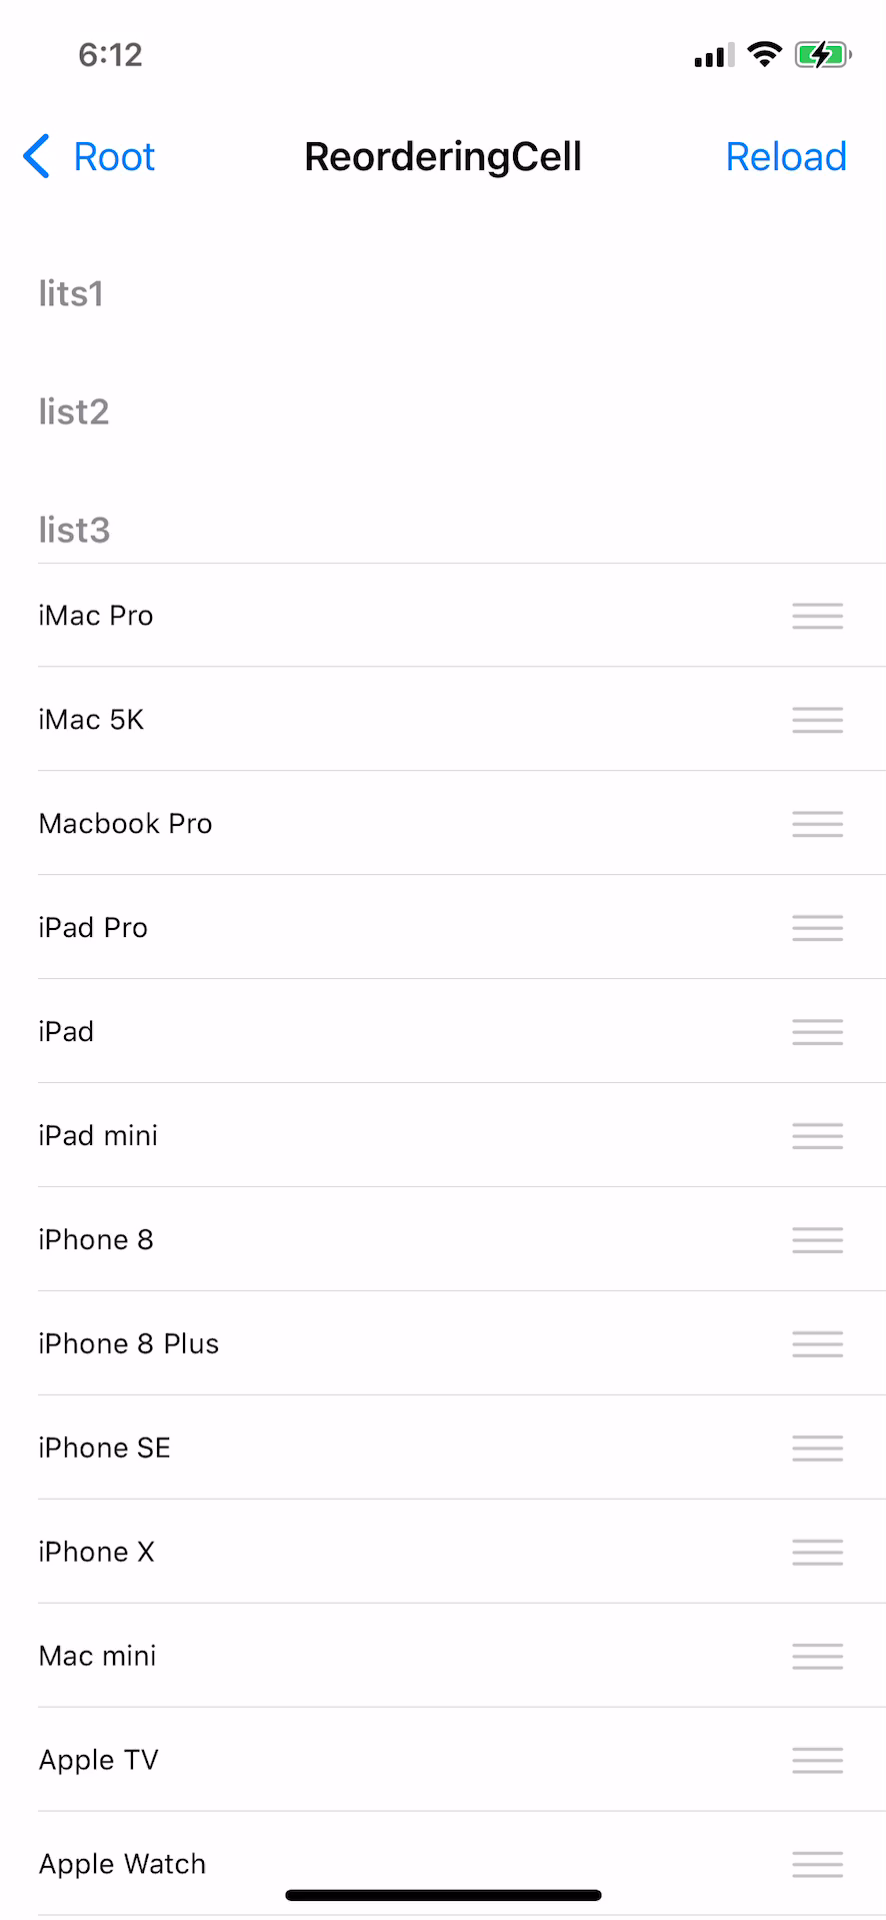
섹션 간의 이동이 가능해졌고,
reload를 터치해도 원래대로 복구되지도 않는다.
이번엔 셀의 이동에 제한을 추가해 본다.
func tableView(_ tableView: UITableView, targetIndexPathForMoveFromRowAt sourceIndexPath: IndexPath, toProposedIndexPath proposedDestinationIndexPath: IndexPath) -> IndexPath {

}
delegate에 tableView(targetIndexPathForMoveFromRowAt:)메소드를 추가한다.
해당 메소드는 셀의 드래그했다가 놨을 때 호출된다.
두 번째 파라미터인 sourceIndexPath로 처음 위치를 전달하고,
세 번째 파라미터인 proposedDestinationIndexPath가 전달되며
셀이 최종적으로 이동하는 위치는 해당 메소드가 반환하는 indexPath로 결정된다.
func tableView(_ tableView: UITableView, targetIndexPathForMoveFromRowAt sourceIndexPath: IndexPath, toProposedIndexPath proposedDestinationIndexPath: IndexPath) -> IndexPath {
	if proposedDestinationIndexPath.section == 0 {
		return sourceIndexPath
	} else {
		return proposedDestinationIndexPath
	}
}
따라서 위와 같이 목표 indexPath의 section이 0인 경우 sourceIndexPath를 반환하도록 구현하면
첫 번째 섹션으로는 셀을 이동시킬 수 없게 된다.
Prefetching API

//
//  PrefetchingViewController.swift
//  TableViewPractice
//
//  Created by Martin.Q on 2021/10/04.
//

import UIKit

class PrefetchingViewController: UIViewController {

	@IBOutlet weak var tableView: UITableView!

	lazy var refreshControl: UIRefreshControl = { [weak self] in
		let control = UIRefreshControl()
		return control
	}()

	@objc func refresh() {
		DispatchQueue.global().async { [weak self] in
			guard let strongSelf = self else {return}
			strongSelf.list = Landscape.generateData()
			strongSelf.downloadTasks.forEach{ $0.cancel() }
			strongSelf.downloadTasks.removeAll()

			DispatchQueue.main.async {
				strongSelf.tableView.reloadData()
			}
		}
	}

	var list = Landscape.generateData()
	var downloadTasks = [URLSessionTask]()

	override func viewDidLoad() {
		super.viewDidLoad()

	}

}

extension PrefetchingViewController: UITableViewDataSource {
	func tableView(_ tableView: UITableView, numberOfRowsInSection section: Int) -> Int {
		return list.count
	}

	func tableView(_ tableView: UITableView, cellForRowAt indexPath: IndexPath) -> UITableViewCell {
		let cell = tableView.dequeueReusableCell(withIdentifier: "cell", for: indexPath)

		if let imageView = cell.viewWithTag(100) as? UIImageView {
			if let image = list[indexPath.row].image {
				imageView.image = image
			} else {
				imageView.image = nil
				downloadImage(at: indexPath.row)
			}

		}

		if let label = cell.viewWithTag(200) as? UILabel {
			label.text = "#\(indexPath.row + 1)"
		}

		return cell
	}
}

extension PrefetchingViewController {
	func downloadImage(at index: Int) {
		guard list[index].image == nil else {
			return
		}

		let targetUrl = list[index].url
		guard !downloadTasks.contains(where: { $0.originalRequest?.url == targetUrl }) else {
			return
		}

		print(#function, index)

		let task = URLSession.shared.dataTask(with: targetUrl) { [weak self] (data, response, error) in
			if let error = error {
				print(error.localizedDescription)
				return
			}
			if let data = data, let image = UIImage(data: data), let strongSelf = self {
				strongSelf.list[index].image = image
				let reloadTargetIndexPath = IndexPath(row: index, section: 0)
				DispatchQueue.main.async {
					if strongSelf.tableView.indexPathsForVisibleRows?.contains(reloadTargetIndexPath) == .some(true) {
						strongSelf.tableView.reloadRows(at: [reloadTargetIndexPath], with: .automatic)
					}
				}
				strongSelf.completeTask()
			}
		}
		task.resume()
		downloadTasks.append(task)
	}

	func completeTask() {
		downloadTasks = downloadTasks.filter { $0.state != .completed }
	}

	func cancelDownload(at index: Int) {
		let targetUrl = list[index].url
		guard let taskIndex = downloadTasks.firstIndex(where: { $0.originalRequest?.url == targetUrl }) else {
			return
		}
//		guard let taskIndex = downloadTasks.index(where: { $0.originalRequest?.url == targetUrl }) else {
//			return
//		}
		let task = downloadTasks[taskIndex]
		task.cancel()
		downloadTasks.remove(at: taskIndex)
	}
}
//
// LandScape.swift
// TableViewPractice
//
// Created by Martin.Q on 2021/10/04.
//
import UIKit
class Landscape {
let urlString: String
var url: URL {
guard let url = URL(string: urlString) else {
fatalError("invalid URL")
}
return url
}
var image: UIImage?
init(urlString: String) {
self.urlString = urlString
}
static func generateData() -> [Landscape] {
return (1...36).map { Landscape(urlString: image's URL)}
}
}사용할 씬과 코드는 위와 같다.
강의에서 사용 중인 index(where:) 메소드는 firstIndex(where:)로 바뀌어 사용된다.
셀이 표시되면 이미지를 다운로드하고, 이를 셀에 표시한다.
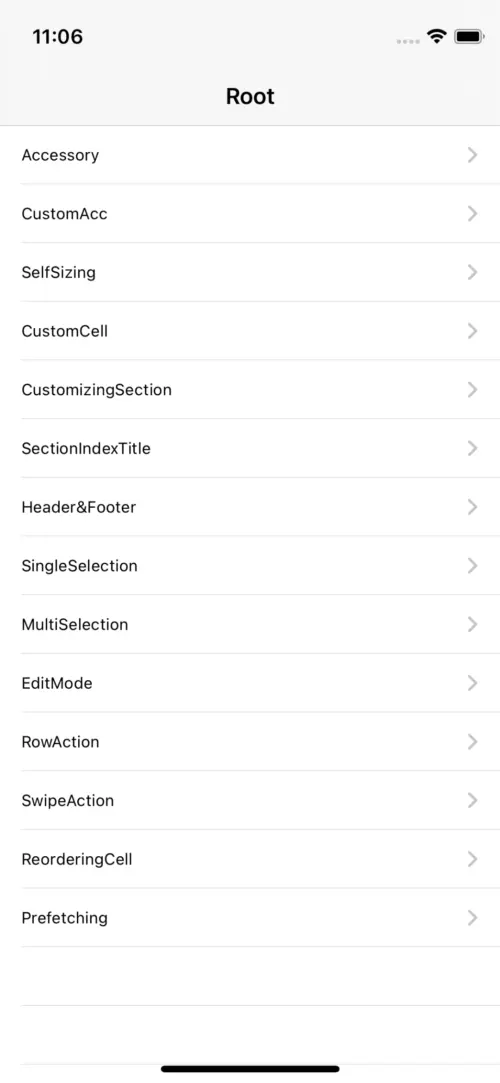
데이터 속도가 빠르면 크게 문제없지만 빠르게 스크롤했을 때 다운로드 후 refresh가 더디게 이뤄지는 부분이 보인다.
prefetching은 다음에 불로 올 데이터를 미리 구현해 보다 자연스럽게 만들어 주는 기능이다.
//
//  LandScape.swift
//  TableViewPractice
//
//  Created by Martin.Q on 2021/10/04.
//

import UIKit

class Landscape {
	let urlString: String
	var url: URL {
		guard let url = URL(string: urlString) else {
			fatalError("invalid URL")
		}
		return url
	}
	var image: UIImage?

	init(urlString: String) {
		self.urlString = urlString
	}

	static func generateData() -> [Landscape] {
		return (1...36).map { Landscape(urlString: image's URL)}
	}
}Landscape 파일은 데이터를 다운로드할 URL과 다운로드한 이미지 또 이를 담은 Landscape 배열이 존재한다.
static func generateData() -> [Landscape] {
	return (1...36).map { Landscape(urlString: image's URL)}
}
위의 image's URL 부분을 다른 URL로 교체해야 한다.
func tableView(_ tableView: UITableView, cellForRowAt indexPath: IndexPath) -> UITableViewCell {
	let cell = tableView.dequeueReusableCell(withIdentifier: "cell", for: indexPath)

	if let imageView = cell.viewWithTag(100) as? UIImageView {
		if let image = list[indexPath.row].image {
			imageView.image = image
		} else {
			imageView.image = nil
			downloadImage(at: indexPath.row)
		}

	}

	if let label = cell.viewWithTag(200) as? UILabel {
		label.text = "#\(indexPath.row + 1)"
	}

	return cell
}
dataSource의 해당 부분을 보면 image에 이미지가 존재한다면 imageView에 표시하고,
존재하지 않는다면 다운로드하도록 구현돼있다.
if let data = data, let image = UIImage(data: data), let strongSelf = self {
	strongSelf.list[index].image = image
	let reloadTargetIndexPath = IndexPath(row: index, section: 0)
	DispatchQueue.main.async {
		if strongSelf.tableView.indexPathsForVisibleRows?.contains(reloadTargetIndexPath) == .some(true) {
			strongSelf.tableView.reloadRows(at: [reloadTargetIndexPath], with: .automatic)
		}
	}
	strongSelf.completeTask()
}
DownloadImage 메소드는 이미지를 다운로드하고, 정상적으로 마쳤다면 Landscape의 image 속성에 저장한다.
이후 연관된 셀을 reload 하게 된다.
테이블에 표시할 데이터를 다운로드할 때는 지금과 같이 비동기 방식으로 진행해야 한다.
viewConstoller를 prefetching data source로 지정해야 하며,
해당 작업은 interface builder와 코드 모두에서 진행할 수 있다.
실습에선 코드로 진행한다.
override func viewDidLoad() {
	super.viewDidLoad()

	tableView.prefetchDataSource = self

}
viewDidLoad에서 tableView의 prefetchDataSource를 self로 지정하고
extension PrefetchingViewController: UITableViewDataSourcePrefetching {
	func tableView(_ tableView: UITableView, prefetchRowsAt indexPaths: [IndexPath]) {

	}


}
UITableViewDataSourcePrefetching 프로토콜을 채용할 수 있도록 extension을 추가한다.
해당 프로토콜은 하나의 필수 메소드와 하나의 옵션 메소드가 존재하고,
tableView(prefetchinRowsAt:)메소드는 필수 메소드이다.
tableView는 다음에 표시될 셀을 미리 판단하고 위의 메소드를 호출한다.
표시될 셀의 위치는 두 번째 파라미터인 prefetchRowsAt을 통해 배열로 전달한다.
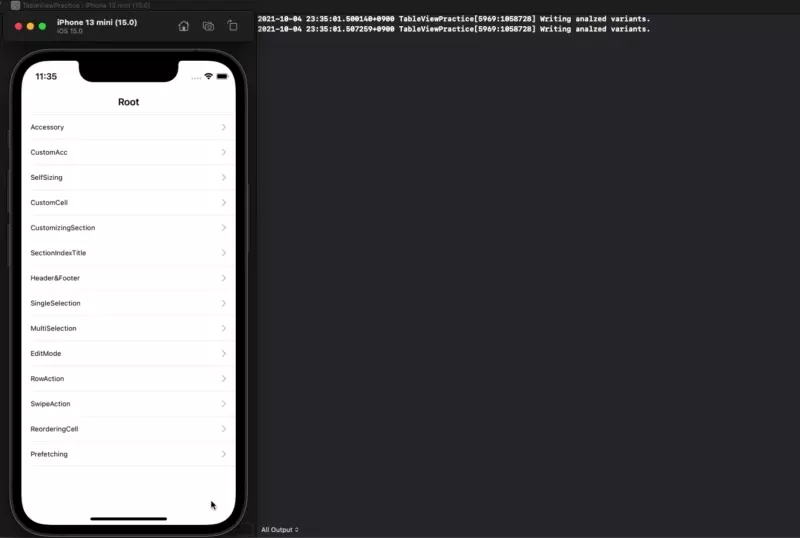
사진처럼 진입하자마자 13번째 사진까지 다운로드하고, prefetch를 호출한다.
이후 끝까지 내려도 딜레이 이전과는 다르게 딜레이가 없이 사진이 표시되고 있다.
또한 최 상단으로 이동할 때에 prefetch를 반복적으로 호출하는 것도 볼 수 있다.

이때의 로그를 보면 중복되는 index를 표시하고 있는 것을 볼 수 있다.
prefetch를 사용할 때는 이렇게 중복으로 요청하지 않도록 주의해서 사용해야 한다.
func downloadImage(at index: Int) {
	guard list[index].image == nil else {
		return
	}

	let targetUrl = list[index].url
	guard !downloadTasks.contains(where: { $0.originalRequest?.url == targetUrl }) else {
		return
	}

	print(#function, index)

	let task = URLSession.shared.dataTask(with: targetUrl) { [weak self] (data, response, error) in
		if let error = error {
			print(error.localizedDescription)
			return
		}
		if let data = data, let image = UIImage(data: data), let strongSelf = self {
			strongSelf.list[index].image = image
			let reloadTargetIndexPath = IndexPath(row: index, section: 0)
			DispatchQueue.main.async {
				if strongSelf.tableView.indexPathsForVisibleRows?.contains(reloadTargetIndexPath) == .some(true) {
					strongSelf.tableView.reloadRows(at: [reloadTargetIndexPath], with: .automatic)
				}
			}
			strongSelf.completeTask()
		}
	}
	task.resume()
	downloadTasks.append(task)
}
downloadImage 메소드를 다시 확인해 보면 이미지를 다운로드하기 직전에 두 가지 조건을 확인하게 된다.
guard list[index].image == nil else {
	return
}
첫 번째 guard문에서 다운로드할 이미지가 존재하는지 확인한다.
이미지를 이미 다운로드했다면 나머지 코드는 실행할 필요가 없기 때문에 바로 종료하게 된다.
let targetUrl = list[index].url
guard !downloadTasks.contains(where: { $0.originalRequest?.url == targetUrl }) else {
	return
}
두 번째 guard문에서 동일한 이미지를 다운로드하는 작업이 있는지 확인하고, 중복 다운로드를 방지한다.
따라서 동일한 index에서 연속적으로 다운로드를 요청해도 불필요한 작업은 실행되지 않게 된다.

스크롤을 빠르게 진행한다면 위와 같이 prefetch 대상이 즉시 해제되기도 한다.
또한 끝까지 굉장히 빠르게 스크롤한다면 중간에 표시되는 사진들을 굳이 다운로드하지 않아도 된다.
func tableView(_ tableView: UITableView, cancelPrefetchingForRowsAt indexPaths: [IndexPath]) {

}
tableView(cancelPrefetchingForRowsAt:)메소드는 필수메소드는 아니지만 함께 구현한다면,
네트워크나 메모리 자원을 아끼는데 큰 도움이 된다.
해당 메소드는 prefetching 대상에서 제외된 cell이 존재할 때마다 호출되고,
두 번째 파라미터로 취소된 indexPath 배열이 전달된다.
func tableView(_ tableView: UITableView, cancelPrefetchingForRowsAt indexPaths: [IndexPath]) {
	print(#function, indexPaths)

	for indexPath in indexPaths {
		cancelDownload(at: indexPath.row)
	}
}
로그를 출력하고, 전달된 indexPath를 활용해 다운로드를 취소한다.

이후 빠르게 스크롤 해 콘솔을 확인해 보면 tableView(cancelPrefetchingForRowsAt:)메소드가 호출됐다.
override func viewDidLoad() {
	super.viewDidLoad()

	tableView.prefetchDataSource = self

	tableView.refreshControl = refreshControl
	refreshControl.addTarget(self, action: #selector(refresh), for: .valueChanged)

}
위처럼 tableView에는 refreshControl 속성이 이미 존재하고,
해당 속성에 코드를 연결하는 것으로 pull to refresh 기능이 활성화된다.

셀을 끌어당기면 pull to refresh가 작동하지만,
데이터가 새로고침 된 이후에도 사라지지 않는 것이 확인된다.
lazy var refreshControl: UIRefreshControl = { [weak self] in
	let control = UIRefreshControl()
	control.tintColor = self?.view.tintColor
	return control
}()

@objc func refresh() {
	DispatchQueue.global().async { [weak self] in
		guard let strongSelf = self else {return}
		strongSelf.list = Landscape.generateData()
		strongSelf.downloadTasks.forEach{ $0.cancel() }
		strongSelf.downloadTasks.removeAll()
		Thread.sleep(forTimeInterval: 2)

		DispatchQueue.main.async {
			strongSelf.tableView.reloadData()
			strongSelf.tableView.refreshControl?.endRefreshing()
		}
	}
}
수정하는 김에 refreshControl의 tintColor를 변경하고,
데이터를 reload 한 이후 refreshControl이 제공 하는 endRefreshing 메소드를 호출해 refreshing을 종료한다.

tintColor가 변경됐고, reload가 완료되면 refreshControl이 종료되는 것을 볼 수 있다.
Table View Controller

좌측은 일반적으로 사용하는 ViewController의 모습이고,
우측은 TableViewController의 모습이다.
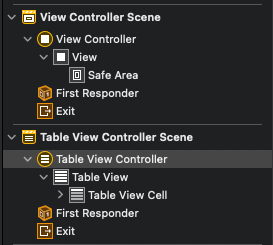
이 둘은 씬의 구조도 다른데,
일반 ViewController는 RootView로 UIView를 가지고 있어 자유롭게 화면을 구성할 수 있다.
반면 TableViewContoller는 RootView로 TableView를 가지고 있어 별도의 View를 추가할 수 없다.

따라서 직접 TableView를 추가하고 제약을 수정하는 수고를 덜 수 있고,
ConnectionPannel에서 확인할 수 있듯 dataSource와 delegate도 자동으로 연결된다.

TableViewController와 연결하는 클래스 파일은 UIViewController Subclass가 아닌 UITableViewController subclass를 가진다.
//
//  SampleTableViewController.swift
//  TableViewPractice
//
//  Created by Martin.Q on 2021/10/05.
//

import UIKit

class SampleTableViewController: UITableViewController {

    override func viewDidLoad() {
        super.viewDidLoad()

        // Uncomment the following line to preserve selection between presentations
        // self.clearsSelectionOnViewWillAppear = false

        // Uncomment the following line to display an Edit button in the navigation bar for this view controller.
        // self.navigationItem.rightBarButtonItem = self.editButtonItem
    }

    // MARK: - Table view data source

    override func numberOfSections(in tableView: UITableView) -> Int {
        // #warning Incomplete implementation, return the number of sections
        return 0
    }

    override func tableView(_ tableView: UITableView, numberOfRowsInSection section: Int) -> Int {
        // #warning Incomplete implementation, return the number of rows
        return 0
    }

    /*
    override func tableView(_ tableView: UITableView, cellForRowAt indexPath: IndexPath) -> UITableViewCell {
        let cell = tableView.dequeueReusableCell(withIdentifier: "reuseIdentifier", for: indexPath)

        // Configure the cell...

        return cell
    }
    */

    /*
    // Override to support conditional editing of the table view.
    override func tableView(_ tableView: UITableView, canEditRowAt indexPath: IndexPath) -> Bool {
        // Return false if you do not want the specified item to be editable.
        return true
    }
    */

    /*
    // Override to support editing the table view.
    override func tableView(_ tableView: UITableView, commit editingStyle: UITableViewCell.EditingStyle, forRowAt indexPath: IndexPath) {
        if editingStyle == .delete {
            // Delete the row from the data source
            tableView.deleteRows(at: [indexPath], with: .fade)
        } else if editingStyle == .insert {
            // Create a new instance of the appropriate class, insert it into the array, and add a new row to the table view
        }
    }
    */

    /*
    // Override to support rearranging the table view.
    override func tableView(_ tableView: UITableView, moveRowAt fromIndexPath: IndexPath, to: IndexPath) {

    }
    */

    /*
    // Override to support conditional rearranging of the table view.
    override func tableView(_ tableView: UITableView, canMoveRowAt indexPath: IndexPath) -> Bool {
        // Return false if you do not want the item to be re-orderable.
        return true
    }
    */

    /*
    // MARK: - Navigation

    // In a storyboard-based application, you will often want to do a little preparation before navigation
    override func prepare(for segue: UIStoryboardSegue, sender: Any?) {
        // Get the new view controller using segue.destination.
        // Pass the selected object to the new view controller.
    }
    */

}
이렇게 생성한 파일은 이제 것 사용하던 형식과는 많이 다른데,
estension으로 상속받는 것이 아닌 overiding을 사용하여 구현하게 된다.

override func tableView(_ tableView: UITableView, numberOfRowsInSection section: Int) -> Int {
	// #warning Incomplete implementation, return the number of rows
	return 100
}


override func tableView(_ tableView: UITableView, cellForRowAt indexPath: IndexPath) -> UITableViewCell {
	let cell = tableView.dequeueReusableCell(withIdentifier: "cell", for: indexPath)

	cell.textLabel?.text = "\(indexPath)"

	return cell
}
TableViewController를 조금 수정한 뒤
코드를 100개의 cell을 출력하고, title은 셀의 indexPath를 출력하도록 수정했다.

이렇게 구현한 tableView는 결과는 이전과 다를 바 없지만 조금 손쉽게 TableView를 구성할 수 있다는 장점이 있다.
Static Cell
여태까지 사용한 모든 TableView는 Dynamic Prototype Table View 형식의 TableView이다.
이 방식은 PrototypeCell을 구성하고, 재사용 메커니즘으로 셀을 표시한다.
적은 메모리로 이론상 무한대의 셀을 표시할 수 있다는 장점이 있지만,
항상 DataSource를 구현해야 한다는 단점도 가지고 있다.
유한하고 고정된 수의 셀을 표시해야 한다면 Static Cell Table View 형식의 TableView가 좋은 대안이 될 수 있다.
ProtoTypeCell을 사용하는 장점은 포기해야 하지만 DataSource를 항상 구현할 필요는 없다는 장점이 있다.

TableView의 attribute Inspector에서 Content 항목을 Static Cells로 바꾸는 걸로 간단하게 전환할 수 있다.

바로 아래의 Sections 속성을 변경해 section의 수를 즉시 변경할 수 있고,

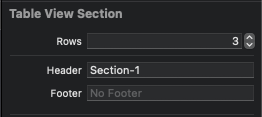
Document OutLine에서 section이 표시되고, Section의 Attribute Inspector에서 셀의 수와 Header와 Footer를 변경할 수 있다.
Dynamic Prototype Table View 형식에서 Delegate를 통해 구현했던 부분을 속성 변경을 통해 쉽게 구현할 수 있다.

이렇게 단 한 줄의 코딩 없이도 TableView를 구현할 수 있다.

코드에서 새롭게 추가된 Switch에 접근해야 한다고 가정했을 때, Dynamic Prototype Table View 형식이었다면
새로운 Class를 생성하고 셀을 연결한 뒤, Switch를 outlet으로 연결해야 한다.
//
//  StaticCellTableViewController.swift
//  TableViewPractice
//
//  Created by Martin.Q on 2021/10/05.
//

class StaticCellTableViewController: UITableViewController {
	@IBAction func switchAvtion(_ sender: Any) {
		print("Stunning!")
	}
	@IBOutlet weak var testSwitch: UISwitch!


	override func viewDidLoad() {
		super.viewDidLoad()

		// Uncomment the following line to preserve selection between presentations
		// self.clearsSelectionOnViewWillAppear = false

		// Uncomment the following line to display an Edit button in the navigation bar for this view controller.
		// self.navigationItem.rightBarButtonItem = self.editButtonItem
	}
}
하지만 Static Cell Table View 형식은 위와 같이 tableView의 클래스에 직접 action과 outlet을 연결하고, 구현할 수 있다.
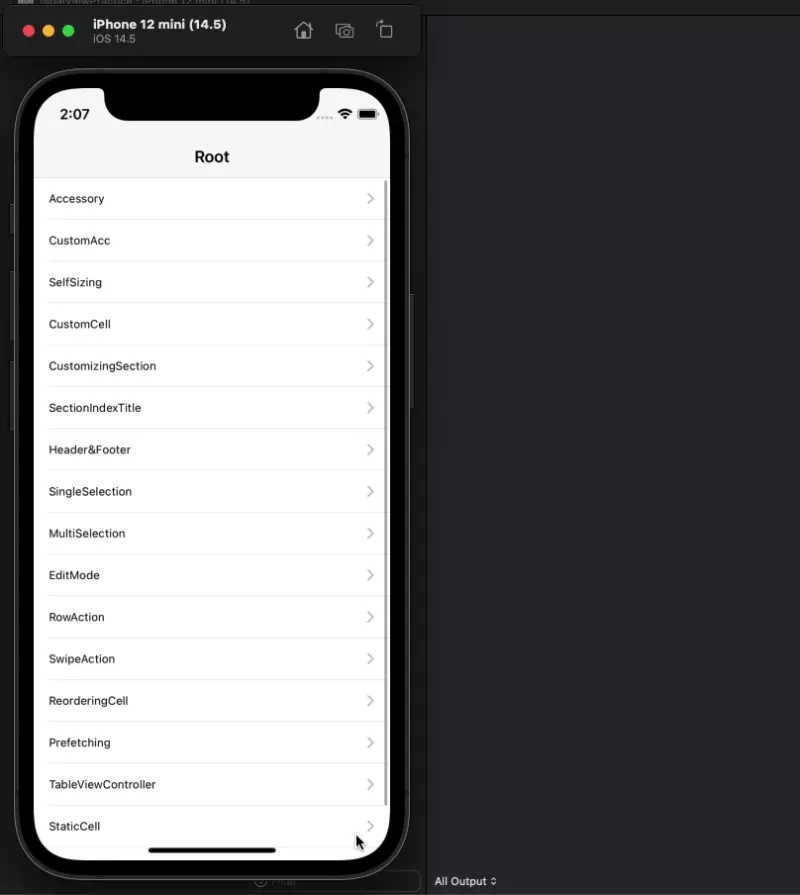
너무 간단하게 기능이 구현된 것을 확인할 수 있다.


