Customizing Section
Custom Header
//
//  CustomSectionViewController.swift
//  TableViewPractice
//
//  Created by Martin.Q on 2021/09/09.
//

import UIKit

class CustomSectionViewController: UIViewController {
	@IBOutlet weak var tableView: UITableView!

	let list = Region.generate()

	override func viewDidLoad() {
		super.viewDidLoad()

	}

}

extension CustomSectionViewController: UITableViewDataSource {
	func numberOfSections(in tableView: UITableView) -> Int {
		list.count
	}
	func tableView(_ tableView: UITableView, numberOfRowsInSection section: Int) -> Int {
		list[section].country.count
	}

	func tableView(_ tableView: UITableView, cellForRowAt indexPath: IndexPath) -> UITableViewCell {
		let cell = tableView.dequeueReusableCell(withIdentifier: "cell", for: indexPath)
		cell.textLabel?.text = list[indexPath.section].country[indexPath.row]
		return cell
	}


}

extension CustomSectionViewController: UITableViewDelegate {

}
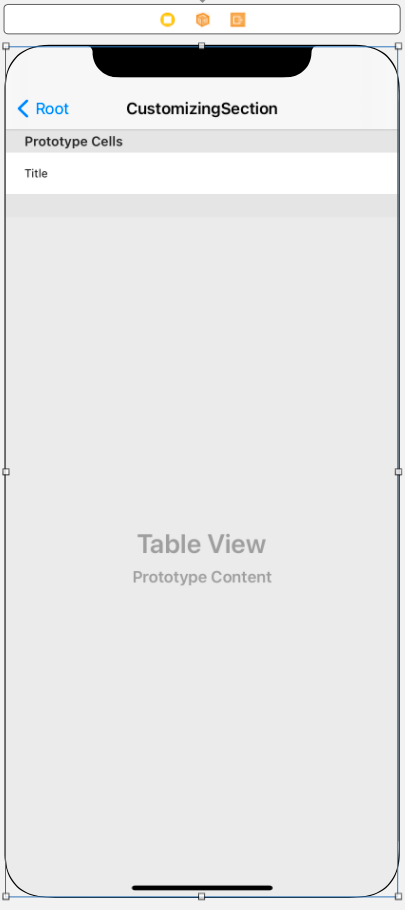
사용할 씬과 연결된 코드는 위와 같다.
//
//  Region.swift
//  TableViewPractice
//
//  Created by Martin.Q on 2021/09/09.
//

import Foundation

class Region {
	let title: String
	var country: [String]

	init (title: String, country: [String]) {
		self.title = title
		self.country = country
	}

	static func generate() -> [Region] {
		var list = [Region]()
		let locationList = [Locale(identifier: "en_us"), Locale(identifier: "ko_kr")]

		for l in locationList {
			for id in Locale.isoRegionCodes {
				guard let name = l.localizedString(forRegionCode: id) else {
					continue
				}

				guard let consonant = name.consonant else {
					continue
				}

				let region = list.first { $0.title.compare(consonant, options: .diacriticInsensitive) == .orderedSame }

				if let region = region {
					region.country.append(name)
				} else {
					list.append(Region(title: consonant, country: [name]))
				}
			}
		}

		for item in list {
			item.country.sort()
		}

		list.sort(by: { $0.title < $1.title })

		return list
	}
}

extension String {
	private var koreanUnicodeRange: (Int, Int) {
		return (0xAC00, 0xD7AF)
	}

	var consonant: String? {
		guard utf16.count > 0 else {
			return nil
		}

		let consonant = ["ㄱ","ㄲ","ㄴ","ㄷ","ㄸ","ㄹ","ㅁ","ㅂ","ㅃ","ㅅ","ㅆ","ㅇ","ㅈ","ㅉ","ㅊ","ㅋ","ㅌ","ㅍ","ㅎ"]
		let code = utf16[utf16.startIndex]

		if code >= UInt16(koreanUnicodeRange.0) && code <= UInt16(koreanUnicodeRange.1) {
			let unicode = code - UInt16(koreanUnicodeRange.0)
			let consonantIndex = Int(unicode / 21 / 28)
			return consonant[consonantIndex]
		}
		return String(first!)
	}
}
Region.generate 메소드는 Region 파일에 새롭게 작성 한
영어와 한국어로 Locale 내의 국가 파일을 전부 받아 배열로 반환하는 메소드이다.
Region의 title 속성에는 정렬을 위한 알파벳이나 초성을 전달하고,
country 속성에는 국가의 이름을 오름차순으로 저장한다.
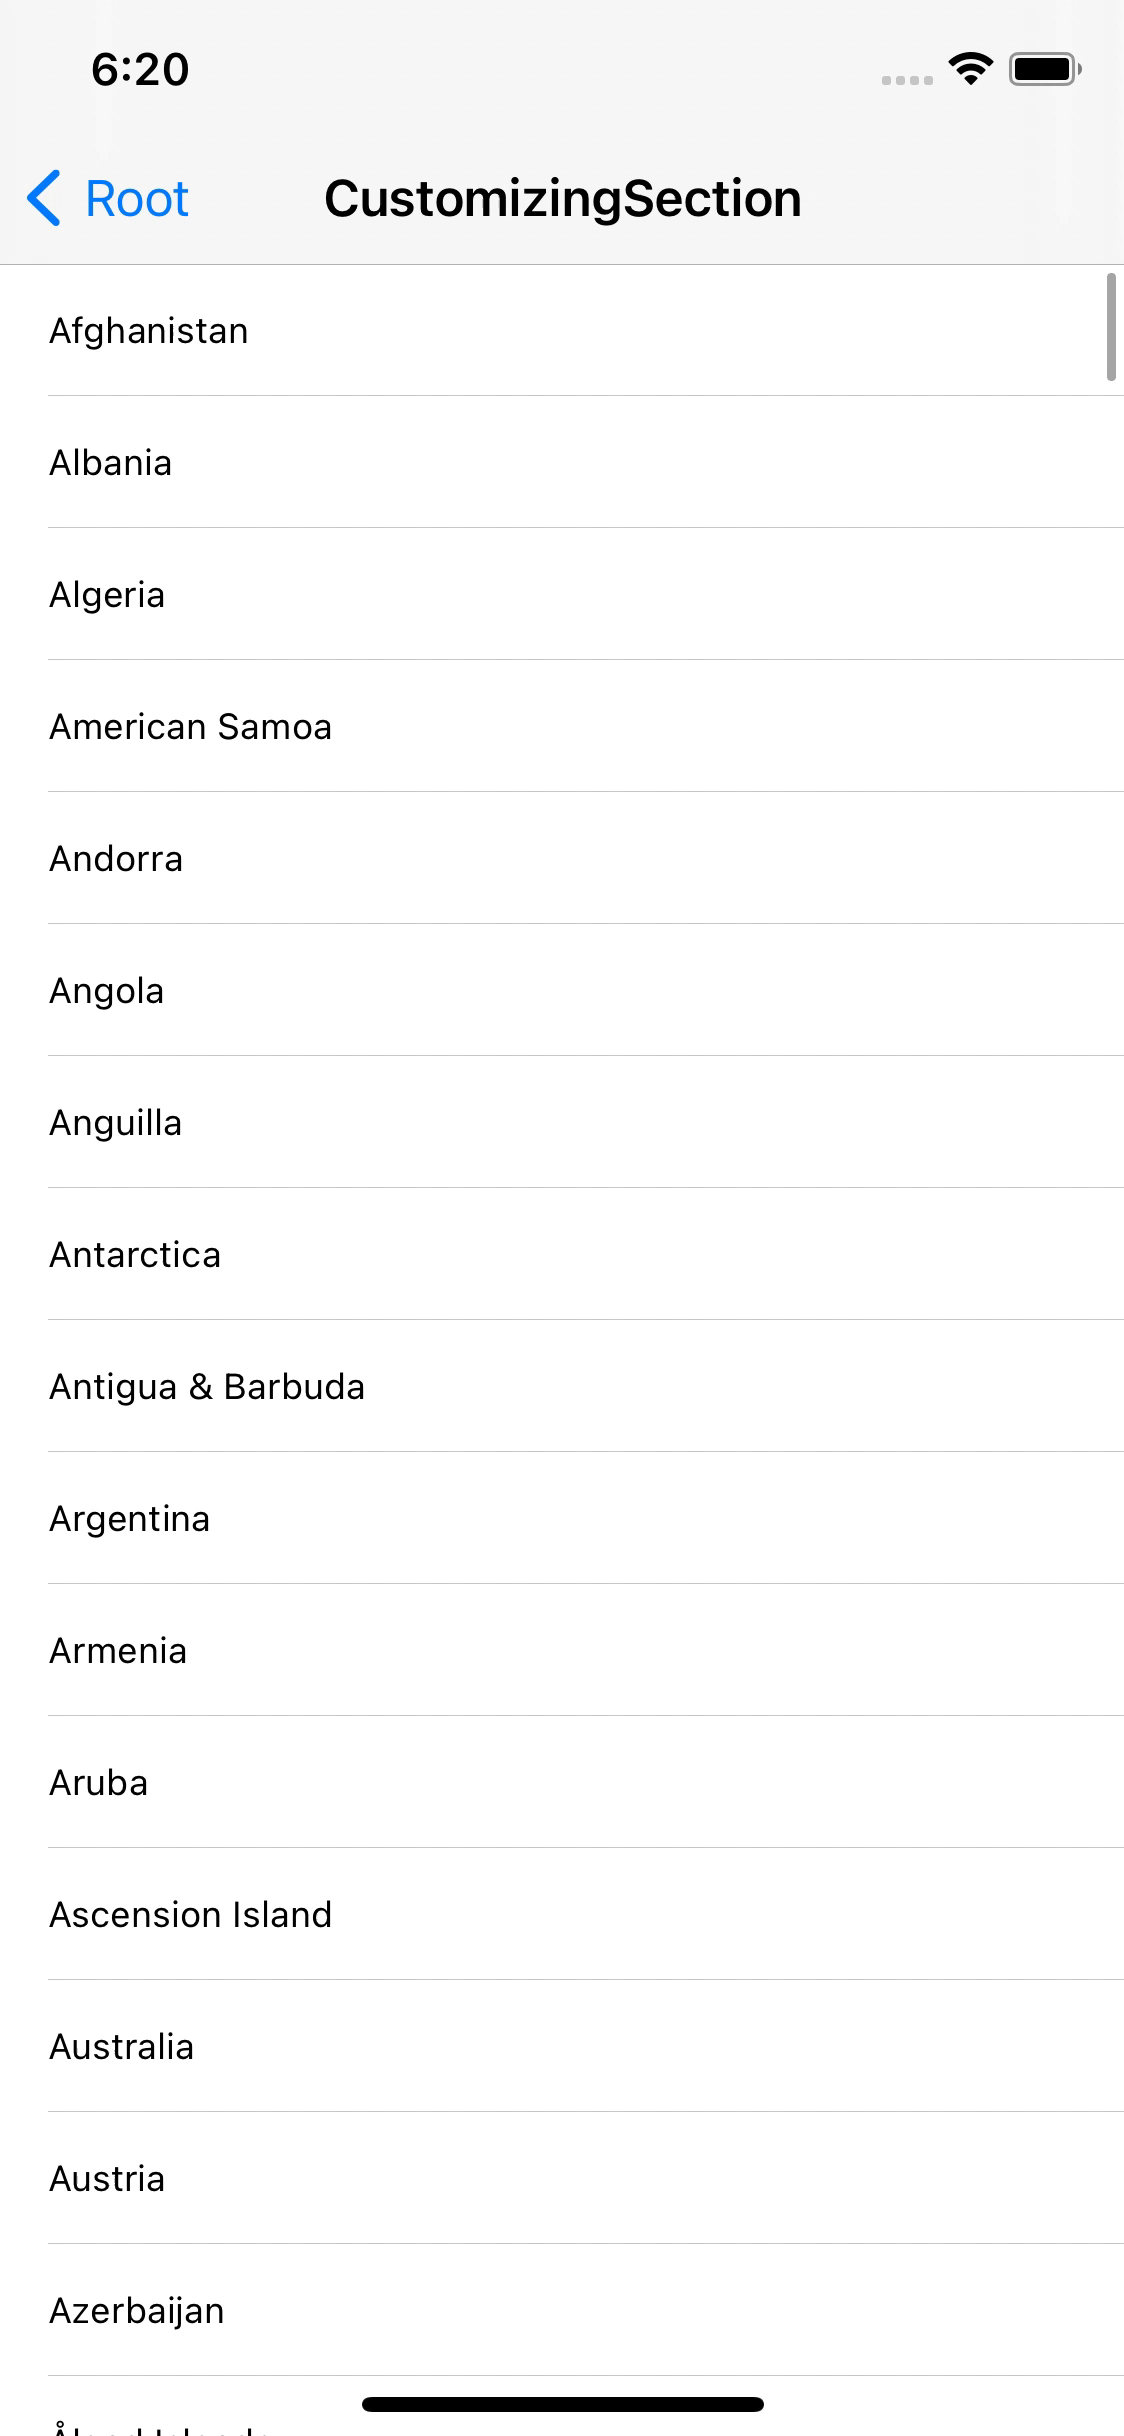
반환된 배열은 알파벳이나 초성에 따라 여러 섹션에 나뉘어 각각의 언어로 Table에 표시된다.
extension CustomSectionViewController: UITableViewDataSource {
	func numberOfSections(in tableView: UITableView) -> Int {
		list.count
	}
	func tableView(_ tableView: UITableView, numberOfRowsInSection section: Int) -> Int {
		list[section].country.count
	}

	func tableView(_ tableView: UITableView, cellForRowAt indexPath: IndexPath) -> UITableViewCell {
		let cell = tableView.dequeueReusableCell(withIdentifier: "cell", for: indexPath)
		cell.textLabel?.text = list[indexPath.section].country[indexPath.row]
		return cell
	}

	func tableView(_ tableView: UITableView, titleForHeaderInSection section: Int) -> String? {
		return list[section].title
	}
}
UITableViewDataSource 프로토콜의 tableView(titleForHeaderInSection:) 메소드를 구현한다.
Header에 표시할 텍스트를 반환하면 된다.
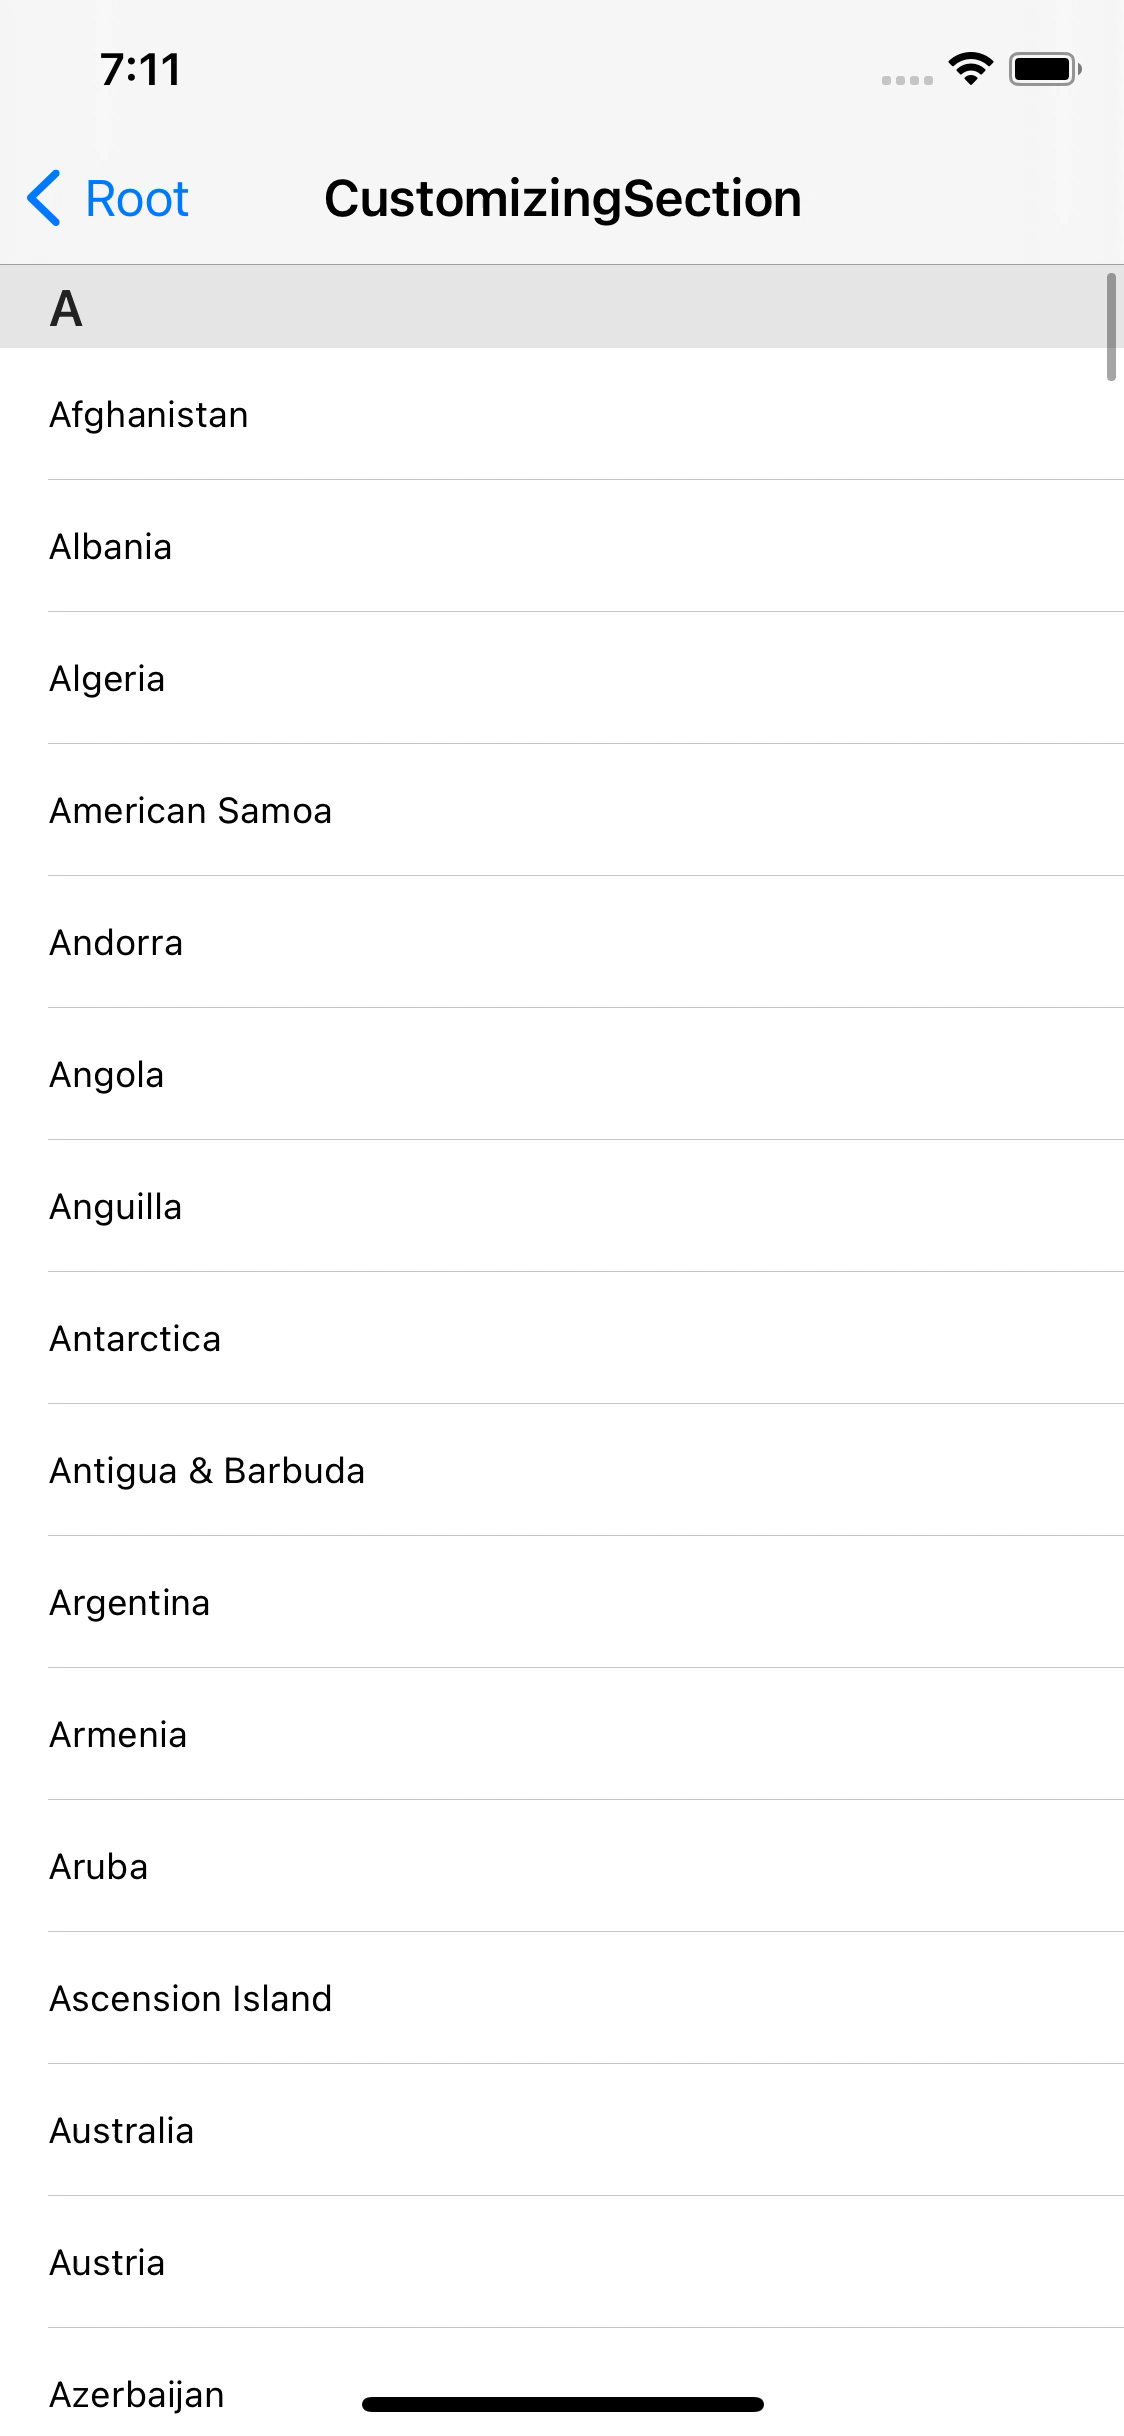
list의 title이 section의 header에 표시된다.
section별 구분이 명확해지고, 다음 section으로 넘어가면 상단에 교체된다.
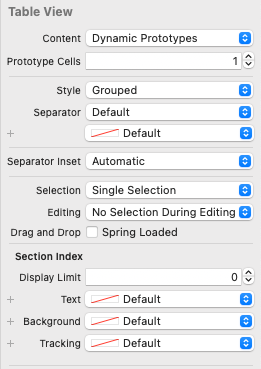
이번엔 tableView의 Style을 Grouped로 변경하고 실행해 보자.
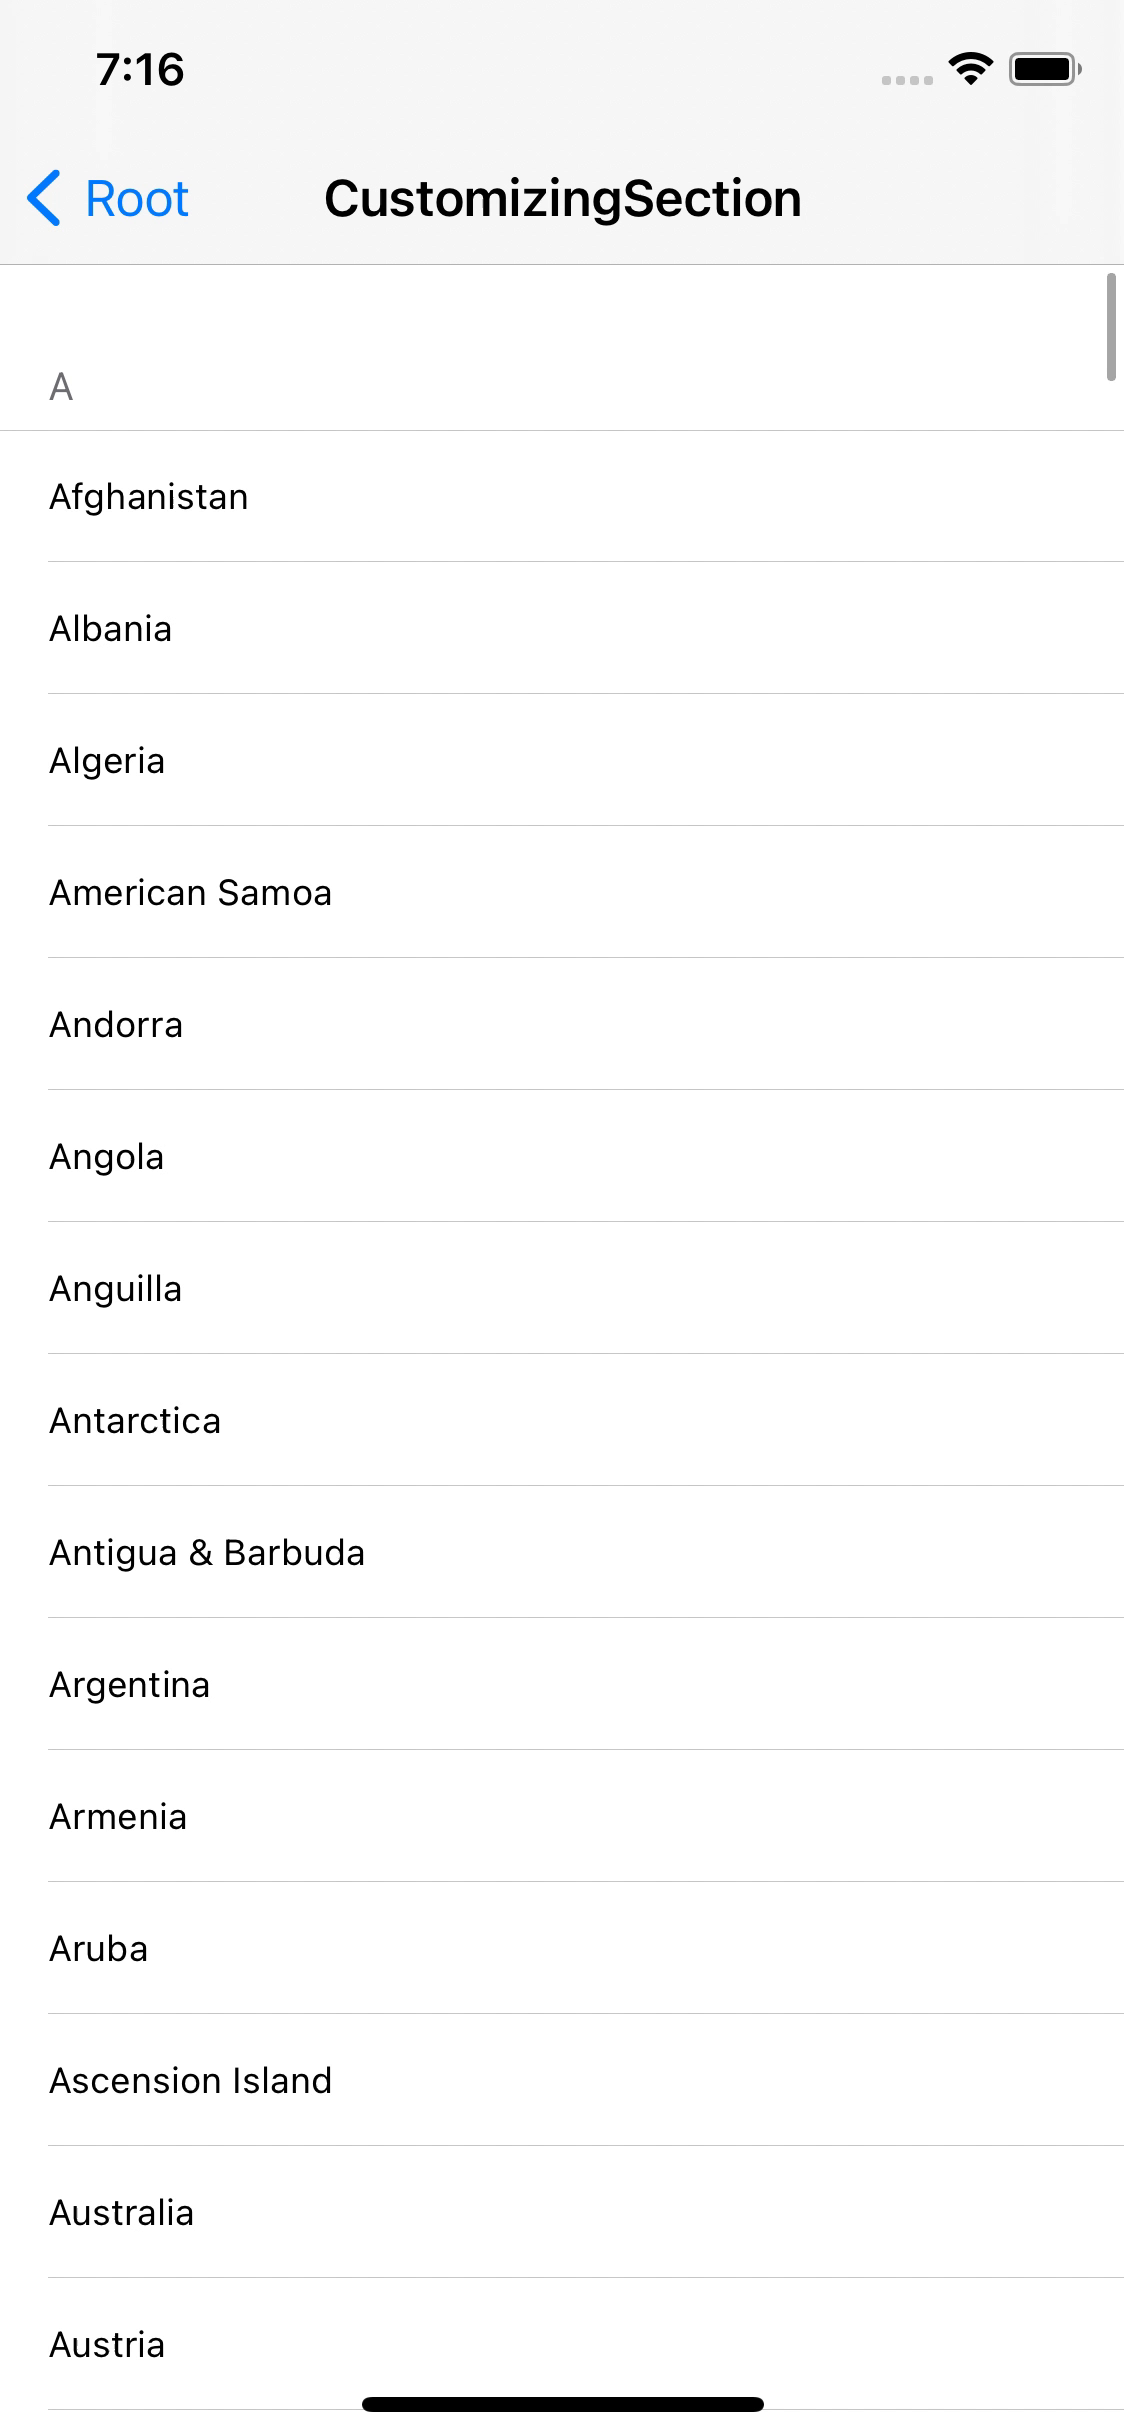
이번엔 시각적으로도, 기능적으로도 조금 다르게 작동하는 것을 볼 수 있다.
section이 넘어가도 상단에 고정돼 표시되지 않는다.
지금처럼 텍스트를 그대로 전당 하기만 한다면 폰트 색이나 배경색을 바꾸는 것은 불가능해진다.
Header를 원하는 대로 바꾸고 싶다면 Custom Header를 직접 구현해야 한다.
구현하는 방법에는 두 가지가 있다.
UITableViewHeaderFooterView를 사용하기
해당 클래스는 subtitle 스타일과 유사한 UI를 제공한다.
textLabel, detailTextLabel의 두 개의 Label을 가지고 있다.

Header를 등록할 때는 Cell을 등록할 때와 비슷하게 register(forHeaderFooterViewReuseIndentifier:) 메소드를 사용한다.
따로 인터페이스 파일을 만들지 않았으므로 class를 파라미터로 전달받는 메소드를 사용한다.
override func viewDidLoad() {
	super.viewDidLoad()

	tableView.register(UITableViewHeaderFooterView.self, forHeaderFooterViewReuseIdentifier: "header")
}
class로는 UITableViewHeaderFooterView를 그대로 전달하고, identifier를 지정한다.
extension CustomSectionViewController: UITableViewDelegate {

}
이제 UITableViewDelegate 프로토콜에서 커스텀 Header를 반환하는 메소드를 구현하면 된다.

tableView(viewForHeaderInSection:) 메소드를 사용해 view를 반환하게 된다.
func tableView(_ tableView: UITableView, viewForHeaderInSection section: Int) -> UIView? {
	let header = tableView.dequeueReusableHeaderFooterView(withIdentifier: "header")
}
header도 셀과 마찬가지로 재사용 메커니즘을 사용한다.
셀을 커스텀할 때와 비슷하게 dequeReusableHeaderFooterView 메소드를 사용해 header를 불러온다.
func tableView(_ tableView: UITableView, viewForHeaderInSection section: Int) -> UIView? {
	let header = tableView.dequeueReusableHeaderFooterView(withIdentifier: "header")
	header?.textLabel?.text = list[section].title
	header?.detailTextLabel?.text = "this is dummy data"

	header?.backgroundColor = .darkGray
	header?.textLabel?.textColor = .cyan
	header?.textLabel?.textAlignment = .center

	return header
}
이후 원하는 대로 수정하고 시뮬레이터를 확인하면
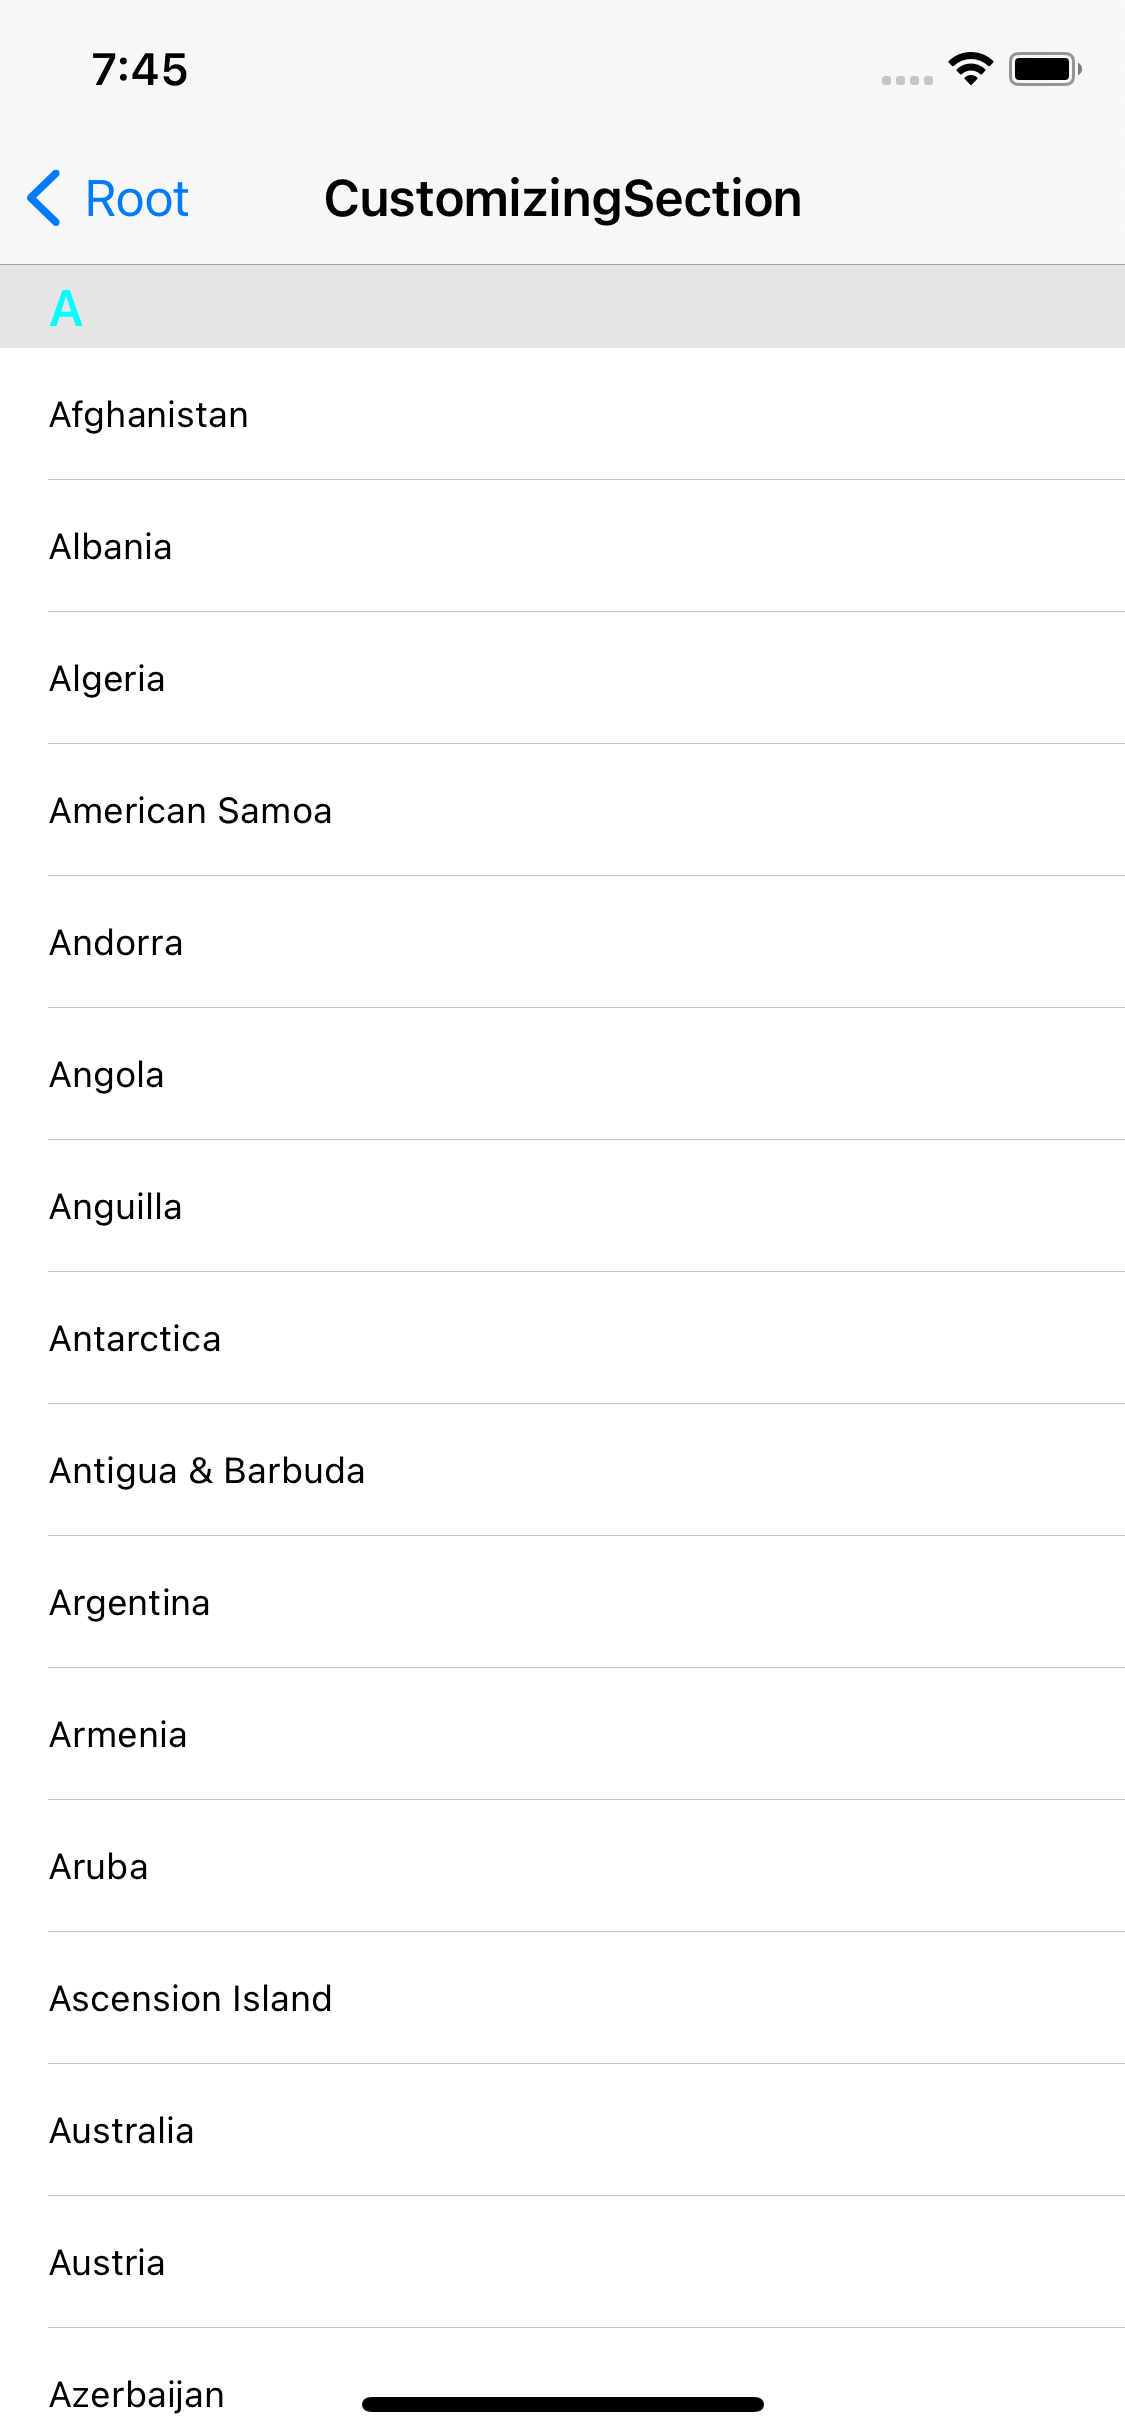
변경된 것은 텍스트 색상뿐, 정렬과 배경색은 변경되지 않았다.
2021-09-09 19:45:09.212291+0900 TableViewPractice[22903:4449127] [TableView] Changing the background color of UITableViewHeaderFooterView is not supported. Use the background view configuration instead.
콘솔에는 배경색을 바꿀 때 직접 변경하는 것이 아닌 background view를 통해 변경하길 권하고 있다.
if header?.backgroundView == nil {
	let view = UIView(frame: .zero)
	view.backgroundColor = .darkGray
	view.isUserInteractionEnabled = false
	header?.backgroundView = view
}
따라서 header에 backgroundView가 존재하는지 확인하고,
존재하지 않는다면 새로운 view를 만들고 배경색을 바꾼 뒤, backgroundView로 지정한다.
이때, 원래의 배경색을 바꾸는 코드는 삭제한다.
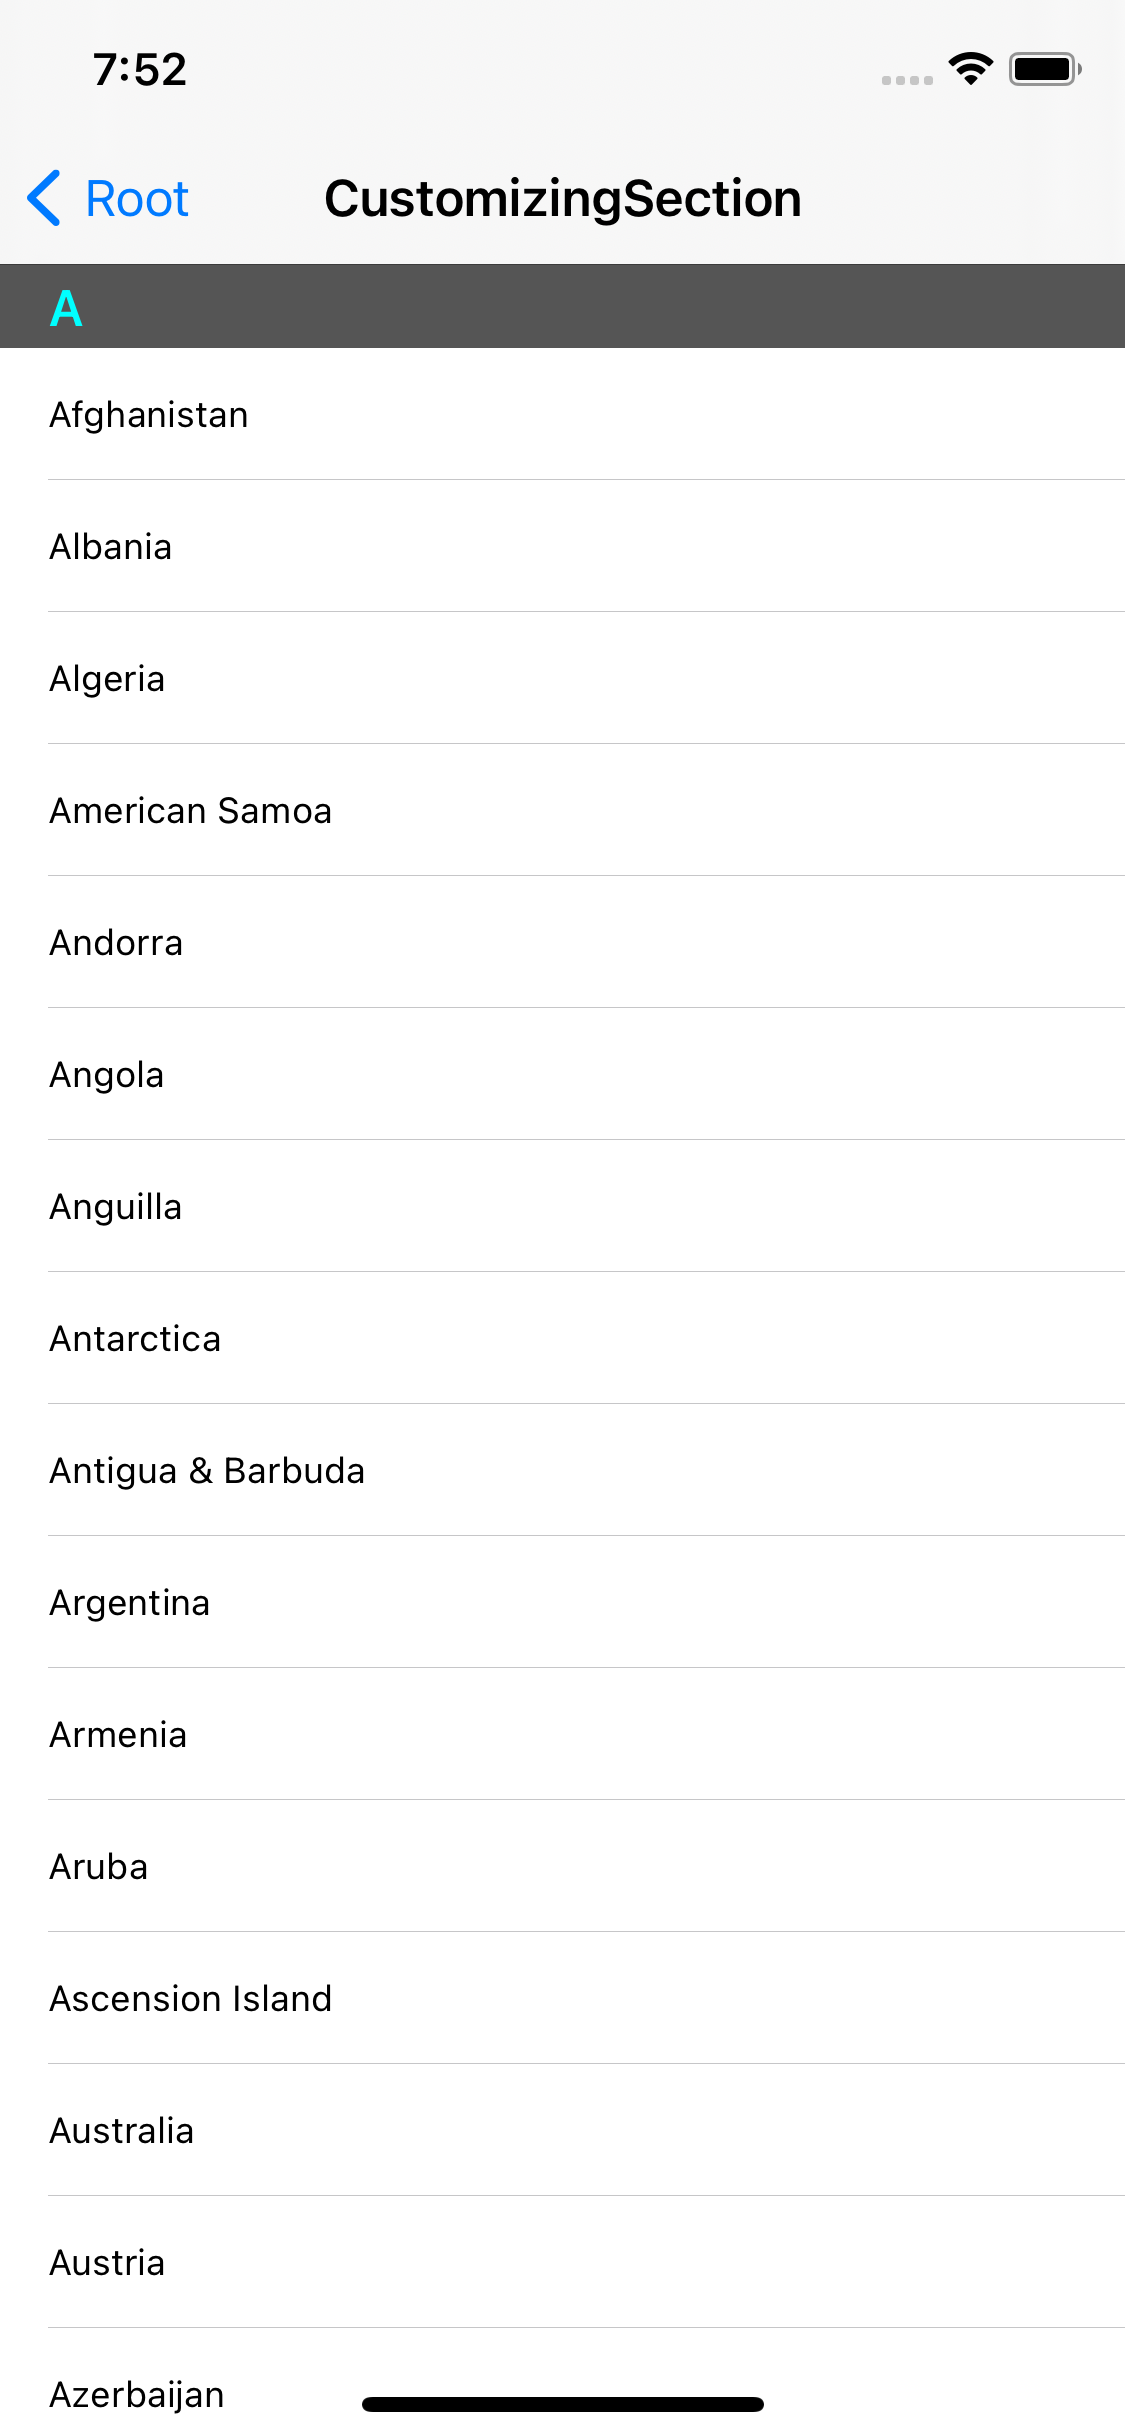
이젠 header의 배경색과 텍스트 색이 변경됐고, 경고도 더 이상 표시되지 않지만
가운데 정렬은 여전히 적용되지 않고 있다.
Header의 정렬을 바꾸기 위해서는 새로운 delegate 메소드가 필요하다.
func tableView(_ tableView: UITableView, willDisplayHeaderView view: UIView, forSection section: Int) {
}
사용할 메소드는 tableView(willDisplayHeaderView:) 메소드이다.
header가 화면에 표시되기 직전 호출된다.
따라서 원래 사용했던 tableView(viewForHeaderInSection:)에서는 텍스트만 설정하고,
시각적인 효과는 tableView(willDisplayHeaderView:)에서 구현하는 것이 바람직하다.
이때, 해당 메소드로 전달되는 view의 속성이 UIView로 변경되기 때문에 UITableViewHeaderFooterView로 타입 캐스팅이 필요하다.
func tableView(_ tableView: UITableView, willDisplayHeaderView view: UIView, forSection section: Int) {
	if let header = view as? UITableViewHeaderFooterView {
		header.textLabel?.textColor = .cyan
		header.textLabel?.textAlignment = .center

		if header.backgroundView == nil {
			let view = UIView(frame: .zero)
			view.backgroundColor = .darkGray
			view.isUserInteractionEnabled = false
			header.backgroundView = view
		}
	}
}
완성된 코드의 모습은 위와 같고,
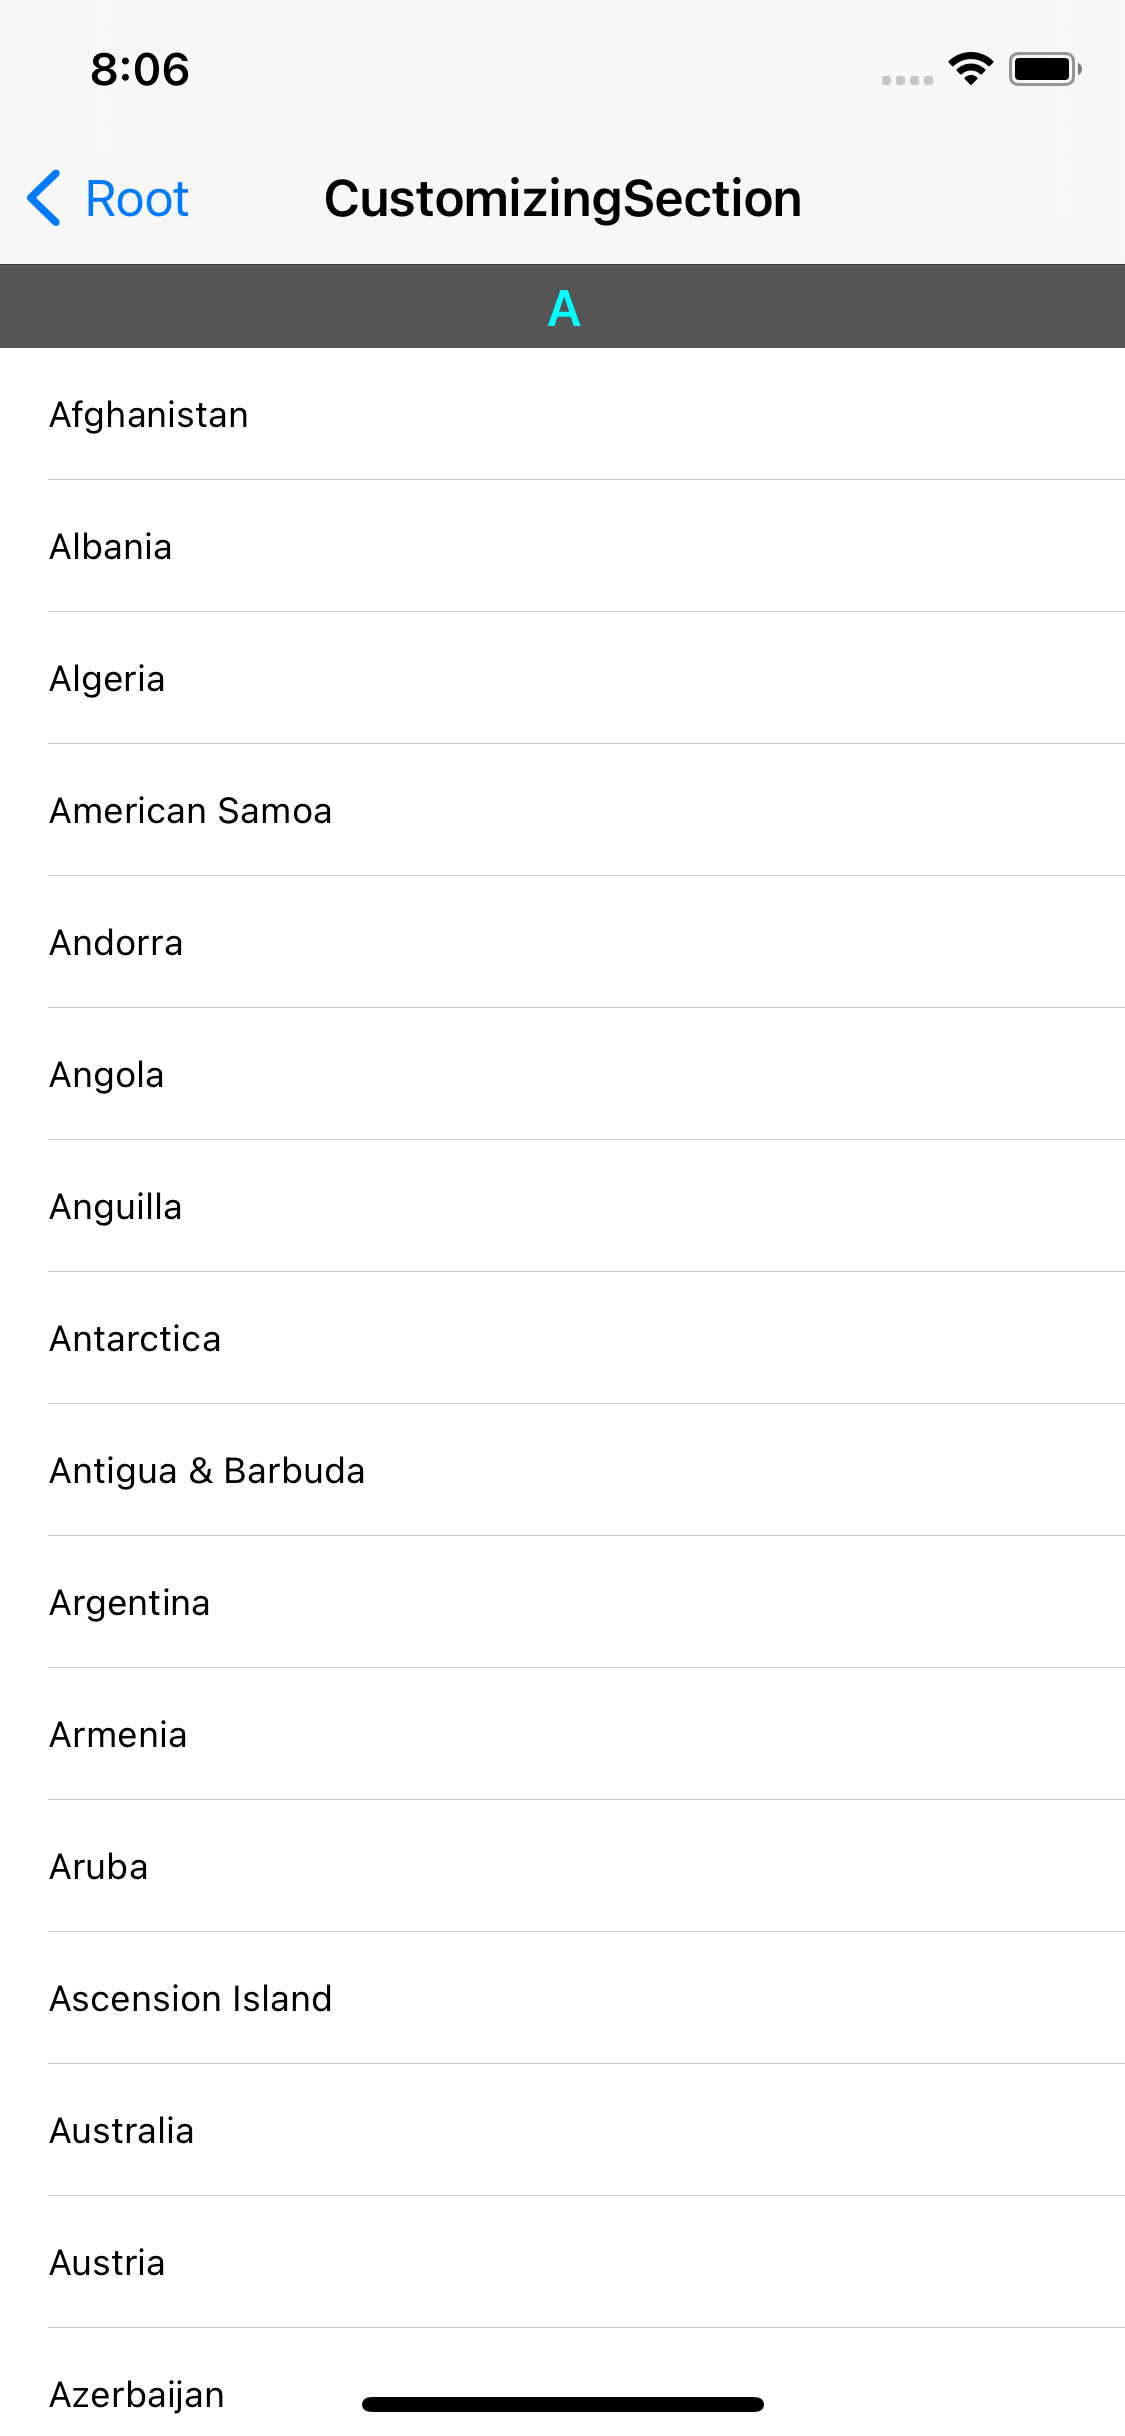
시뮬레이터를 통해 적용된 모습을 확인할 수 있다.
UITableViewHeaderFooterView를 subClassing하고, UI 직접 구성하기
Header UI는 새로운 인터페이스 파일을 생성하고, 구성한다.
subClassing한 클래스와 연결하고, tableView에 등록한다.
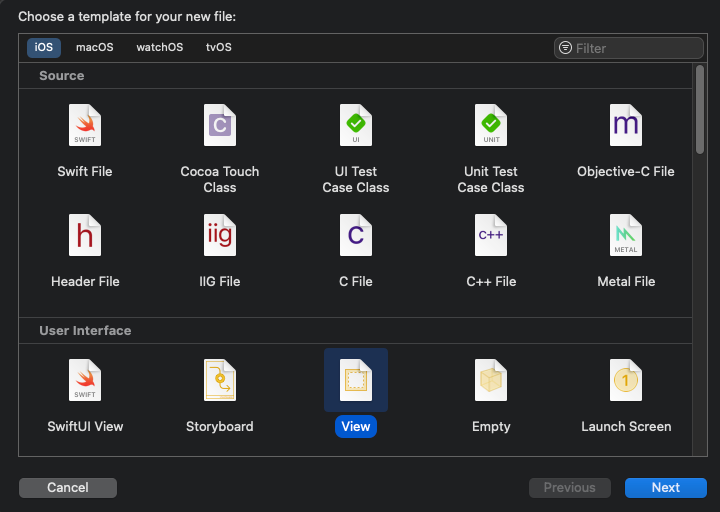
새로운 인터페이스 파일은 View template을 사용해 생성한다.
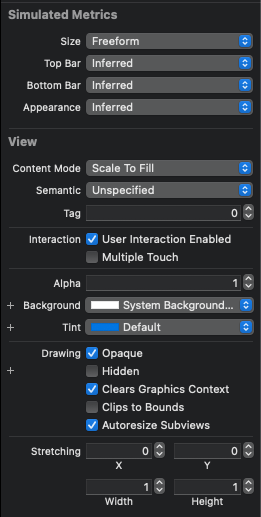
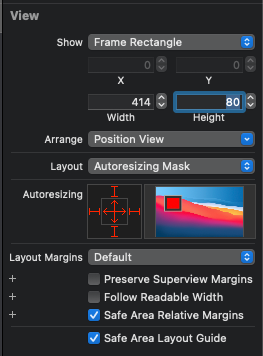
attribute inspector에서 Size를 Freeform으로 변경하고,
size inspector에서 Height를 80으로 조정한다.
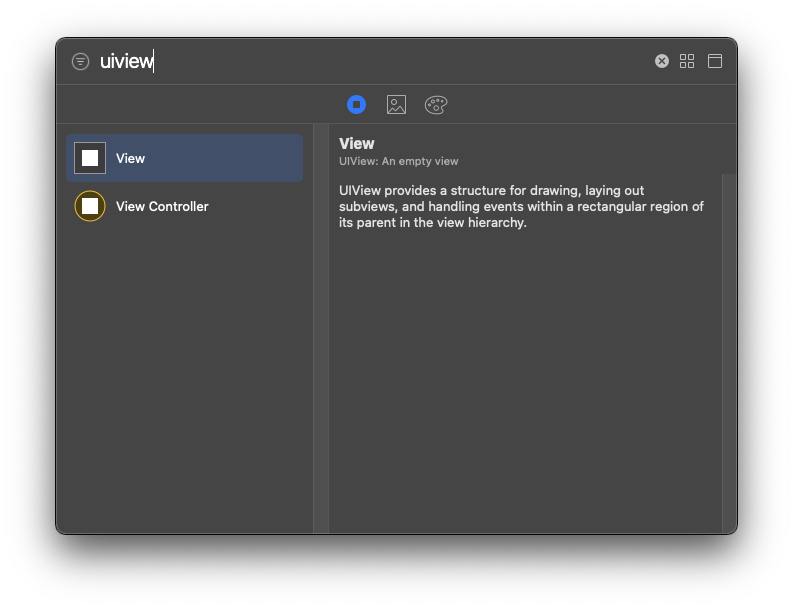
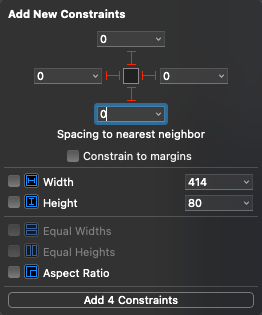
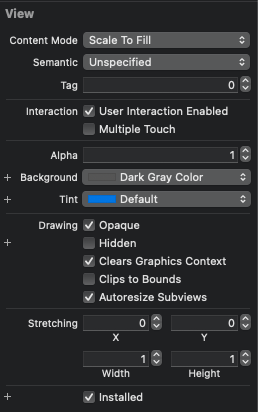
라이브러리에서 UIView를 검색해 추가하고,
사이즈 제약은 영역 전체를 채울 수 있도록 0으로 설정한다.
이후 이전에 설정한 것과 같이 Background Color를 변경한다.
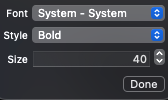
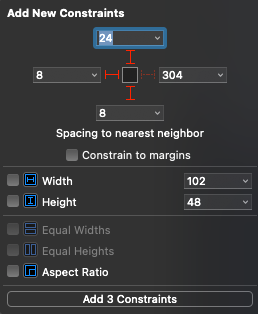
Label을 하나 추가하고, 폰트 Style을 Bold로, Size는 40으로 변경한다.
좌 하단의 가이드에 맞추고 위, 아래, Leading의 제약을 추가한다.
또한 원하는 폰트 색상으로 변경할 수도 있다.
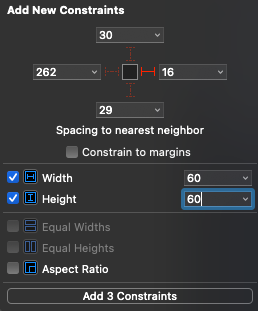
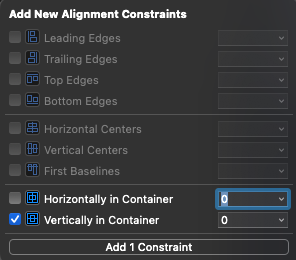
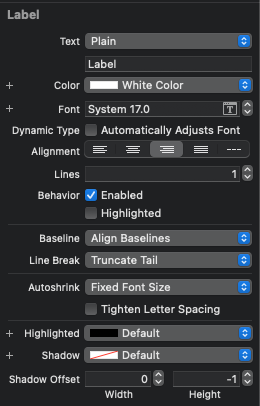
오른쪽에 새로운 Label을 하나 추가하고,
위치 제약에서 수직 중앙을, 사이즈 제약에서 Trailing 여백을 16으로, 높이와 너비를 60으로 설정한다.
폰트 색상을 흰색으로 변경하고, 정렬은 가운데 정렬로 설정한다.
이렇게 만들어진 왼쪽 Label에는 section의 title을,
오른쪽 Label에는 section에 포함된 국가 수를 표시하게 된다.
Custom Cell과 마찬가지로 만든 셀을 Custom Class에 outlet 연결하고,
해당 클래스를 등록하면 된다.
//
//  CustomHeaderView.swift
//  TableViewPractice
//
//  Created by Martin.Q on 2021/09/09.
//

import UIKit

class CustomHeaderView: UITableViewHeaderFooterView {

}
이때 생성하는 클래스는 UITableViewHeaderFooterView를 상속받아야 한다.
생성한 클래스는 CustomHeader의 Custom Class로 지정하고, 뷰 자체의 BackgroundColor를 default로 변경한다.
//
//  CustomHeaderView.swift
//  TableViewPractice
//
//  Created by Martin.Q on 2021/09/09.
//

import UIKit

class CustomHeaderView: UITableViewHeaderFooterView {
	@IBOutlet weak var titleLabel: UILabel!
	@IBOutlet weak var countLabel: UILabel!
	@IBOutlet weak var customBackgroundView: UIView!
}
코드에 outlet으로 연결할 때는 코드를 먼저 작성하고 Label에 연결하는 식으로 진행한다.
class CustomHeaderView: UITableViewHeaderFooterView {
	@IBOutlet weak var titleLabel: UILabel!
	@IBOutlet weak var countLabel: UILabel!
	@IBOutlet weak var customBackgroundView: UIView!

	override class func awakeFromNib() {
		super.awakeFromNib()
		countLabel.text = "0"
		backgroundView = customBackgroundView
	}
}
이후 awakeFromNib 메소드를 추가하고 메소드 안에서 초기화 코드를 구현한다.
override func viewDidLoad() {
	super.viewDidLoad()

	let headerNib = UINib(nibName: "CustomHeader", bundle: nil)
	tableView.register(headerNib, forHeaderFooterViewReuseIdentifier: "header")
}
다시 씬의 클래스 파일로 돌아와 viewDidLoad에서 만들었던 xib 파일을 불러와 등록하고,
func tableView(_ tableView: UITableView, viewForHeaderInSection section: Int) -> UIView? {
	let header = tableView.dequeueReusableHeaderFooterView(withIdentifier: "header") as! CustomHeaderView

	header.titleLabel.text = list[section].title
	header.countLabel.text = "\(list[section].country.count)"
//        header?.textLabel?.text = list[section].title
//        header?.detailTextLabel?.text = "this is dummy data"
	return header
}
custom cell 때와 마찬가지로 CustomHeaderView로 다운 캐스팅 한 뒤,
각각의 레이블에 데이터를 연결한다.
두 번째 방법으로 구현한 Custom Header는 인터페이스 파일 안에서 초기화를 진행하기 때문에
func tableView(_ tableView: UITableView, willDisplayHeaderView view: UIView, forSection section: Int) {
	if let header = view as? UITableViewHeaderFooterView {
		header.textLabel?.textColor = .cyan
		header.textLabel?.textAlignment = .center

		if header.backgroundView == nil {
			let view = UIView(frame: .zero)
			view.backgroundColor = .darkGray
			view.isUserInteractionEnabled = false
			header.backgroundView = view
		}
	}
}
willDisplayHeaderView에서 진행한 코드는 필요가 없어졌다.
따라서 삭제하거나 주석 처리한다.
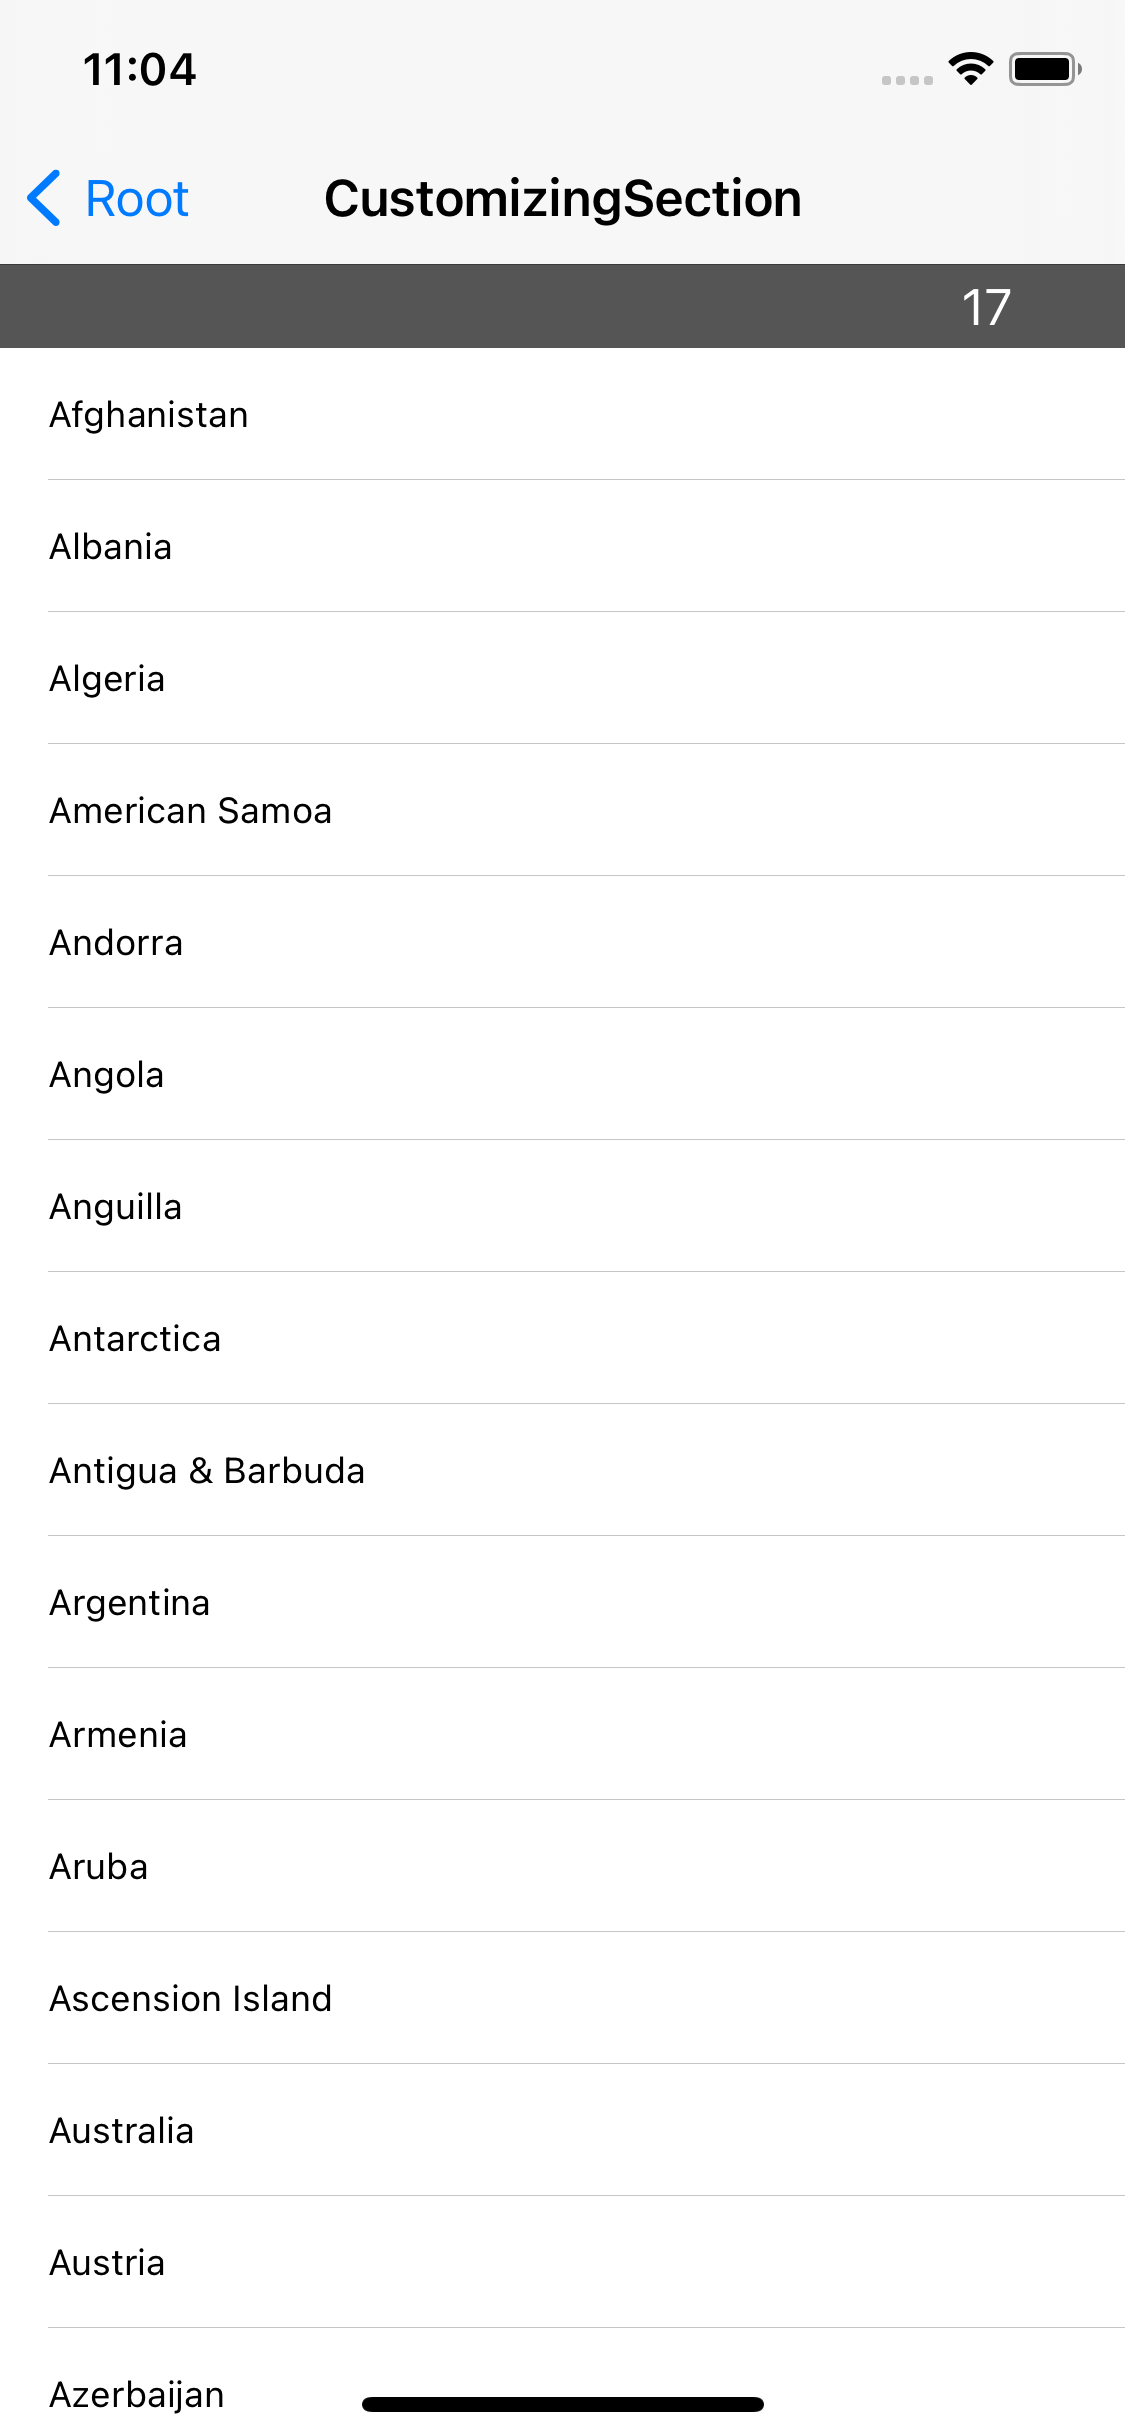
실행해 보면 높이가 적용되지 않은 것을 확인할 수 있는데,
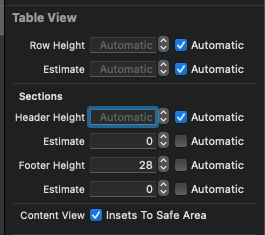
tableView의 size inspector에서 header height를 automatic으로 설정해 준 뒤 다시 확인하면,
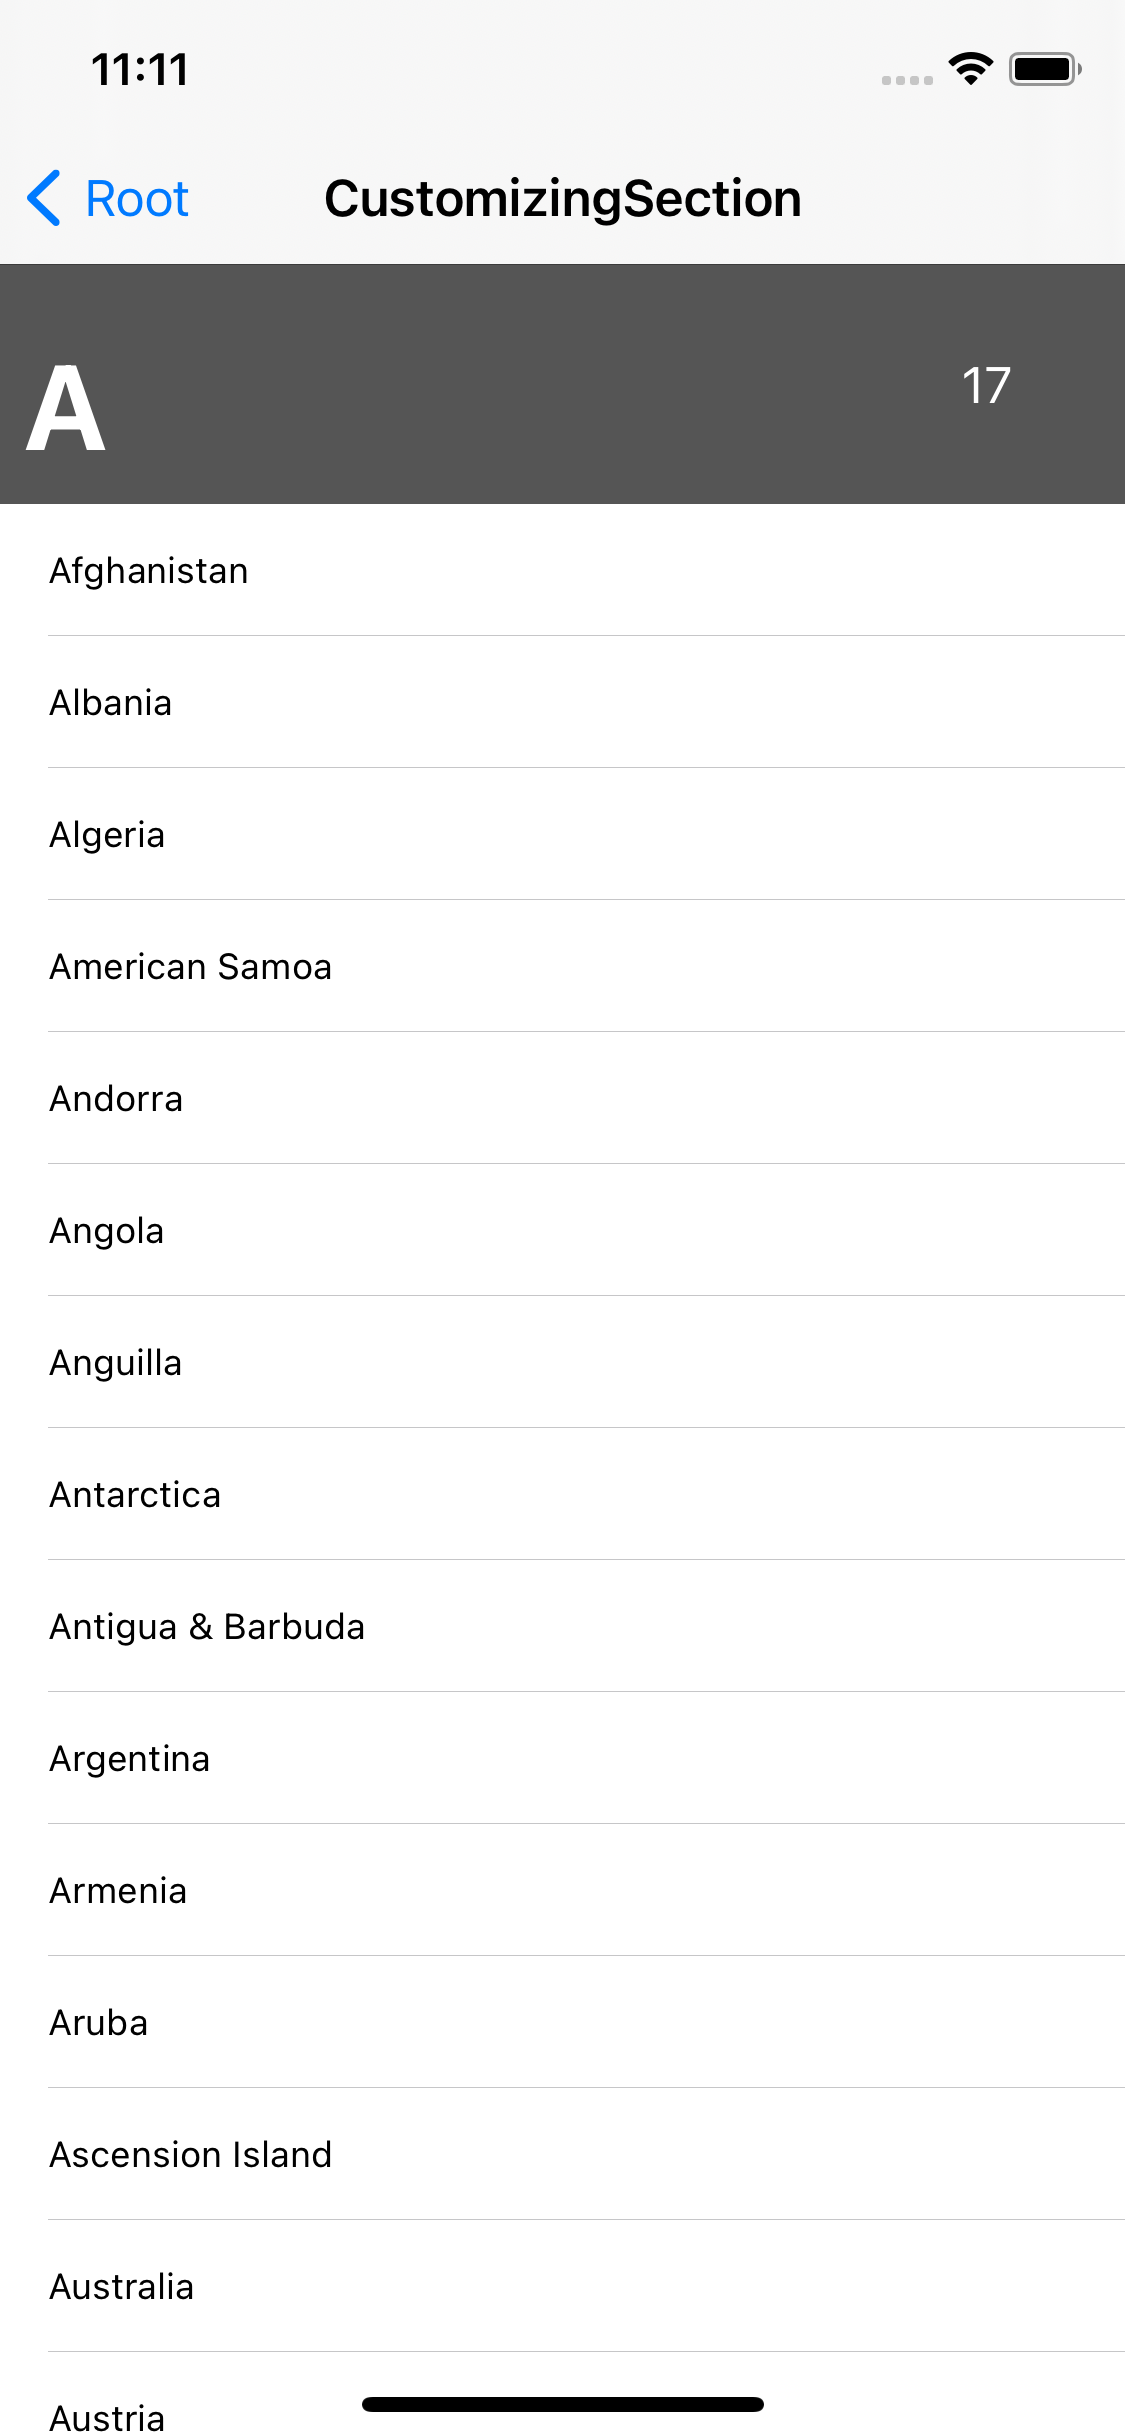
이젠 제대로 적용된 것을 볼 수 있다.
Footer도 Header와 완전히 동일한 방식으로 구현한다.
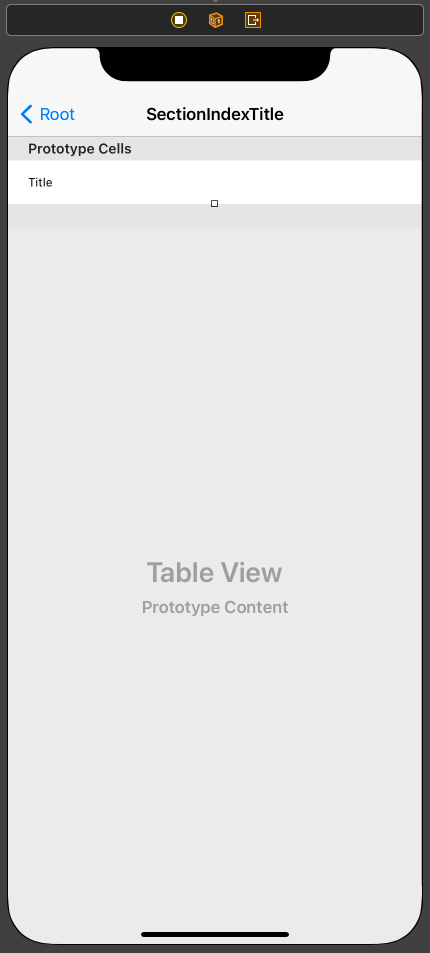
Section Index Title
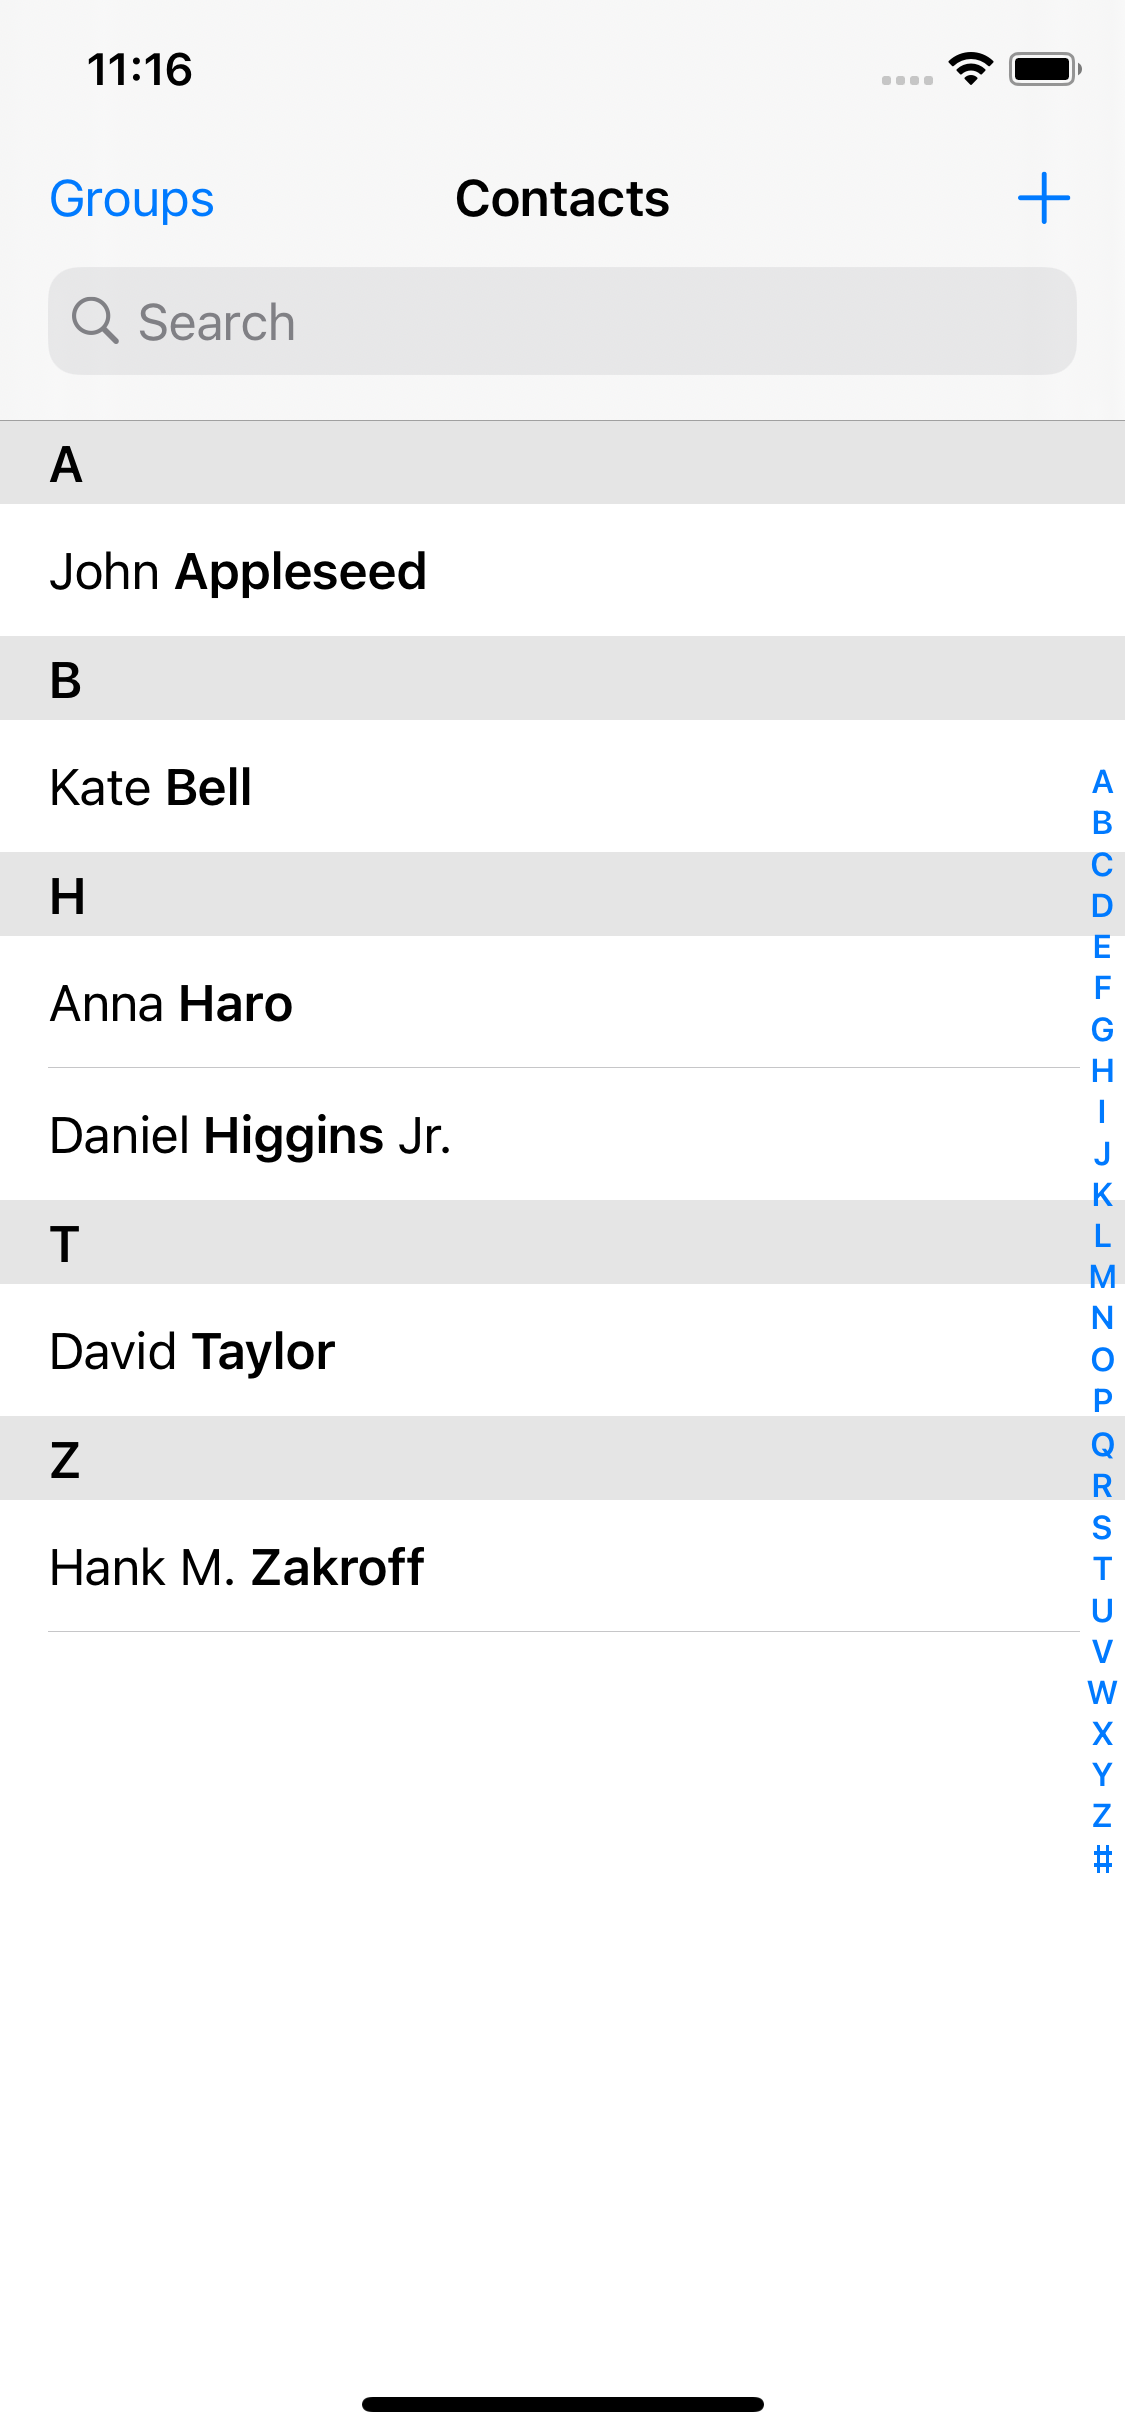
연락처 앱의 오른쪽에 작게 표시되는 바를 Section Index Title이라고 한다.
드래그해서 섹션을 빠르게 건너뛸 수 있다.
꽤나 매력적인 기능이지만 구현 자체는 단순한 편이다.
//
//  SectionIndexTitleViewController.swift
//  TableViewPractice
//
//  Created by Martin.Q on 2021/09/09.
//

import UIKit

class SectionIndexTitleViewController: UIViewController {
	@IBOutlet weak var tableView: UITableView!

	let list = Region.generate()

	override func viewDidLoad() {
		super.viewDidLoad()
	}
}

extension SectionIndexTitleViewController: UITableViewDataSource {
	func numberOfSections(in tableView: UITableView) -> Int {
		return list.count
	}
	func tableView(_ tableView: UITableView, numberOfRowsInSection section: Int) -> Int {
		return list[section].country.count
	}

	func tableView(_ tableView: UITableView, cellForRowAt indexPath: IndexPath) -> UITableViewCell {
		let cell = tableView.dequeueReusableCell(withIdentifier: "cell", for: indexPath)
		cell.textLabel?.text = list[indexPath.section].country[indexPath.row]
		return cell
	}
	func tableView(_ tableView: UITableView, titleForHeaderInSection section: Int) -> String? {
		return list[section].title
	}


	}

	extension SectionIndexTitleViewController: UITableViewDelegate {

}
사용할 씬과 연결된 코드는 위와 같다.
list에 저장되는 Region은 이전에 사용하던 Region과 동일하다.
func sectionIndexTitles(for tableView: UITableView) -> [String]? {
	return list.map { $0.title }
}
sectionIndexTitles 메소드를 사용해 문자열을 전달하면 sectionIndexTitle로 표시된다.
list의 title만 새로운 배열로 만들어 전달한다.
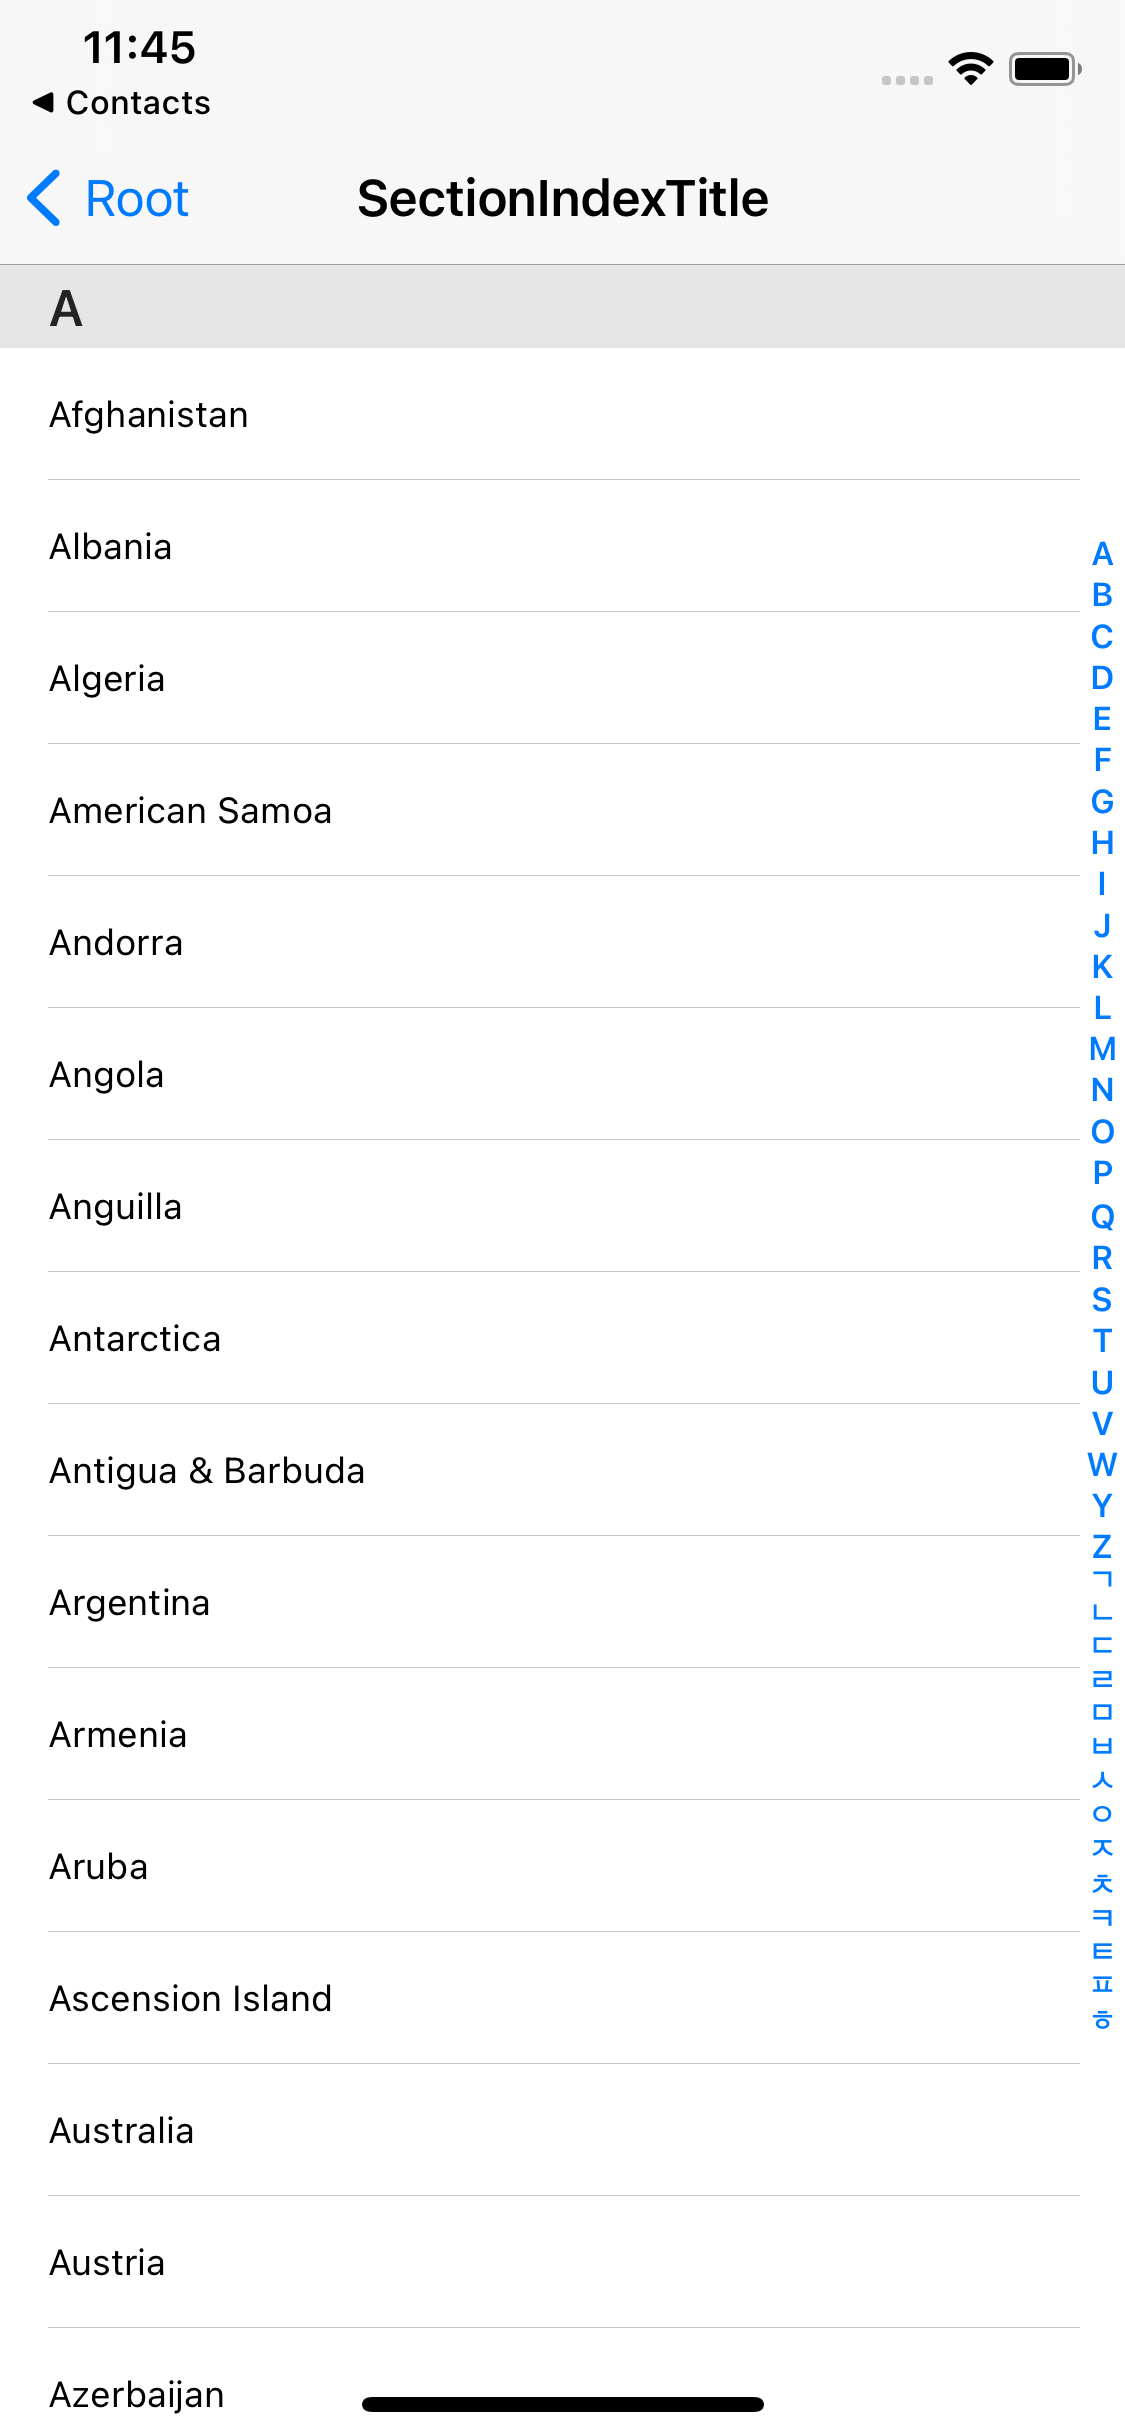
이것 만으로도 SectionIndexTitle을 사용할 수 있다.
현재는 section의 수와 sectionIndexTitle에 표시되는 index의 수가 같다.
지금처럼 한 화면에 담길 수 있다면 문제가 없지만, 화면의 범위를 넘어가게 되는 경우엔 문제가 생긴다.
이러한 이유 때문에 일부만 표시하거나 디자인을 위해 일부만 표현할 수도 있다.
func sectionIndexTitles(for tableView: UITableView) -> [String]? {
	return stride(from: 0, to: list.count, by: 2).map { list[$0].title }
}
짝수번째 인덱스만 표시하기 위해 stride 메소드를 사용했다.
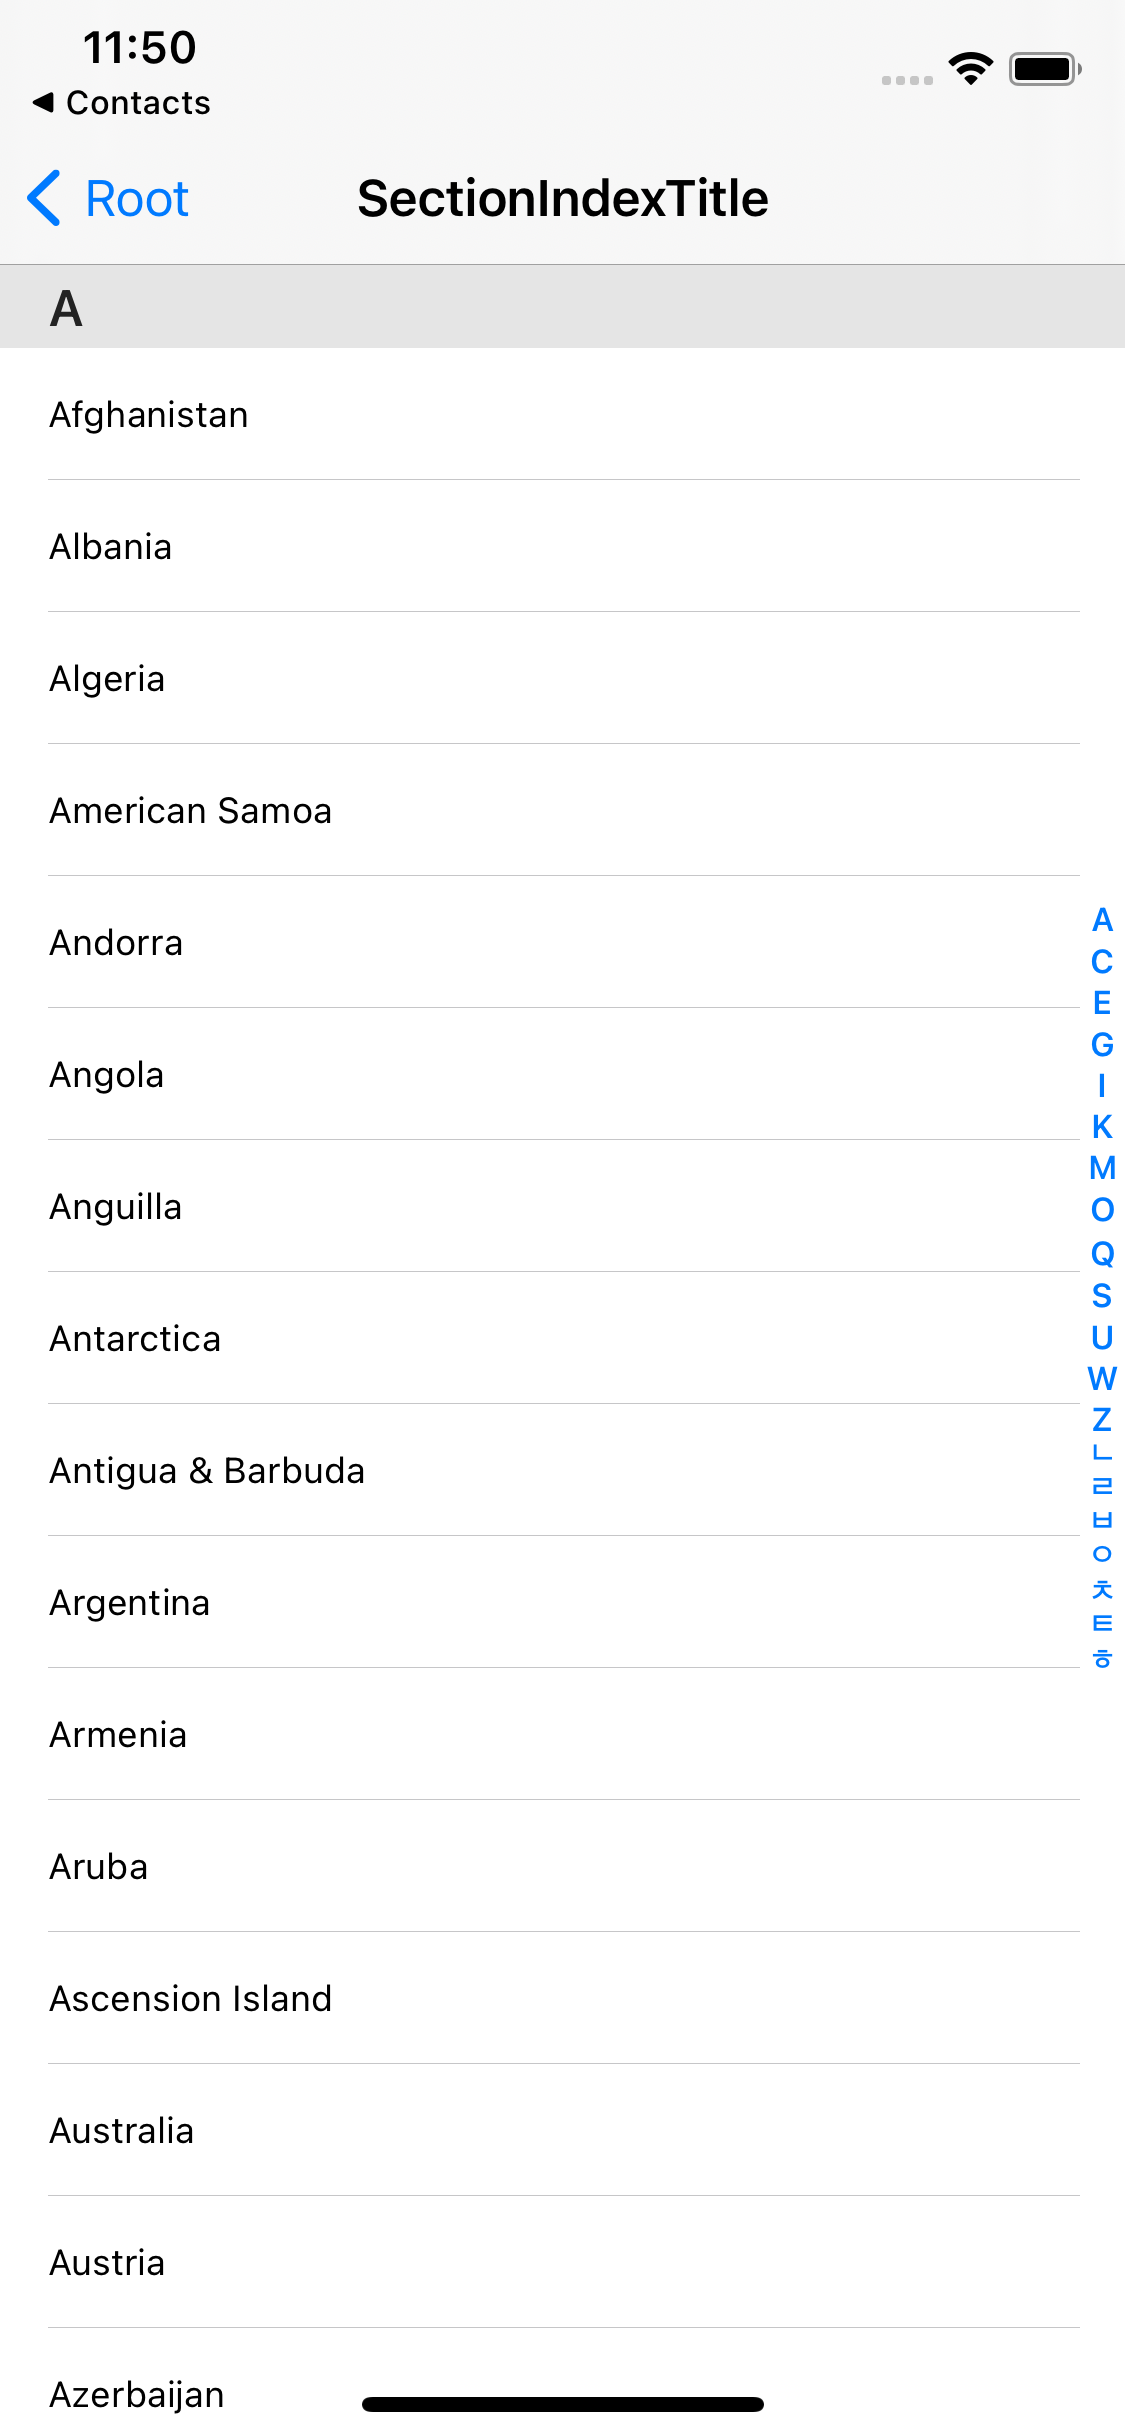
그러면 이렇게 간결화된 sectioIndexTitle을 볼 수 있는데,
sectionIndexTitle에 표시되어있는 인덱스를 선택하면 엉뚱한 section으로 이동한다.
tableView는 sectionIndexTitle과 section 간의 관계를 알지 못한다.
그냥 다음 인덱스로 넘어가면 그다음 섹션으로 이동할 뿐이다.
따라서 새로운 메소드에서 이를 계산해 정확한 인덱스를 반환해 줘야 한다.
func tableView(_ tableView: UITableView, sectionForSectionIndexTitle title: String, at index: Int) -> Int {
	return index * 2
}
사용할 메소드는 tableView(sectionForSectionIndexTitle:) 메소드이다.
section 인덱스를 선택하고 해당 section으로 이동하기 직전에 호출된다.
인덱스를 2씩 건너뛰도록 했으므로 세 번째 파라미터로 전달되는 index에 2를 곱해주면 된다.
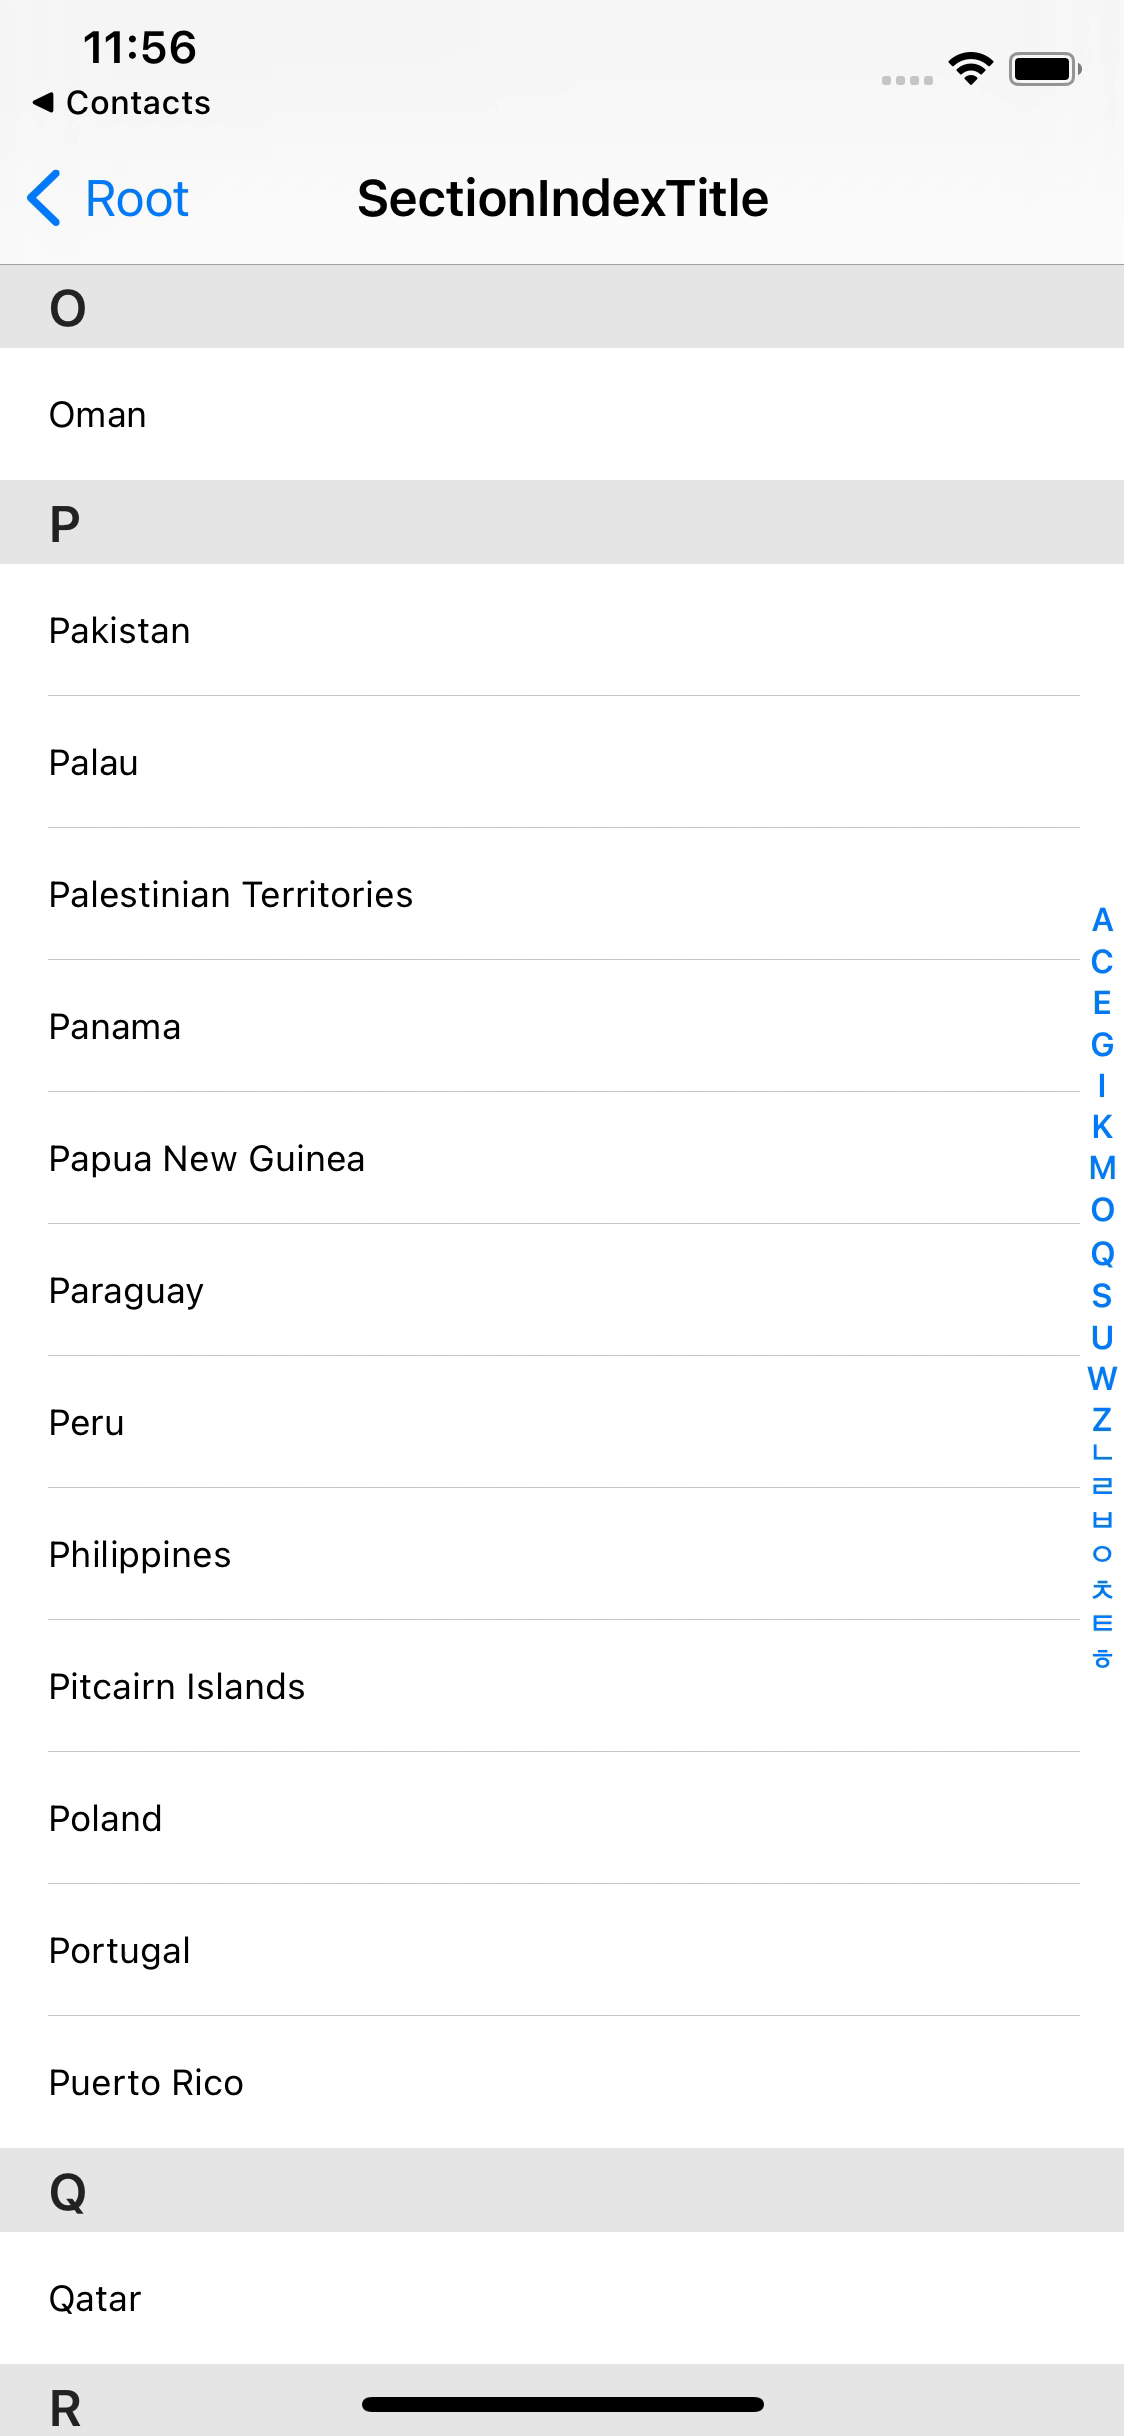
선택한 section으로 이동하는 것을 확인할 수 있다.
sectionIndexTitle은 titleColor와 backgroundColor를 변경할 수 있다.
필요한 속성은 UITableView 클래스에 선언되어있다.
override func viewDidLoad() {
	super.viewDidLoad()
	tableView.sectionIndexColor = .systemOrange
	tableView.sectionIndexBackgroundColor = .systemGray2
	tableView.sectionIndexTrackingBackgroundColor = .white
}
sectionIndexColor는 title의 색을,
sectionIndexBackgroundColor는 기본 상태의 배경색을,
sectionIndexTrackingBackgroundColor는 조작 중일 때의 배경색을 설정한다.
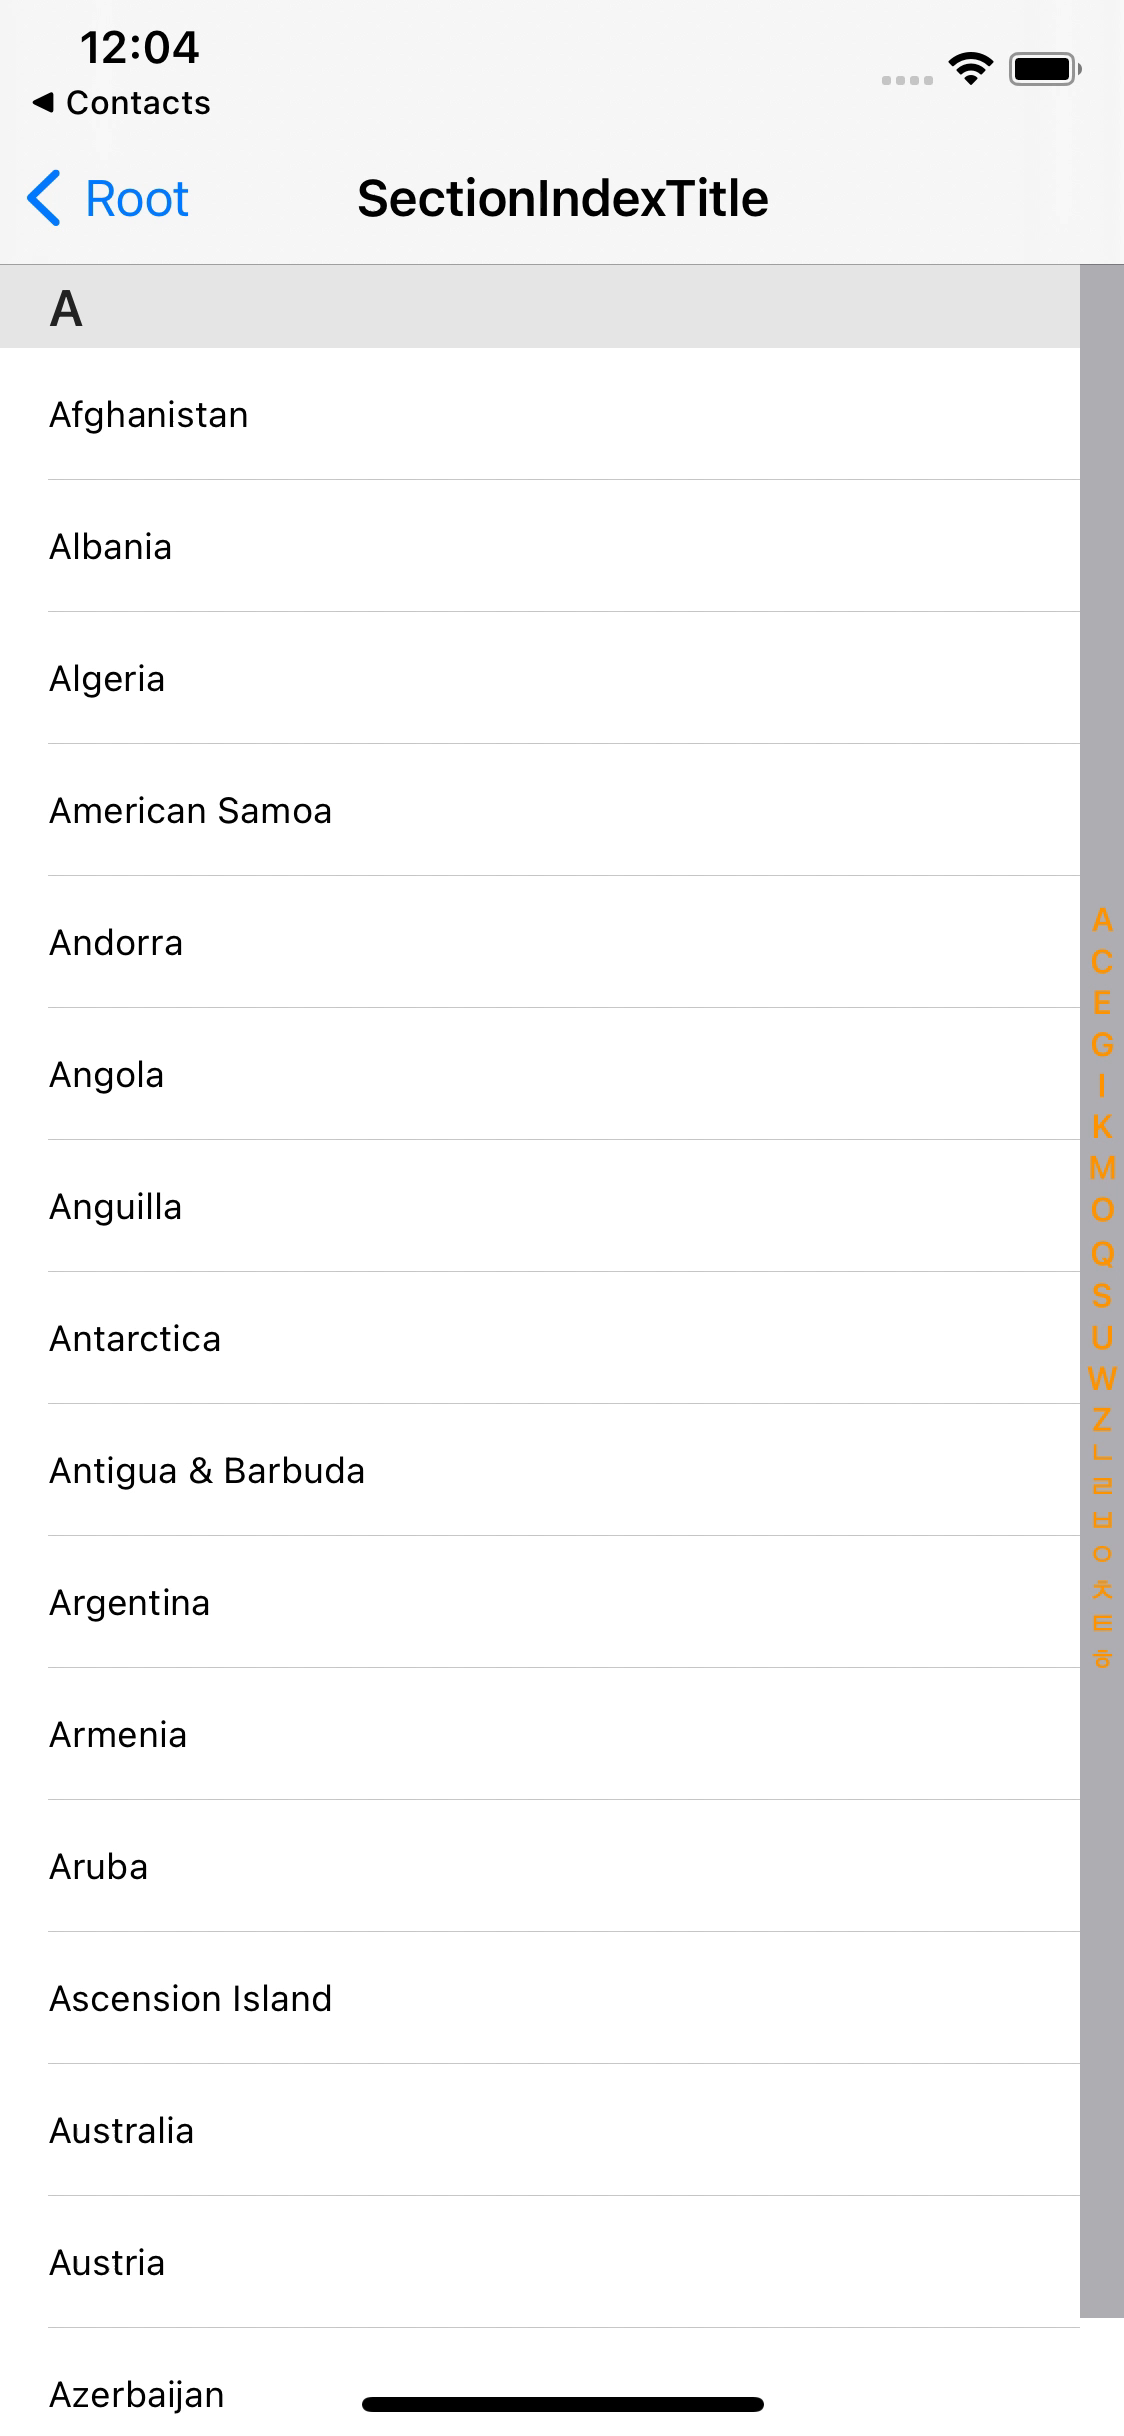
의도한 대로 적용된 것을 확인할 수 있다.
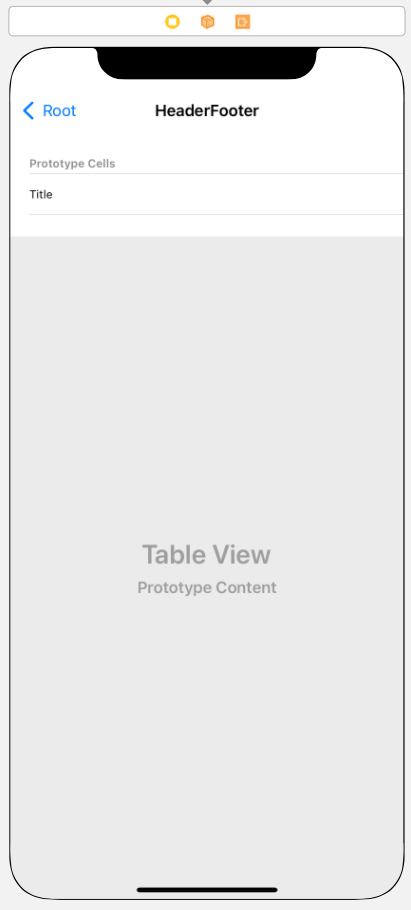
Table Header View
Table Header View는 첫 번째 셀 이전에 표시된다.
Section Header와 혼동하지 않도록 주의한다.
//
//  HeaderAndFooterViewController.swift
//  TableViewPractice
//
//  Created by Martin.Q on 2021/09/27.
//

import UIKit

class HeaderAndFooterViewController: UIViewController {
	@IBOutlet weak var tableView: UITableView!


	let list = ["iMac Pro", "iMac 5K", "Macbook Pro", "iPad Pro", "iPad", "iPad mini", "iPhone 8", "iPhone 8 Plus", "iPhone SE", "iPhone X", "Mac mini", "Apple TV", "Apple Watch"]
	var filteredList = ["iMac Pro", "iMac 5K", "Macbook Pro", "iPad Pro", "iPad", "iPad mini", "iPhone 8", "iPhone 8 Plus", "iPhone SE", "iPhone X", "Mac mini", "Apple TV", "Apple Watch"]

	lazy var result: UILabel = {[weak self] in
		var frame = self?.view.bounds ?? .zero
		frame.size.height = 50

		let lbl = UILabel(frame: frame)
		lbl.textAlignment = .center
		lbl.textColor = UIColor.orange
		lbl.backgroundColor = UIColor.gray
		return lbl
	} ()

	@objc func handle(notification: Notification) {
		switch notification.name {
		case UIResponder.keyboardWillShowNotification:
			if let frame = notification.userInfo?[UIResponder.keyboardFrameEndUserInfoKey] as? CGRect {
				var inset = tableView.contentInset
				inset.bottom = frame.height
				tableView.contentInset = inset
			}
		case UIResponder.keyboardWillHideNotification:
			var inset = tableView.contentInset
			inset.bottom = 0
			tableView.contentInset = inset
		default:
			break
		}
	}

	override func viewDidLoad() {
		super.viewDidLoad()

		NotificationCenter.default.addObserver(self, selector: #selector(handle(notification:)), name: UIResponder.keyboardWillShowNotification, object: nil)
		NotificationCenter.default.addObserver(self, selector: #selector(handle(notification:)), name: UIResponder.keyboardWillHideNotification, object: nil)
	}
}

extension HeaderAndFooterViewController: UITableViewDataSource {
	func tableView(_ tableView: UITableView, numberOfRowsInSection section: Int) -> Int {
		return filteredList.count
	}

	func tableView(_ tableView: UITableView, cellForRowAt indexPath: IndexPath) -> UITableViewCell {
		let cell = tableView.dequeueReusableCell(withIdentifier: "cell", for: indexPath)
		let target = filteredList[indexPath.row]
		cell.textLabel?.text = target

		return cell
	}
}
사용할 씬과 코드는 위와 같다.
강의에서 사용하는 UIKeyboardWillShow notification은
NSNotification.Name.UIKeyboardWillShow에서 UIResponder.keyboardWillShowNotification으로,
NSNotification.Name.UIKeyboardWillHide에서 UIResponder.keyboardWillHideNotification으로,
UIKeyboardFrameEndUserInfoKey에서 UIResponder.keyboardFrameEndUserInfoKey로 변경됐다.
따라서 @available을 통해
Table Header View에 Search Bar를 추가하고, 검색 결과는 Table Footer View에 출력하도록 한다.
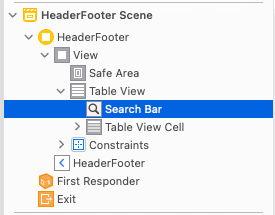
라이브러리에서 Search Bar를 찾아 Cell 위에 추가한다.

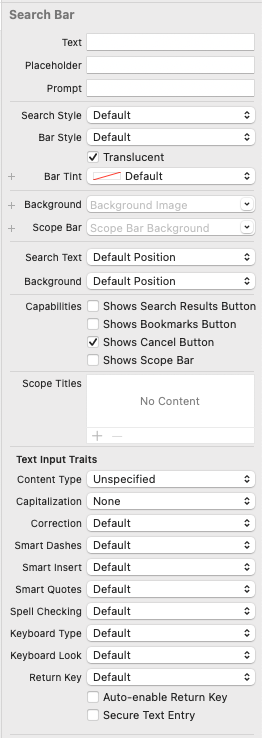
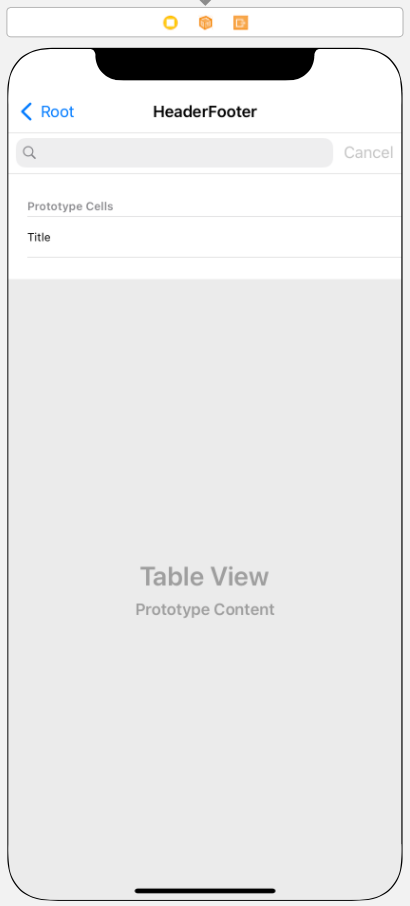
추가된 Search Bar를 선택하고 shows cancel button 옵션을 선택하면,
오른쪽과 같이 Search Bar의 오른쪽에 Cancel 버튼이 표시된다.
이후 Search Bar의 Delegate를 씬에 연결한다.
extension HeaderAndFooterViewController: UISearchBarDelegate {
	func filter(with keyword: String) {
		if keyword.count > 0 {
			filteredList = list.filter{$0.contains(keyword)}
		} else {
			filteredList = list
		}

		tableView.reloadData()
		result.text = "\(filteredList.count) result(s) found"
	}

	func searchBar(_ searchBar: UISearchBar, textDidChange searchText: String) {
		filter(with: searchText)
	}

	func searchBarTextDidBeginEditing(_ searchBar: UISearchBar) {

	}

	func searchBarTextDidEndEditing(_ searchBar: UISearchBar) {

	}

	func searchBarSearchButtonClicked(_ searchBar: UISearchBar) {

	}

	func searchBarCancelButtonClicked(_ searchBar: UISearchBar) {
		filteredList = list
		tableView.reloadData()

		searchBar.resignFirstResponder()
	}
}
serchBar에 입력된 내용이 변경될 때마다 filter 함수를 호출하고,
filter 함수는 내용이 존재하면 해당 내용으로 list에서 검색해 이를 반환한다.
Cancel 버튼을 투르면 searchBarCancelButtonClicked 메소드가 호출되고,
테이블을 초기화하고, searchBar의 포커스를 해제하게 된다.
Table Footer View
Table Footer View는 마지막 셀 다음에 표시된다.
Section Footer와 혼동하지 않도록 주의한다.
Search Bar를 통새 검색을 시작하면 Table Footer View를 추가하도록 코드에서 구현한다.
lazy var result: UILabel = {[weak self] in
	var frame = self?.view.bounds ?? .zero
	frame.size.height = 50

	let lbl = UILabel(frame: frame)
	lbl.textAlignment = .center
	lbl.textColor = UIColor.orange
	lbl.backgroundColor = UIColor.gray
	return lbl
} ()
Footer에 사용될 Label은 매번 새로 생성하는 것이 아닌 속성으로 선언해 재사용이 가능하도록 되어있다.
extension HeaderAndFooterViewController: UISearchBarDelegate {
	func filter(with keyword: String) {
		if keyword.count > 0 {
			filteredList = list.filter{$0.contains(keyword)}
		} else {
			filteredList = list
		}

		tableView.reloadData()
		result.text = "\(filteredList.count) result(s) found"
	}

	func searchBar(_ searchBar: UISearchBar, textDidChange searchText: String) {
		filter(with: searchText)
	}

	func searchBarTextDidBeginEditing(_ searchBar: UISearchBar) {

	}

	func searchBarTextDidEndEditing(_ searchBar: UISearchBar) {

	}

	func searchBarSearchButtonClicked(_ searchBar: UISearchBar) {

	}

	func searchBarCancelButtonClicked(_ searchBar: UISearchBar) {
		filteredList = list
		tableView.reloadData()

		searchBar.resignFirstResponder()
	}
}
func searchBarTextDidBeginEditing(_ searchBar: UISearchBar) {
tableView.tableFooterView = result
}searchBarTextDidBeginEditing 메소드는 Search Bar가 편집 모드에 진입했을 경우 호출된다.
따라서 이때 tableFooterView를 설정해 주고,
func searchBarTextDidEndEditing(_ searchBar: UISearchBar) {
	searchBar.text = nil
	result.text = "0 result(s) found"
	tableView.tableFooterView = nil
}
편집 모드가 종료됐을 때 호출되는 searchBarTextDidEndEditing 메소드에서
searchBar의 내용과 결과를 변경하고, tableFooterView를 삭제한다.
Managing Selection
singleSelection
//
//  SingleSelectionViewController.swift
//  TableViewPractice
//
//  Created by Martin.Q on 2021/09/27.
//

import UIKit

class SingleSelectionViewController: UIViewController {
	@IBOutlet weak var tableView: UITableView!

	let list = Region.generate()

	func selectRandomCell() {

	}
	func deselect() {

	}


	override func viewDidLoad() {
		super.viewDidLoad()

		navigationItem.rightBarButtonItem = UIBarButtonItem(barButtonSystemItem: .action, target: self, action: #selector(showMenu(_:)))
	}

	@objc func showMenu(_ sender: UIBarButtonItem) {
		let menu = UIAlertController(title: nil, message: nil, preferredStyle: .actionSheet)

		let selectRandomCell = UIAlertAction(title: "Select Random Cell", style: .default) { (action) in
			self.selectRandomCell()
		}
		let deselect = UIAlertAction(title: "Deselect", style: .default) { (action) in
		self.deselect()
	}
	let cancel = UIAlertAction(title: "Cancel", style: .cancel, handler: nil)

	menu.addAction(selectRandomCell)
	menu.addAction(deselect)
	menu.addAction(cancel)

	if let pc = menu.popoverPresentationController {
		pc.barButtonItem = sender
	}

	present(menu, animated: true, completion: nil)
	}
}

extension SingleSelectionViewController: UITableViewDataSource {
	func numberOfSections(in tableView: UITableView) -> Int {
		return list.count
	}
	func tableView(_ tableView: UITableView, numberOfRowsInSection section: Int) -> Int {
		return list[section].country.count
	}

	func tableView(_ tableView: UITableView, cellForRowAt indexPath: IndexPath) -> UITableViewCell {
		let cell = tableView.dequeueReusableCell(withIdentifier: "cell", for: indexPath)
		let target = list[indexPath.section].country[indexPath.row]
		cell.textLabel?.text = target

		return cell
	}

	func tableView(_ tableView: UITableView, titleForHeaderInSection section: Int) -> String? {
		return list[section].title
	}

}

extension SingleSelectionViewController: UITableViewDelegate {

}

extension UIViewController {
	func showAlert(with value: String) {
		let alert = UIAlertController(title: nil, message: value, preferredStyle: .alert)
		let okAction = UIAlertAction(title: "OK", style: .cancel, handler: nil)
		alert.addAction(okAction)
		present(alert, animated: true, completion: nil)
	}
}
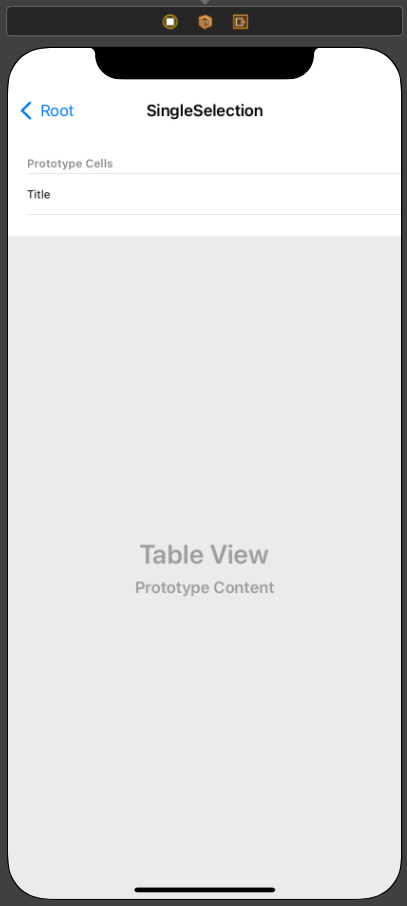
사용할 씬과 코드는 위와 같다.
이전에 작성했던 Region 클래스를 사용해 list를 생성하고,
해당 list를 사용해 section이 존재하는 테이블을 작성한다.
viewDidLoad 안에서 BarButtonItem을 추가해 menu를 표시할 수 있도록 구성했다.
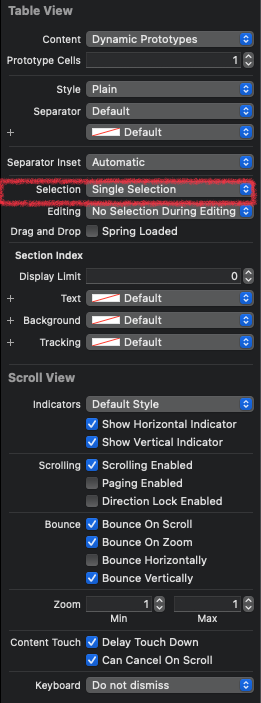
해당 TableView의 Selection 속성은 SingleSelection으로 선택되어 있다.
이 상태에서는 한 번에 하나의 셀을 선택할 수 있다.
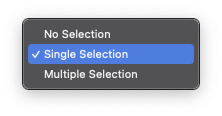
해당 속성에는 두 개의 옵션이 더 존재하는데,
이름 그대로 선택을 할 수 없도록 하거나, 여러 셀을 선택할 수 있도록 한다.
TableView가 편집 상태에 있을 때는 선택 기능이 비활성화된다.
만약 편집 상태에서 선택 기능이 필요하다면 바로 아래에 존재하는 Editing 옵션에서 선택해 준다.
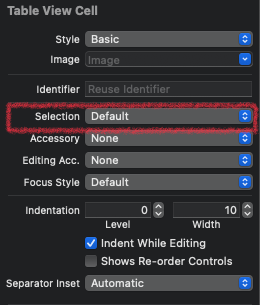
Selection 옵션은 셀에도 존재하는데, 해당 옵션은
선택됐을 때의 Background 강조 색상을 선택한다.
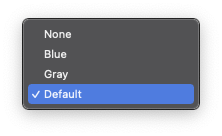
Default 상태애 선 회색으로 표시되고, Blue와 Gray는 이름과는 다르게 모두 Default와 동일하게 동작한다.
따라서 현재는 None과 Default만 사용한다.
만약 다른 색을 사용하고 싶다면 SelectedBackground View를 직접 추가해야 한다.
extension SingleSelectionViewController: UITableViewDelegate {
	func tableView(_ tableView: UITableView, willSelectRowAt indexPath: IndexPath) -> IndexPath? {
		return indexPath
	}
}
비어있는 Delegate에 tableView(willSelectRowAt:)메소드를 추가한다.
해당 메소드는 셀을 선택하기 직전 호출되고, 해당 메소드가 indexPath를 반환하면 셀이 선택되고,
nil이 반환되면 셀은 선택되지 않는다.
이러한 특성을 사용해 특정 조건에서 셀의 선택을 금지할 때 활용한다.
extension SingleSelectionViewController: UITableViewDelegate {
	func tableView(_ tableView: UITableView, willSelectRowAt indexPath: IndexPath) -> IndexPath? {
		return indexPath
	}
	func tableView(_ tableView: UITableView, didSelectRowAt indexPath: IndexPath) {

	}
}
tableView(didSelectRowAt:)메소드는 셀이 선택된 직후 호출된다.
전달된 indexPath를 통해 선택한 셀의 위치를 확인할 수 있고,
셀을 선택했을 때 실행할 동작들은 주로 여기서 구현하게 된다.
extension SingleSelectionViewController: UITableViewDelegate {
	func tableView(_ tableView: UITableView, willSelectRowAt indexPath: IndexPath) -> IndexPath? {
		return indexPath
	}
	func tableView(_ tableView: UITableView, didSelectRowAt indexPath: IndexPath) {
		let target = list[indexPath.section].country[indexPath.row]
		showAlert(with: target)
	}
}
선택된 셀의 데이터를 경고창에 표시하도록 showAlert 메소드를 호출한다.
extension SingleSelectionViewController: UITableViewDelegate {
	func tableView(_ tableView: UITableView, willSelectRowAt indexPath: IndexPath) -> IndexPath? {
		return indexPath
	}
	func tableView(_ tableView: UITableView, didSelectRowAt indexPath: IndexPath) {
		let target = list[indexPath.section].country[indexPath.row]
		showAlert(with: target)
	}
	func tableView(_ tableView: UITableView, willDeselectRowAt indexPath: IndexPath) -> IndexPath? {
		return indexPath
	}
}
tableView(willDeselectRowAt:)메소드는 셀의 선택이 해제되기 직전 호출된다.
tableView(willSelectRowAt:)와 마찬가지로 indexPath를 반환하면 선택이 해제되고,
nil을 반환하면 동작하지 않는다.
extension SingleSelectionViewController: UITableViewDelegate {
	func tableView(_ tableView: UITableView, willSelectRowAt indexPath: IndexPath) -> IndexPath? {
		return indexPath
	}
	func tableView(_ tableView: UITableView, didSelectRowAt indexPath: IndexPath) {
		let target = list[indexPath.section].country[indexPath.row]
		showAlert(with: target)
	}
	func tableView(_ tableView: UITableView, willDeselectRowAt indexPath: IndexPath) -> IndexPath? {
		return indexPath
	}
	func tableView(_ tableView: UITableView, didDeselectRowAt indexPath: IndexPath) {
		print(#function, indexPath)
	}
}
tableView(didDeselectRowAt:)메소드는 선택이 해제된 직후 호출된다.
해당 부분에선 전달된 indexPath를 콘솔에 출력한다.
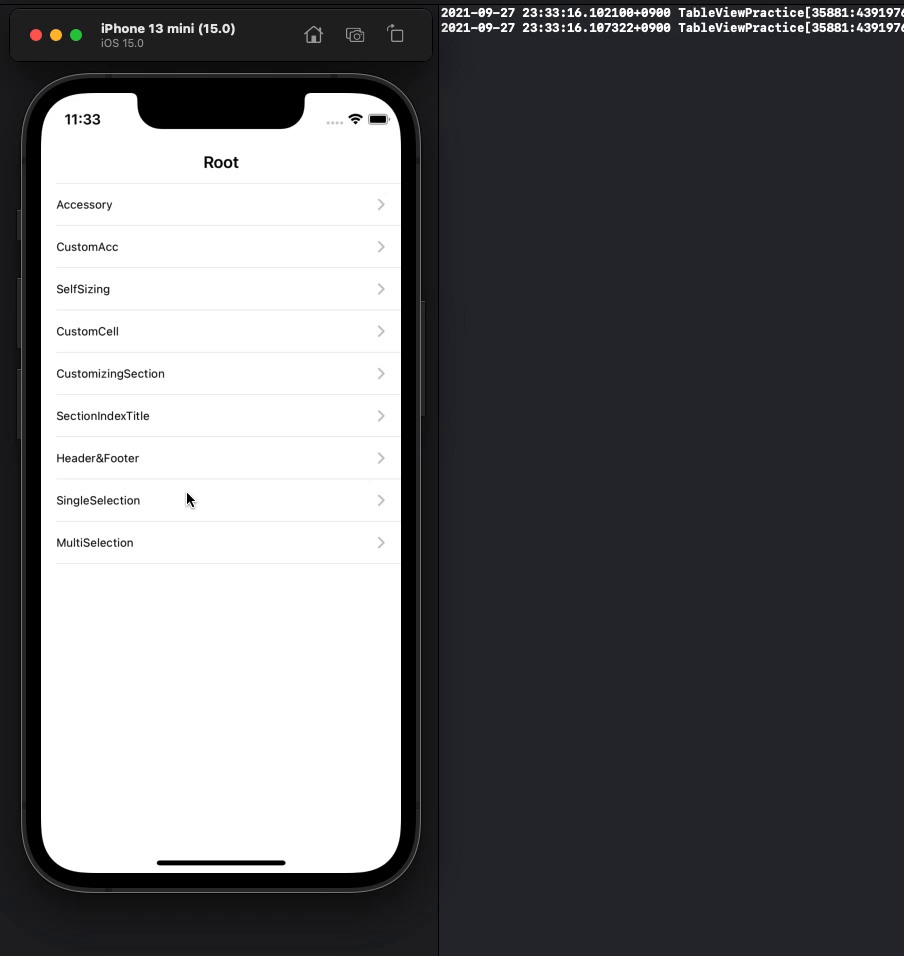
선택된 셀의 제목이 경고창에 표시되고,
다른 셀을 선택하면서 해제된 셀의 indexPath가 콘솔에 표시된다.
func tableView(_ tableView: UITableView, willSelectRowAt indexPath: IndexPath) -> IndexPath? {
	if indexPath.row == 0 {
		return nil
	} else {
		return indexPath
	}
}
만약 tableView(willSelectRowAt:)메소드를 위와 같이
indexPath의 row가 0인 경우 nil을 반환하도록 수정한다면

첫 번째 셀은 선택이 되지 않게 된다.
단, 길게 누르면 강조 상태로는 진입이 가능하다.
강조 상태로 전환됐다가 일반 상태로 돌아오거나 선택 상태로 전환하게 된다.
이 둘도 연관된 메소드가 존재한다.
extension SingleSelectionViewController: UITableViewDelegate {
	func tableView(_ tableView: UITableView, willSelectRowAt indexPath: IndexPath) -> IndexPath? {
		if indexPath.row == 0 {
			return nil
		} else {
			return indexPath
		}
	}
	func tableView(_ tableView: UITableView, didSelectRowAt indexPath: IndexPath) {
		let target = list[indexPath.section].country[indexPath.row]
		showAlert(with: target)
	}
	func tableView(_ tableView: UITableView, willDeselectRowAt indexPath: IndexPath) -> IndexPath? {
		return indexPath
	}
	func tableView(_ tableView: UITableView, didDeselectRowAt indexPath: IndexPath) {
		print(#function, indexPath)
	}
	func tableView(_ tableView: UITableView, shouldHighlightRowAt indexPath: IndexPath) -> Bool {
		return indexPath.row != 0
	}
}
가장 마지막에 푸가 된 tableView(shouldHighlightRowAt:)메소드는 true를 반환하면 강조 효과가 실행되고,
false를 반환하면 실행되지 않는다.
위의 코드는 첫 번째 셀만 강조 효과를 실행하지 않는다.
extension SingleSelectionViewController: UITableViewDelegate {
	func tableView(_ tableView: UITableView, willSelectRowAt indexPath: IndexPath) -> IndexPath? {
		if indexPath.row == 0 {
			return nil
		} else {
			return indexPath
		}
	}
	func tableView(_ tableView: UITableView, didSelectRowAt indexPath: IndexPath) {
		let target = list[indexPath.section].country[indexPath.row]
		showAlert(with: target)
	}
	func tableView(_ tableView: UITableView, willDeselectRowAt indexPath: IndexPath) -> IndexPath? {
		return indexPath
	}
	func tableView(_ tableView: UITableView, didDeselectRowAt indexPath: IndexPath) {
		print(#function, indexPath)
	}
	func tableView(_ tableView: UITableView, shouldHighlightRowAt indexPath: IndexPath) -> Bool {
		return indexPath.row != 0
	}
		func tableView(_ tableView: UITableView, didHighlightRowAt indexPath: IndexPath) {

	}
		func tableView(_ tableView: UITableView, didUnhighlightRowAt indexPath: IndexPath) {

	}
}
이번에 추가한 tableView(didHighlightRowAt:)과 tableView(didUnjighlightRowAt:)메소드는 각각
강조가 된 직후, 강조가 해제된 직후 호출되게 된다.
이 둘은 짧은 시간 내에 연달아 호출된다.
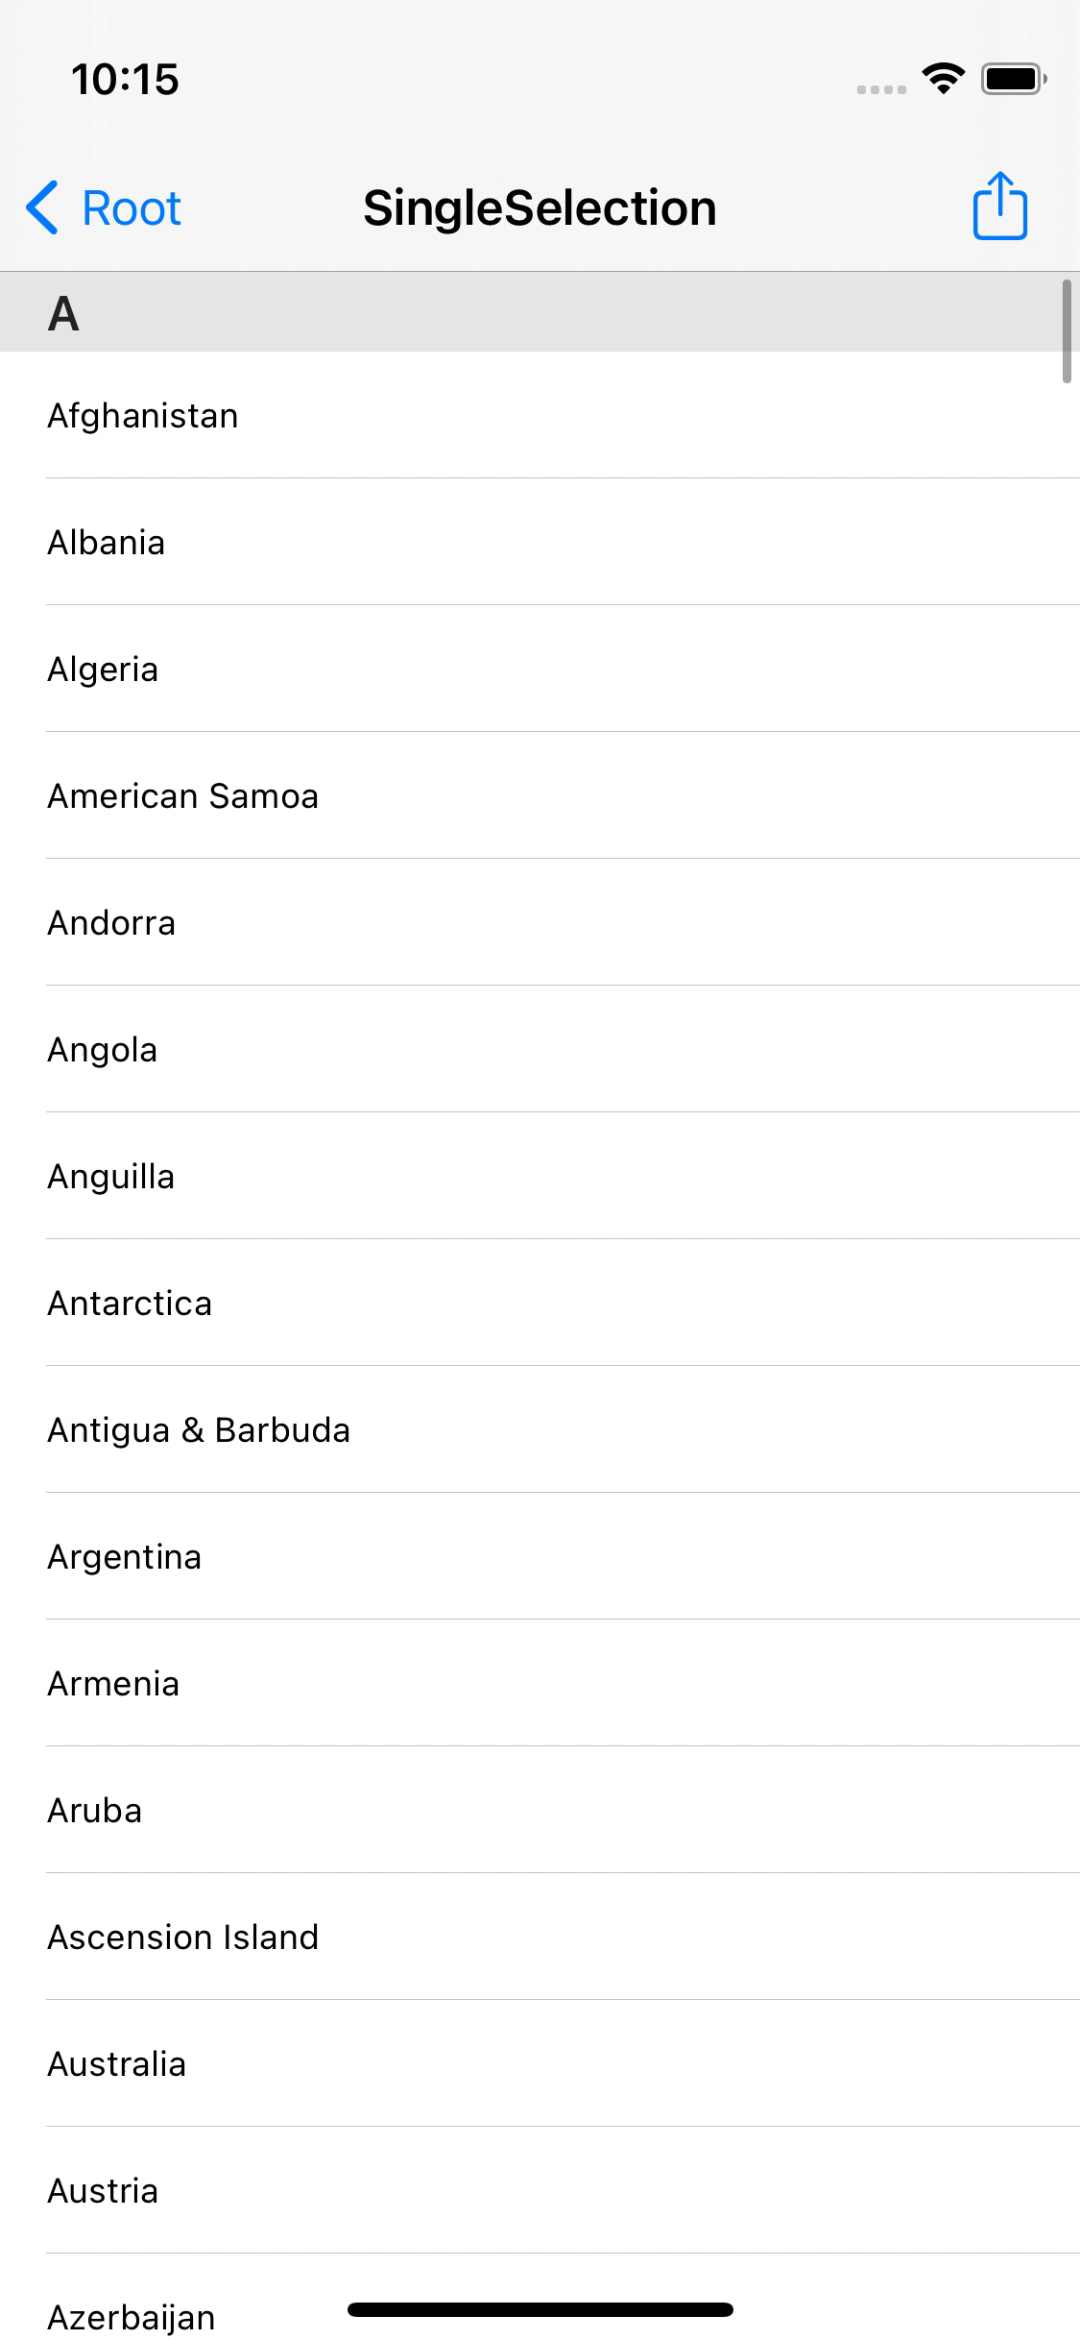
첫 번째 셀은 길게 누르고 있어도 반응하지 않지만,
두 번째 셀인 Albania는 제대로 강조되고, 기능도 동작하는 것을 확인할 수 있다.
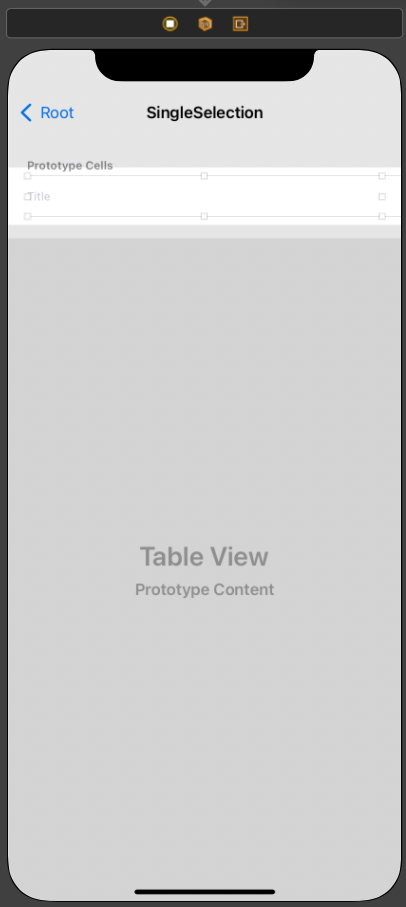
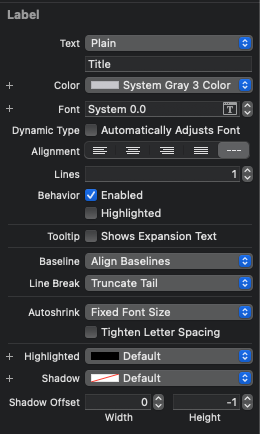
이번엔 셀의 tilte의 색을 System Gray 3으로 변경했다.
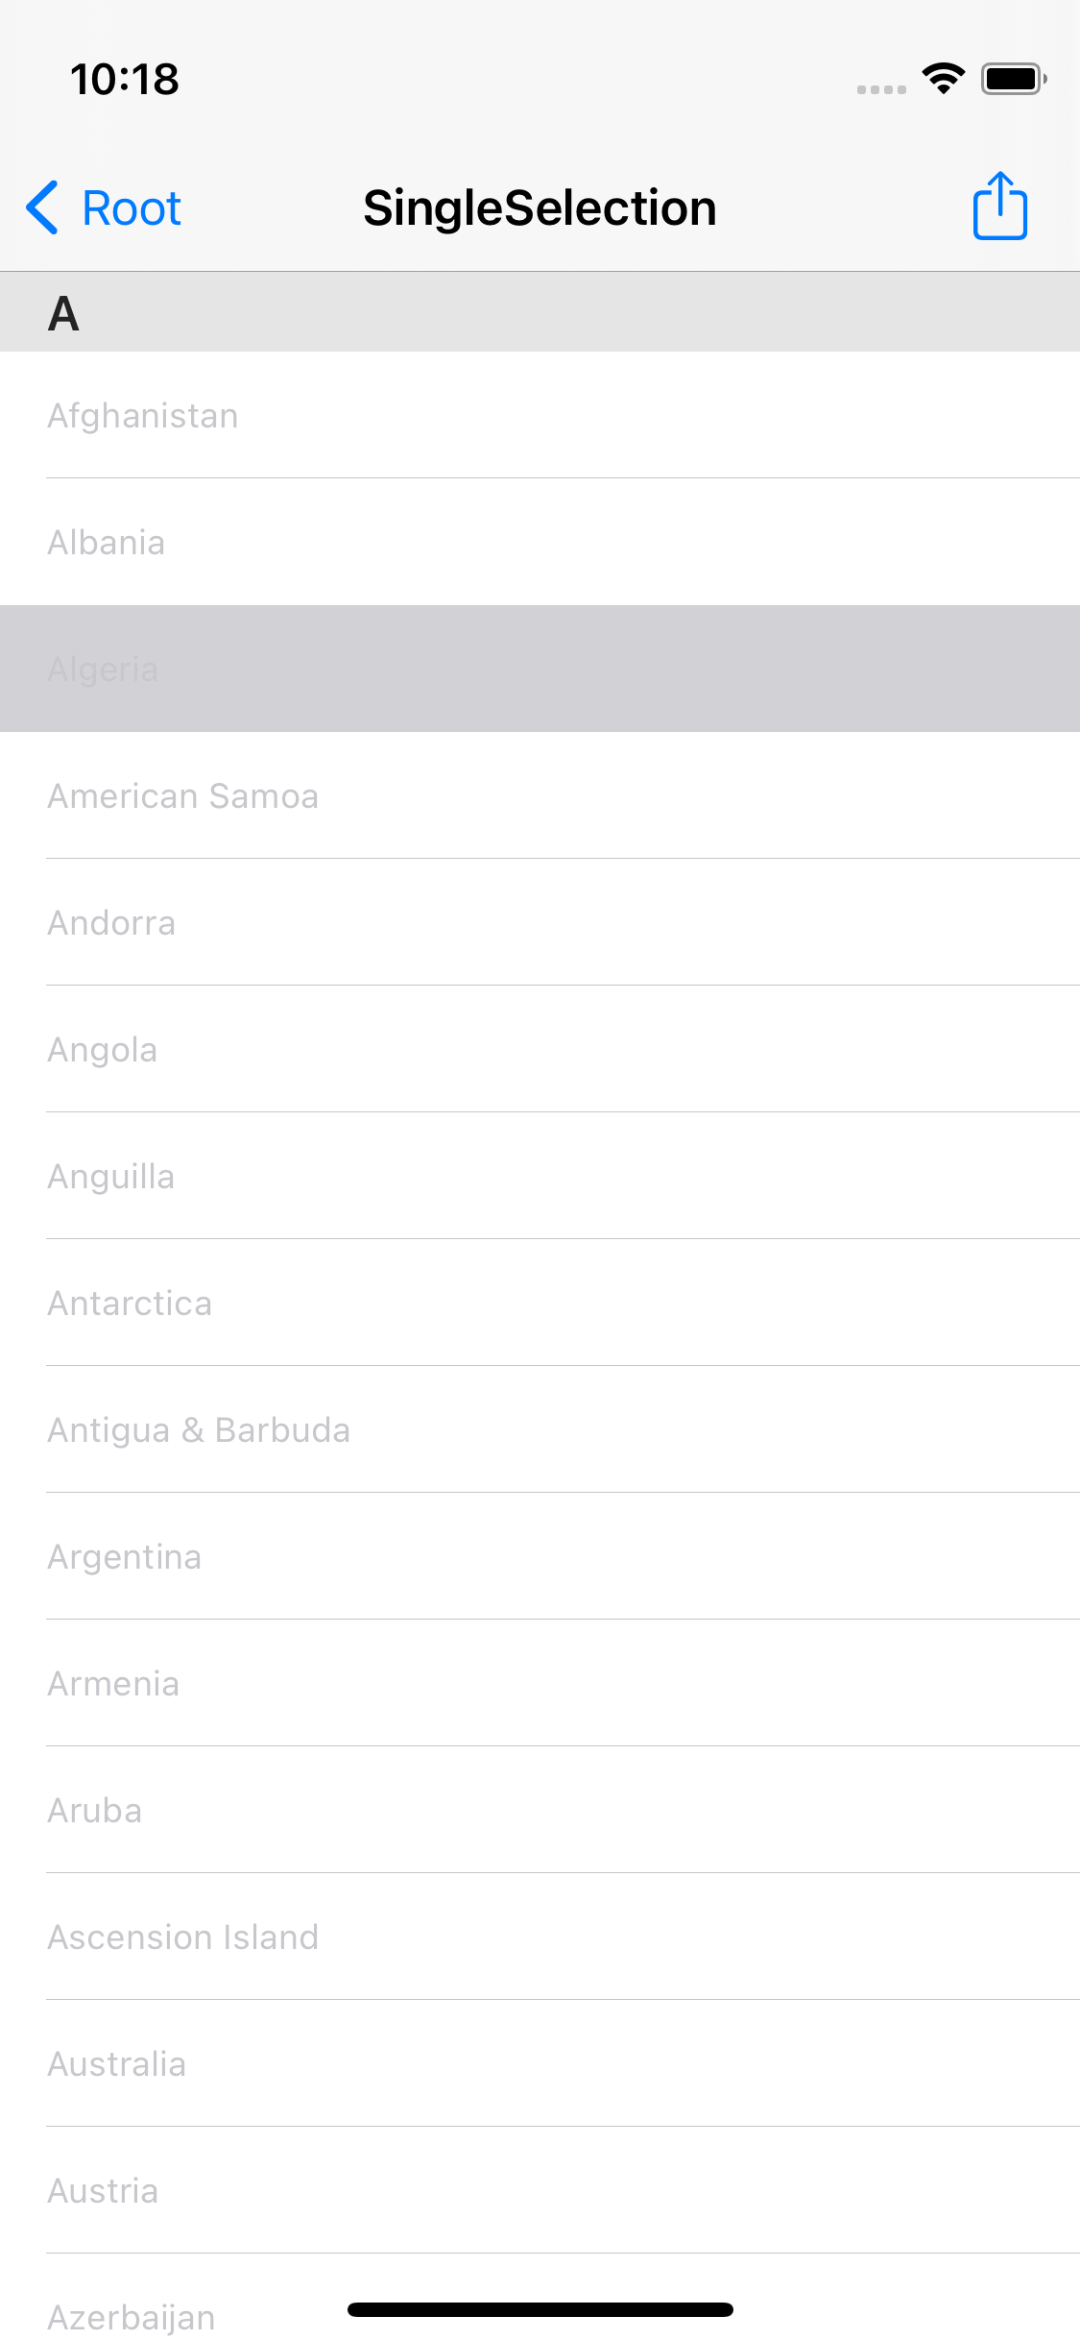
이렇게 연한 색으로 설정되어 있다면 강조되었을 때 시인성이 나빠진다.
이번에는 셀의 상태에 따라 텍스트 색을 바꿔보도록 한다.
extension SingleSelectionViewController: UITableViewDelegate {
	func tableView(_ tableView: UITableView, willSelectRowAt indexPath: IndexPath) -> IndexPath? {
		if indexPath.row == 0 {
			return nil
		} else {
			return indexPath
		}
	}
	func tableView(_ tableView: UITableView, didSelectRowAt indexPath: IndexPath) {
		let target = list[indexPath.section].country[indexPath.row]
		showAlert(with: target)

		tableView.cellForRow(at: indexPath)?.textLabel?.textColor = UIColor.black
	}
	func tableView(_ tableView: UITableView, willDeselectRowAt indexPath: IndexPath) -> IndexPath? {
		return indexPath
	}
	func tableView(_ tableView: UITableView, didDeselectRowAt indexPath: IndexPath) {
		print(#function, indexPath)

		tableView.cellForRow(at: indexPath)?.textLabel?.textColor = UIColor.systemGray3
	}
	func tableView(_ tableView: UITableView, shouldHighlightRowAt indexPath: IndexPath) -> Bool {
		return indexPath.row != 0
	}
	func tableView(_ tableView: UITableView, didHighlightRowAt indexPath: IndexPath) {
		tableView.cellForRow(at: indexPath)?.textLabel?.textColor = UIColor.black
	}
	func tableView(_ tableView: UITableView, didUnhighlightRowAt indexPath: IndexPath) {
		tableView.cellForRow(at: indexPath)?.textLabel?.textColor = UIColor.systemGray3
	}
}
이번엔 tableView(didSelectRowAt:)메소드에서 textColor를 검은색으로,
tableView(didDeselectRowAt:)메소드에서 textColor를 기본색으로,
tableView(didHighlightRowAt:)메소드에서 textColor를 검은색으로,
tableView(didUnhighlightRowAt:)메소드에서 textColor를 기본색으로 설정한다.
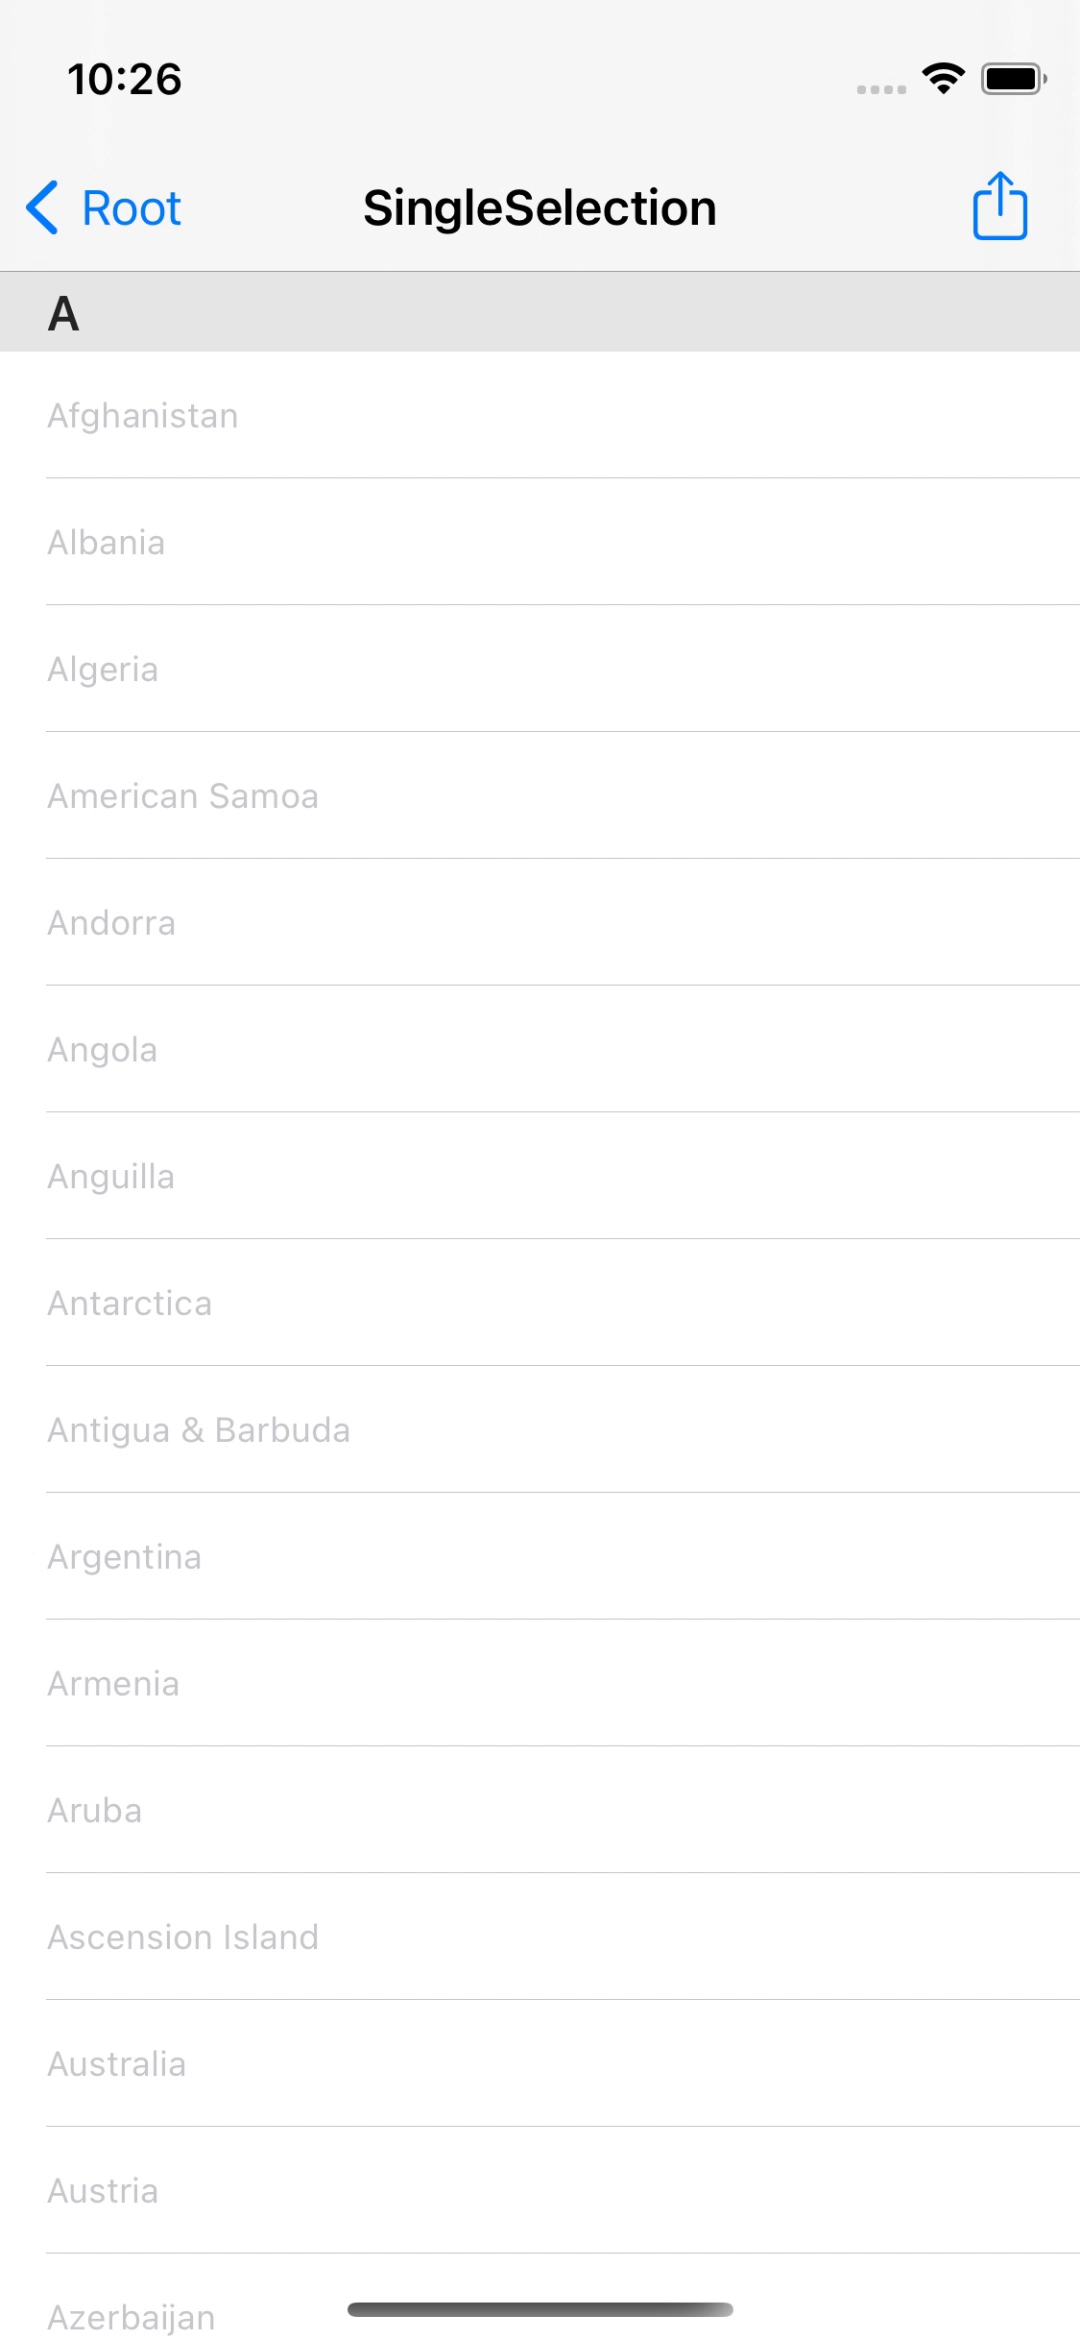
의도한 대로 동작해 시인성을 확보하고 있다.
셀 상태에서 디자인을 변경하거나 업데이트를 처리해야 할 때 유용하게 활용할 수 있다.
위에서 구현한 동작은 조금 더 간단하게 구현할 수 있다.
TableViewCell은 선택 상태와 강조 상태를 직접 처리할 수 있다.
class SingleSelectionCell: UITableViewCell {
	override func awakeFromNib() {
		super.awakeFromNib()

	}
}
위와 같이 UITableCell을 상속받는 별도의 클래스를 생성하고, 해당 클래스를 셀의 커스텀 클래스로 설정한다.
class SingleSelectionCell: UITableViewCell {
	override func awakeFromNib() {
		super.awakeFromNib()

		textLabel?.textColor = UIColor.systemGray3
		textLabel?.highlightedTextColor = UIColor.black
	}
}
이후 textColor와 highlightedTextColor를 설정해 주면
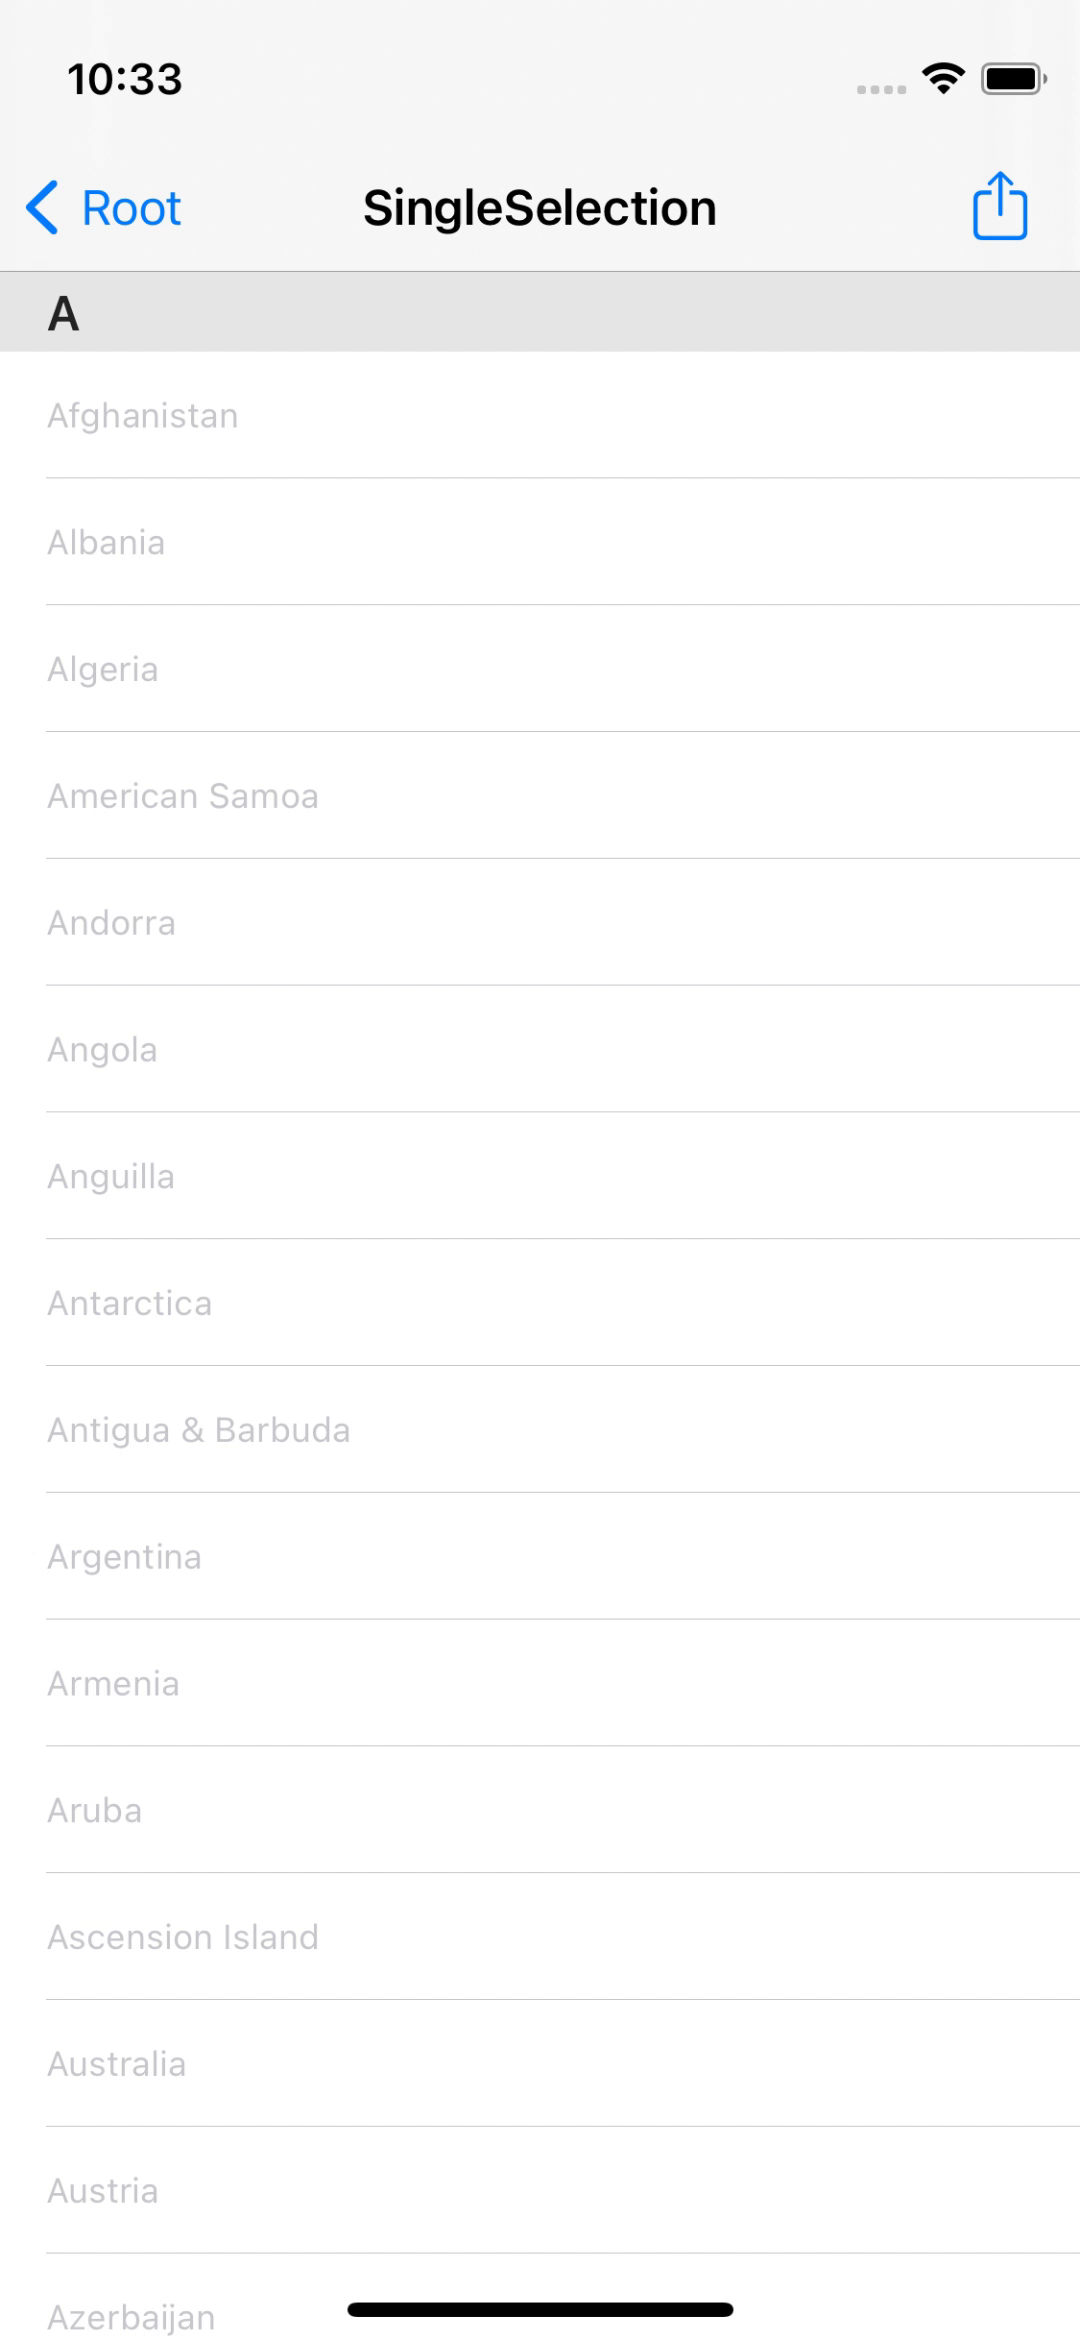
동일하게 textColor가 바뀌는 것을 확인할 수 있다.
또한 셀의 강조 상태는 imageView에도 영향을 미치기 때문에,
imageView에 기본 상태와 강조 상태에 적절한 이미지가 설정되어 있다면 반응하게 된다.
override func setSelected(_ selected: Bool, animated: Bool) {
	super.setSelected(selected, animated: animated)

}
해당 메소드는 셀의 선택 상태가 바뀔 때마다 호출된다.
첫 번째 파라미터를 통해 선택 상태를 확인할 수 있다.
override func setHighlighted(_ highlighted: Bool, animated: Bool) {
	super.setHighlighted(highlighted, animated: animated)

}
해당 메소드는 셀의 강조 상태가 바뀔 때마다 호출된다.
마찬가지로 첫 번째 파라미터를 통해 강조 상태를 확인할 수 있다.
이번엔 코드를 통해 셀을 선택해 보도록 한다.
func selectRandomCell() {

}
func deselect() {

}
코드에 작성되어 있는 두 개의 메소드로 셀 선택과 해제를 구현한다.
func selectRandomCell() {
	let section = Int.random(in: 0 ..< list.count)
	let row = Int.random(in: 0 ..< list[section].country.count)
	let targetIndex = IndexPath(row: row, section: section)
}
우선 선택할 셀을 특정하기 위해 무작위의 indexPath를 생성한다.
이미 생성된 범위를 벗어나 잘못된 indexPath를 생성하는 것을 방지하기 위해 list의 section과 country의 범위 내에서 생성한다.
func selectRandomCell() {
	let section = Int.random(in: 0 ..< list.count)
	let row = Int.random(in: 0 ..< list[section].country.count)
	let targetIndex = IndexPath(row: row, section: section)

	tableView.selectRow(at: targetIndex, animated: true, scrollPosition: .top)
}
셀 선택은 selectRow 메소드로 구현한다.
첫 번째 파라미터로 선택할 셀의 indexPath를 전달하고,
두 번째 파라미터로 애니메이션 여부를,
세 번째 파라미터로 스크롤 위치를 설정한다. 각각 top, bottom, middle, none으로 none을 선택하면 위치로 이동하지 않는다.
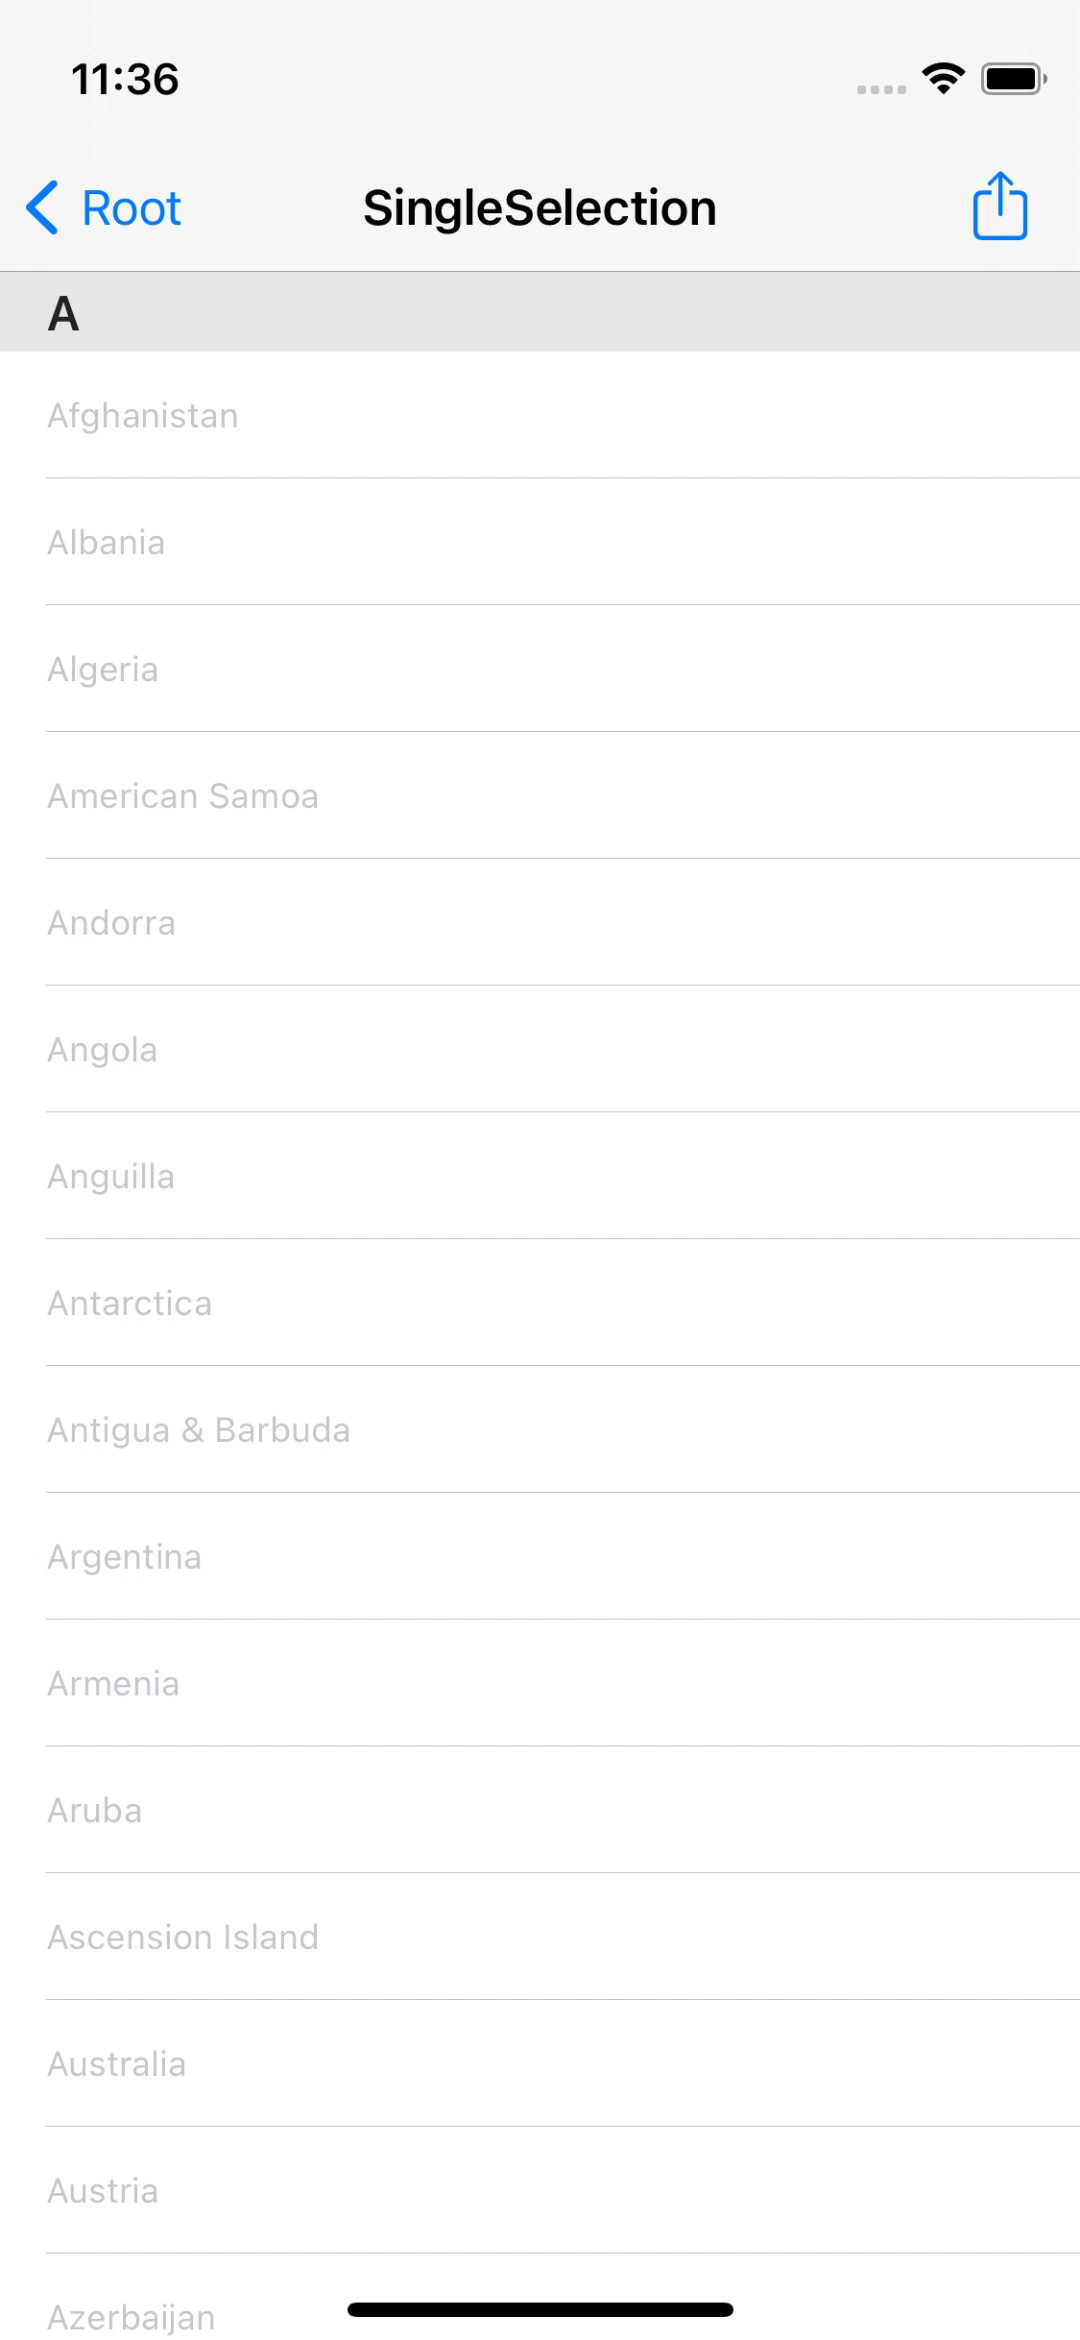
우측 상단의 버튼을 선택해 메뉴를 표시하고,
select random cell을 선택하면 무작위의 셀을 선택한다.
scrollposition이 top으로 설정되어 있기 때문에 선택된 셀을 화면의 상단에 표시되고, 마지막에 존재하는 셀들은
최대한 상단에 가까운 위치까지 스크롤된다.
func deselect() {
	if let selected = tableView.indexPathForSelectedRow {
		tableView.deselectRow(at: selected, animated: true)
	}
}
deselect 메소드는 선택된 셀이 있다면 해당 선택을 해제한다.
indexPathForSelectedRow는 해당 tableView에서 선택된 셀의 indexPath를 반환하며,
multiSelection을 사용 중인 경우 indexPathsForSelectedRows 속성을 사용한다.
이후 deselectRow 메소드를 사용해 해제할 indexPath와 애니메이션 여부를 전달한다.
func deselect() {
	if let selected = tableView.indexPathForSelectedRow {
		tableView.deselectRow(at: selected, animated: true)

		DispatchQueue.main.asyncAfter(deadline: .now() + 1) { [weak self] in
			let targetIndex = IndexPath(row: 0, section: 0)
			self?.tableView.scrollToRow(at: targetIndex, at: .top, animated: true)
		}
	}
}
또한, 선택을 해제한 뒤 1초 후에 첫 번째 셀로 이동하도록 구성한다.
asyncAfter 메소드의 deadline 파라미터로 유효 시간을 전달하고,
실행할 코드를 작성한다.
특정 위치로 스크롤하기 위해 IndexPath를 하나 생성하고, 해당 인덱스를 scrollToRow에 전달한다.
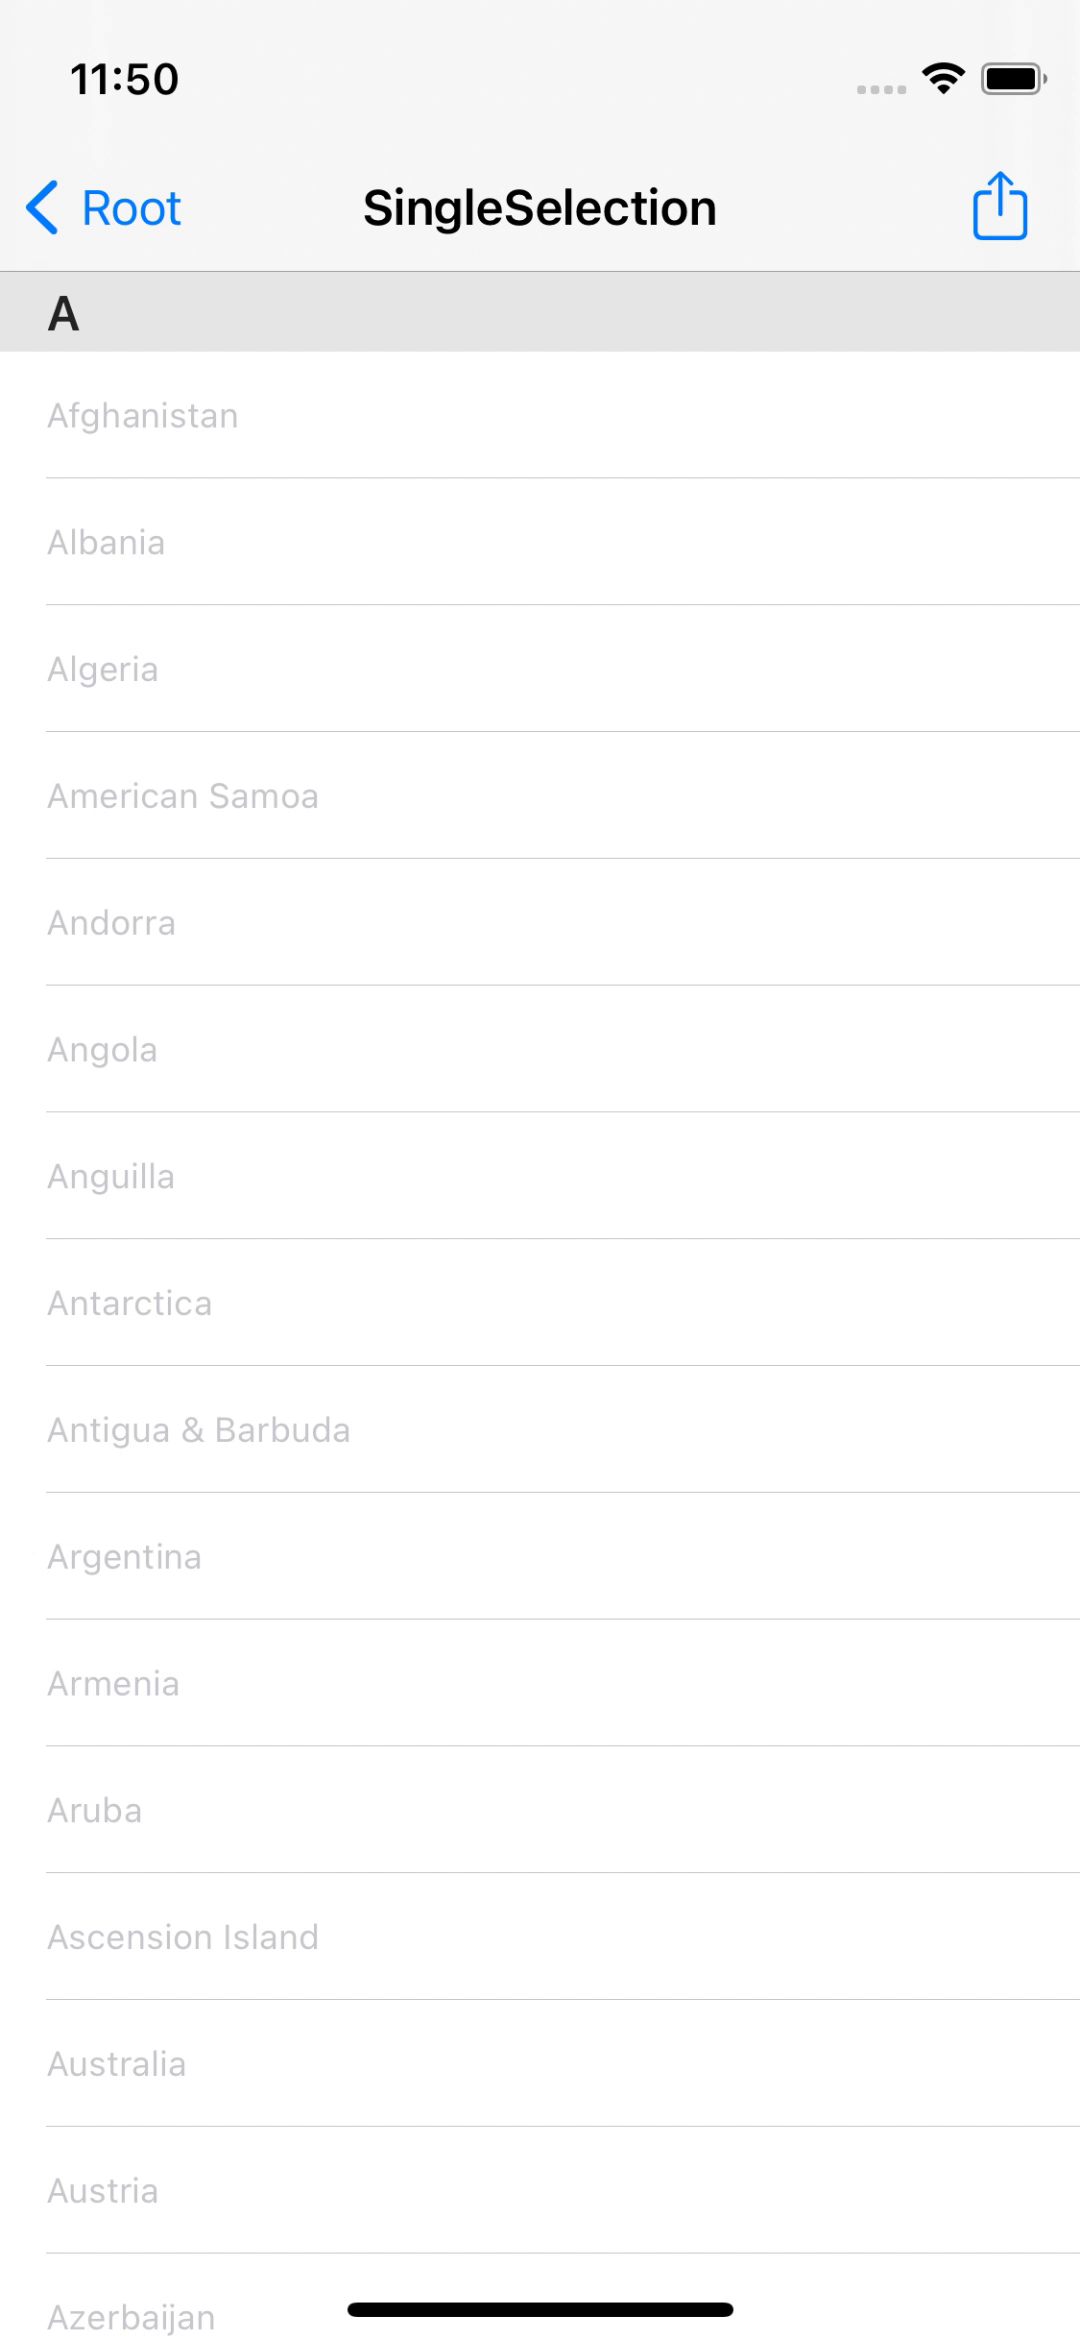
의도한 대로 동작하는 것을 확인할 수 있다.
multiSelection
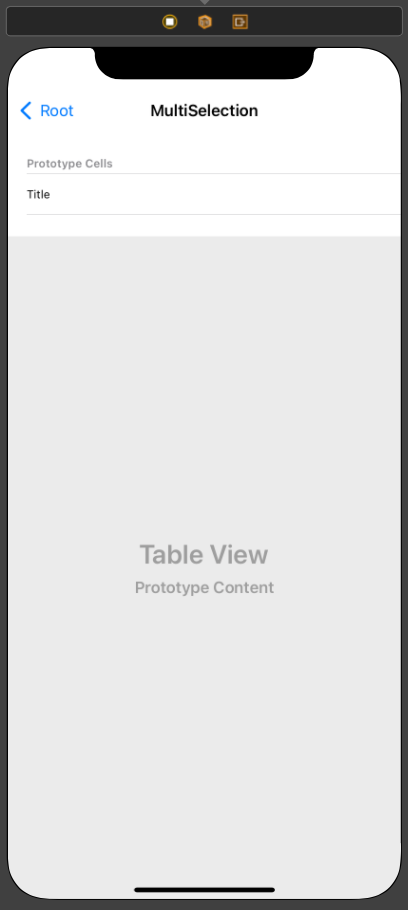
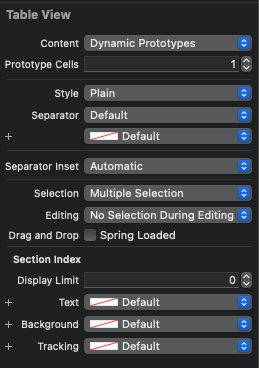
씬의 구성은 이전과 같고, Selection 속성만 Multiple Selection으로 설정했다.
//
//  MultipleSelectionViewController.swift
//  TableViewPractice
//
//  Created by Martin.Q on 2021/09/28.
//

import UIKit

class MultipleSelectionViewController: UIViewController {
	let list = Region.generate()

	@IBOutlet weak var tableView: UITableView!

	@objc func report() {

	}

	override func viewDidLoad() {
		super.viewDidLoad()

		navigationItem.rightBarButtonItem = UIBarButtonItem(title: "Report", style: .plain, target: self, action: #selector(report))
	}

}

extension MultipleSelectionViewController: UITableViewDataSource {
	func numberOfSections(in tableView: UITableView) -> Int {
		return list.count
	}
	func tableView(_ tableView: UITableView, numberOfRowsInSection section: Int) -> Int {
		return list[section].country.count
	}
	func tableView(_ tableView: UITableView, cellForRowAt indexPath: IndexPath) -> UITableViewCell {
		let cell = tableView.dequeueReusableCell(withIdentifier: "cell", for: indexPath)
		let target = list[indexPath.section].country[indexPath.row]
		cell.textLabel?.text = target

		return cell
	}
	func tableView(_ tableView: UITableView, titleForHeaderInSection section: Int) -> String? {
		return list[section].title
	}
}
사용할 코드는 위와 같다.
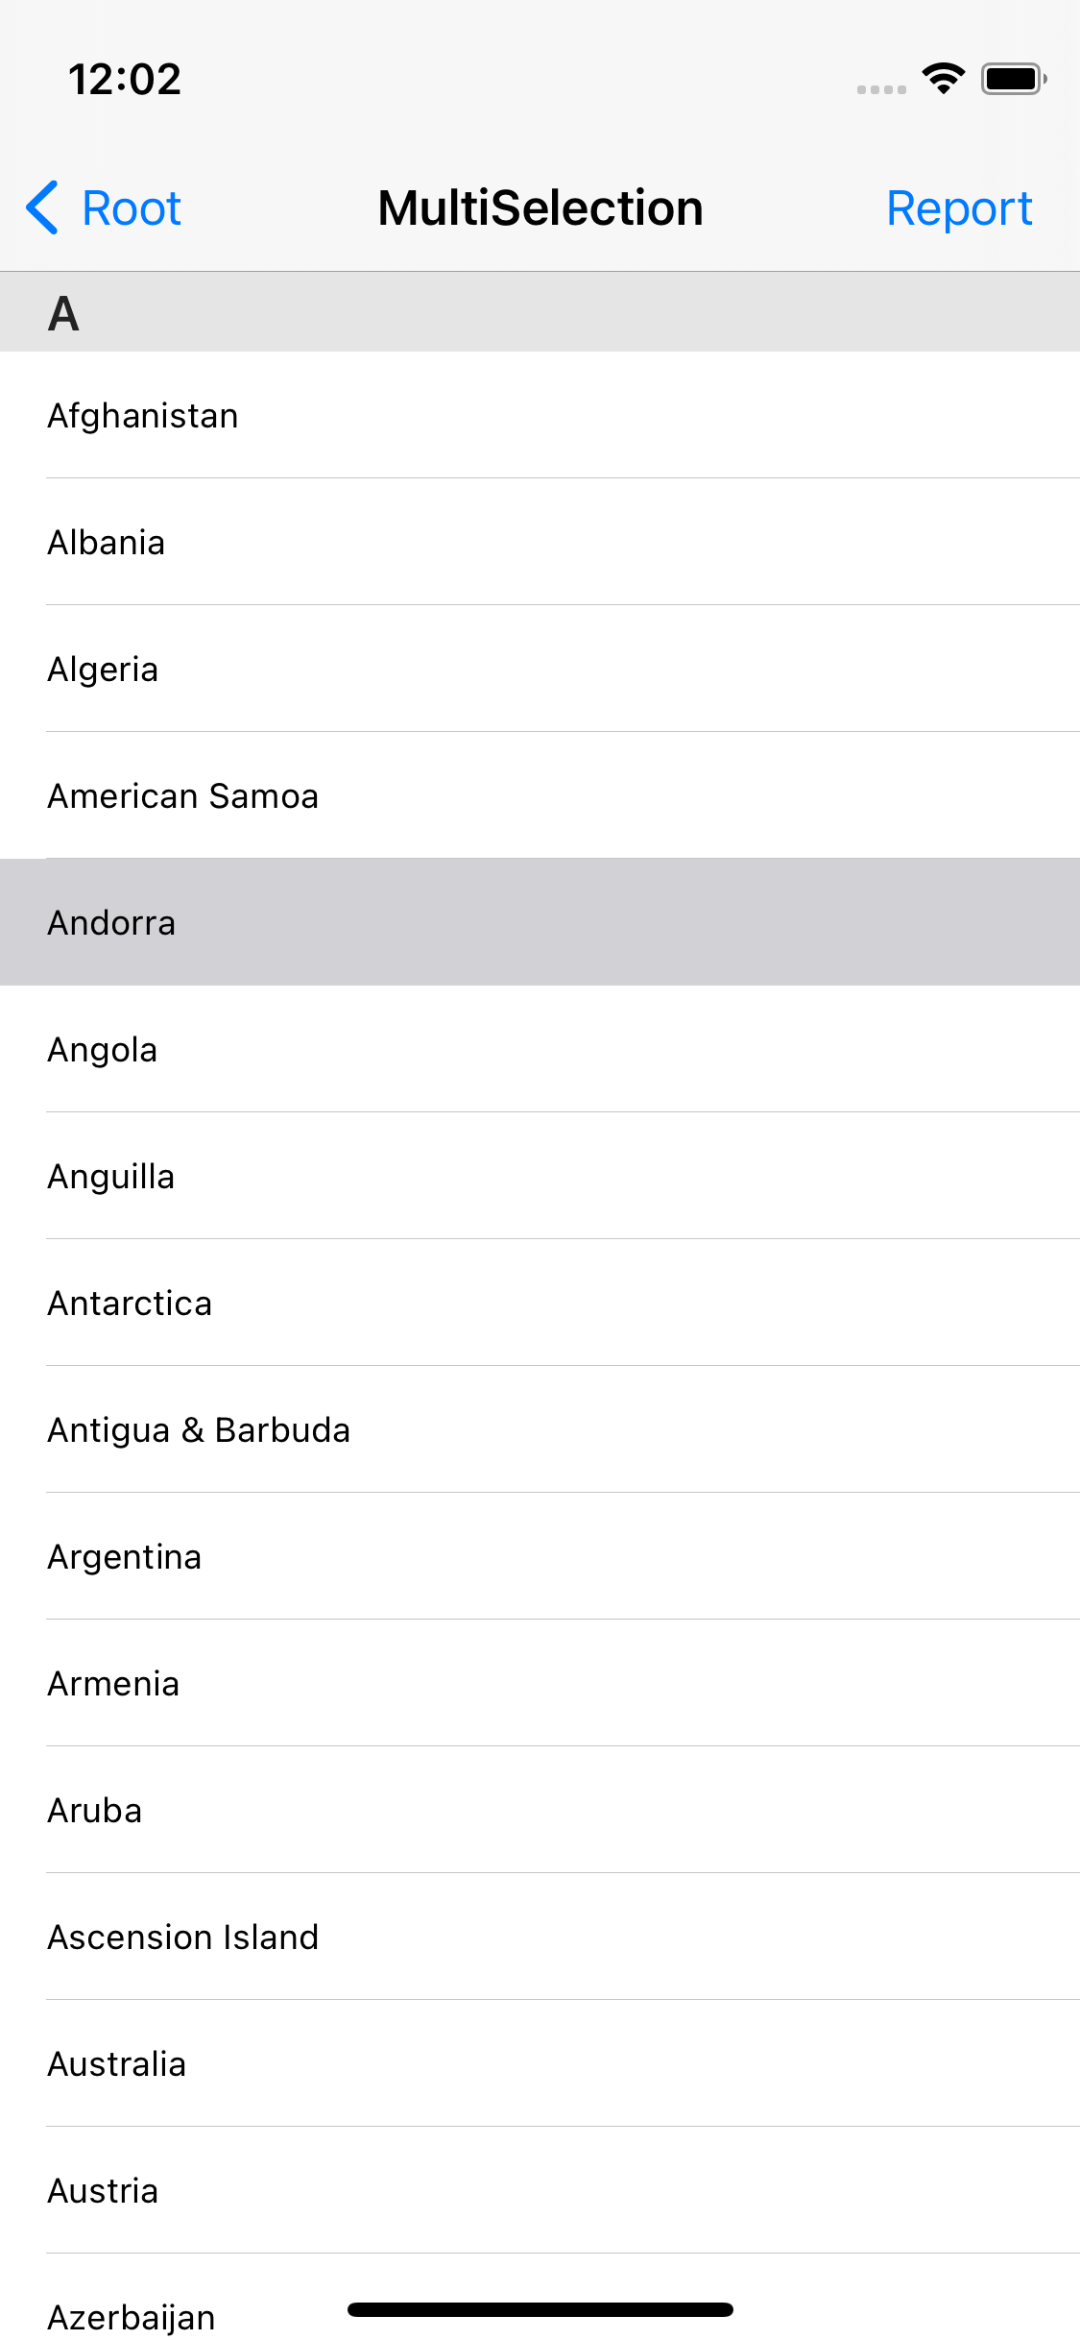
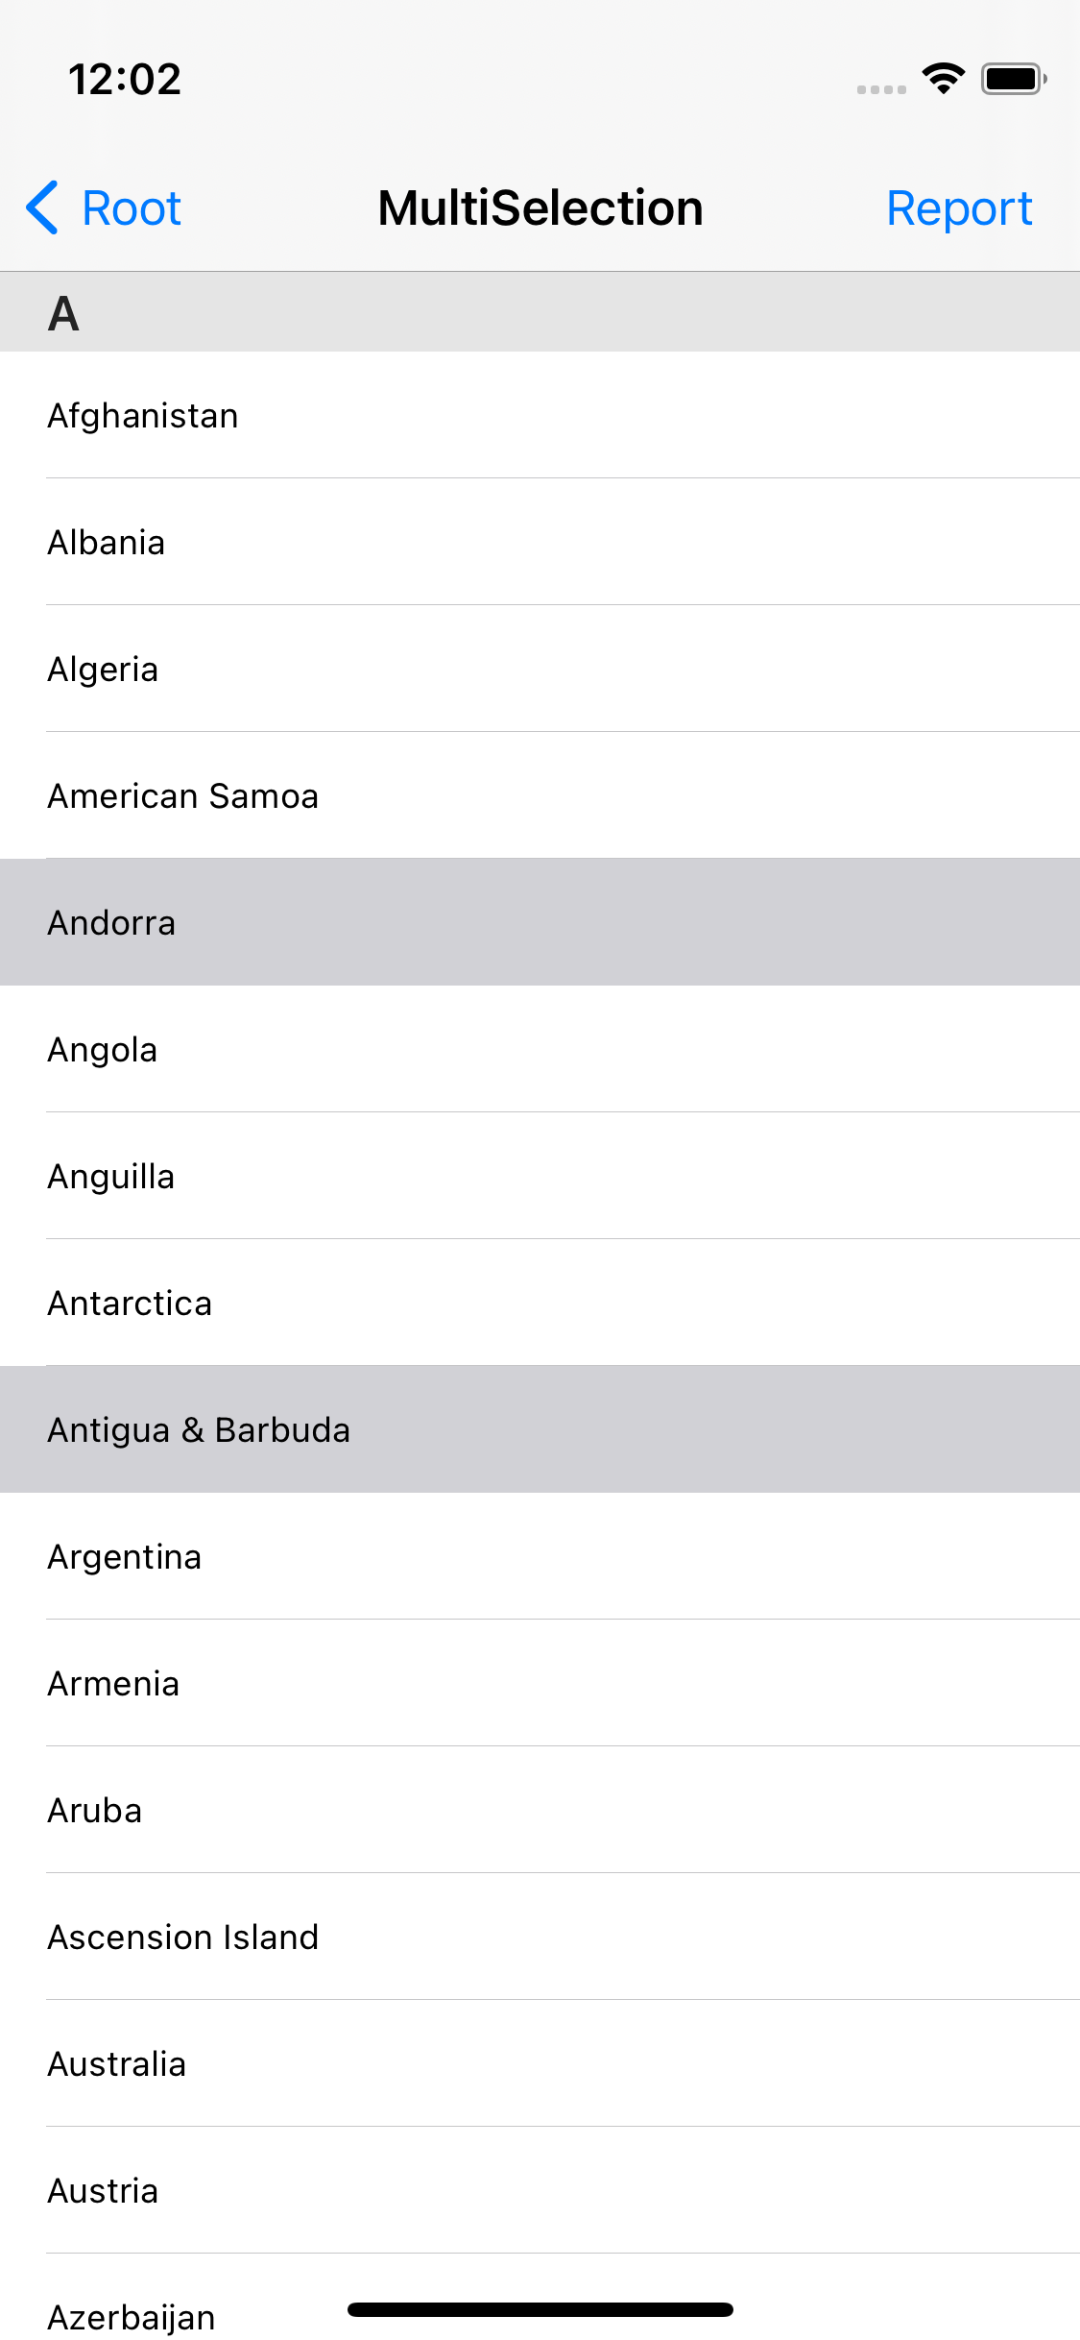
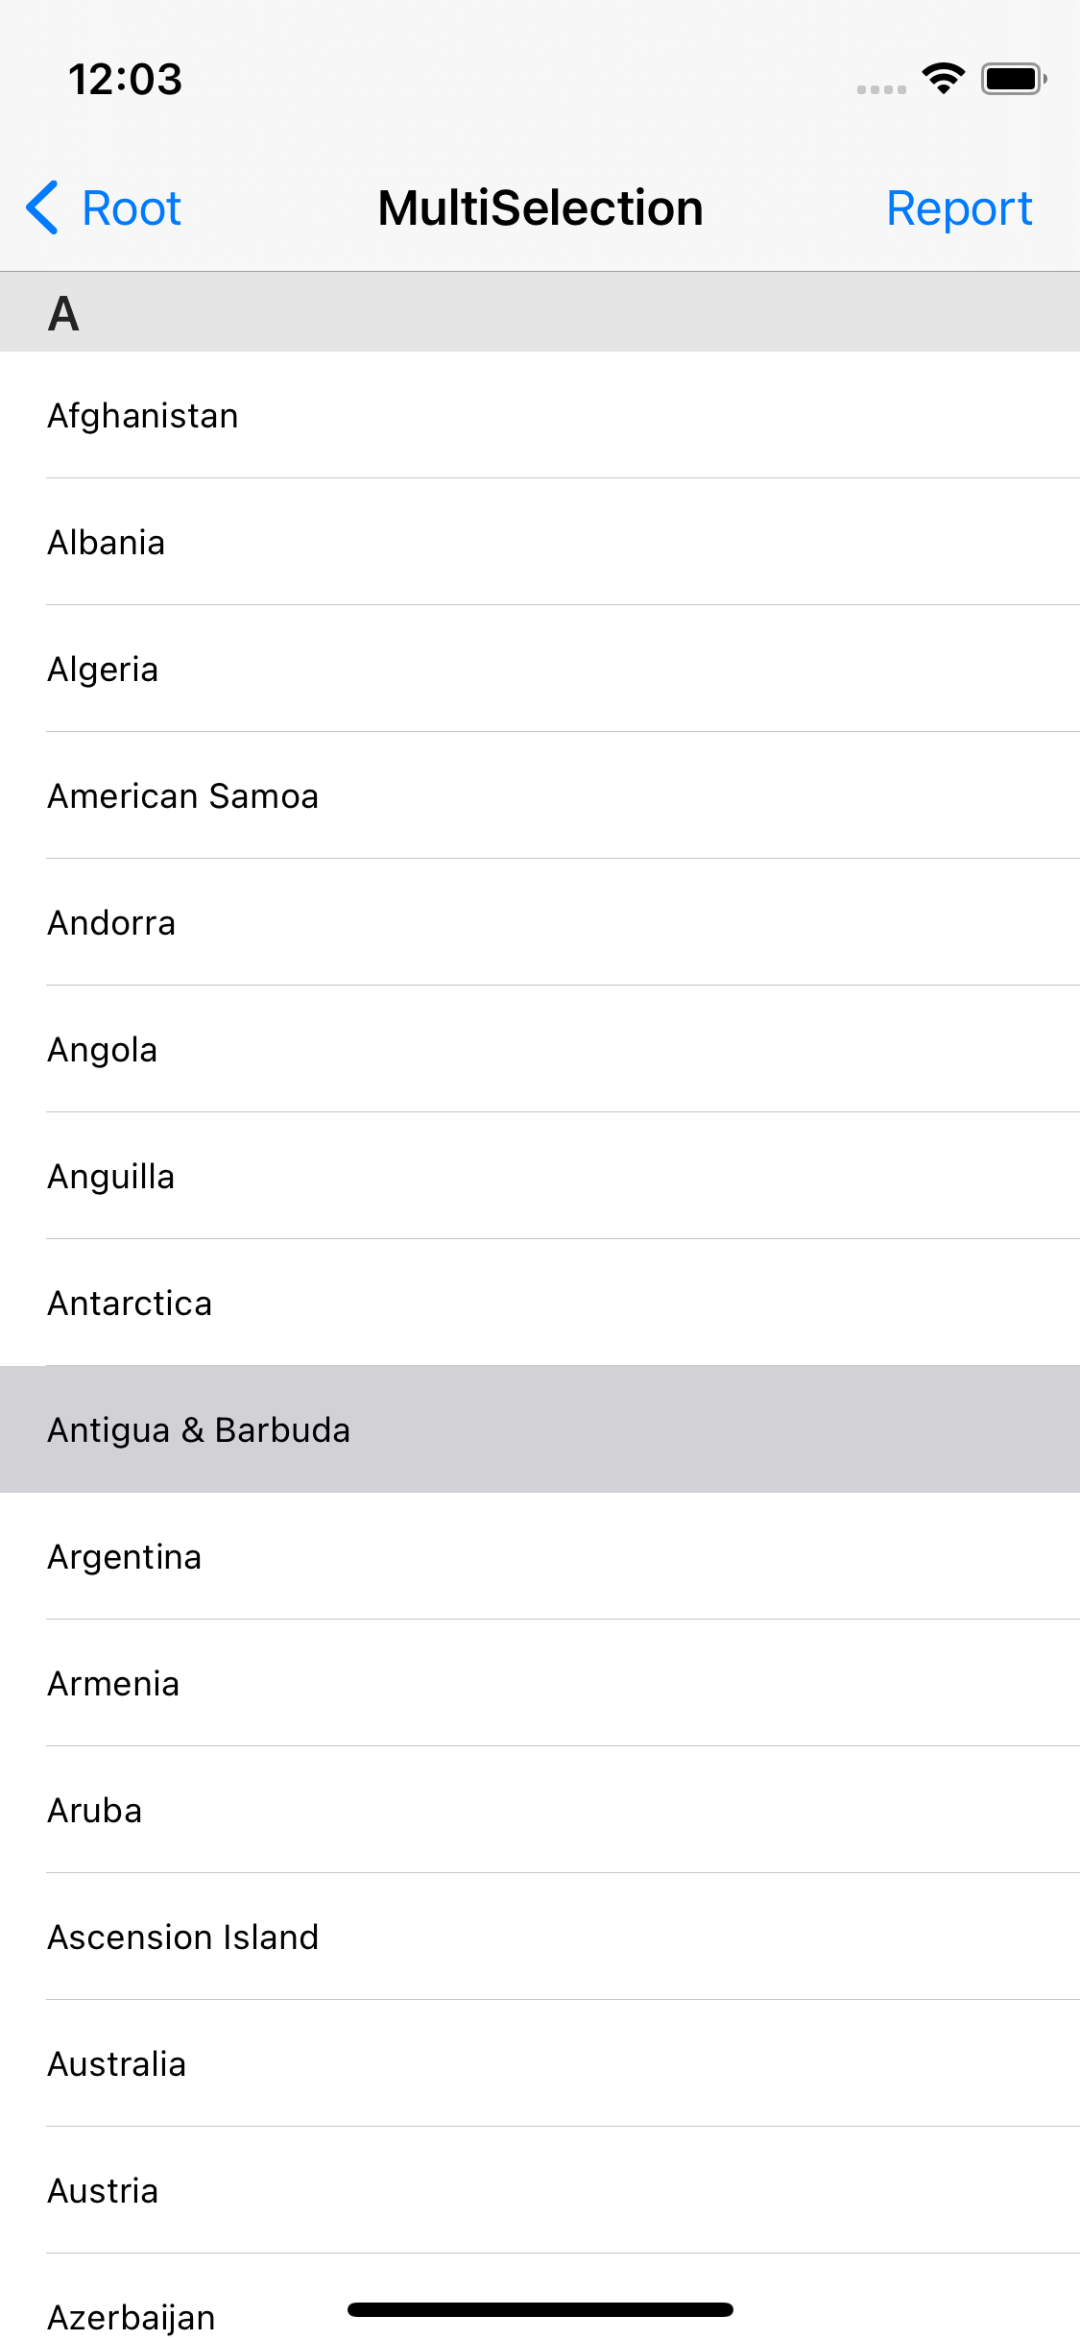
셀을 하나 선택했을 때는 기존과 같고,
셀을 하나 더 선택하면 이전에 선택한 셀이 남아 있으며,
다시 셀을 선택하면 선택이 해제된다.
singleSelection에서는 선택된 셀을 다시 선택해도 변화가 없지만,
multiSelection에서는 선택된 셀을 다시 선택하면 토글 된다는 차이가 있다.
선태한 셀의 오른쪽에 체크마크를 표시하고,
우측 상단의 Report 버튼을 누르면 선택한 목록을 경고창에 표시하도록 구현한다.
class MultiSelectionCell: UITableViewCell {

}
체크마크 구현을 위해 클래스를 하나 생성하고,
해당 클래스는 셀의 커스텀 클래스로 연결한다.
class MultiSelectionCell: UITableViewCell {
	override func setSelected(_ selected: Bool, animated: Bool) {
		super.setSelected(selected, animated: animated)

		accessoryType = selected ? .checkmark : .none
	}
}
셀의 선택 상태에 따라 checkmark를 표시하도록 구현한다.
@objc func report() {
	if let targetIndex = tableView.indexPathsForSelectedRows {
		let target = targetIndex.map {
			list[$0.section].country[$0.row]
		}.joined(separator: "\n")

		showAlert(with: target)
	}
}
우측 상단의 report 버튼을 누를 때마다 위의 메소드가 호출된다.
indexPathsForSelectedRows 속성을 사용해 선택된 복수의 셀의 indexPath를 받아서,
이를 경고창에 표시하게 된다.
이때 indexPath 사이는 '\n'을 포함해 줄 바꿈을 하도록 했다.
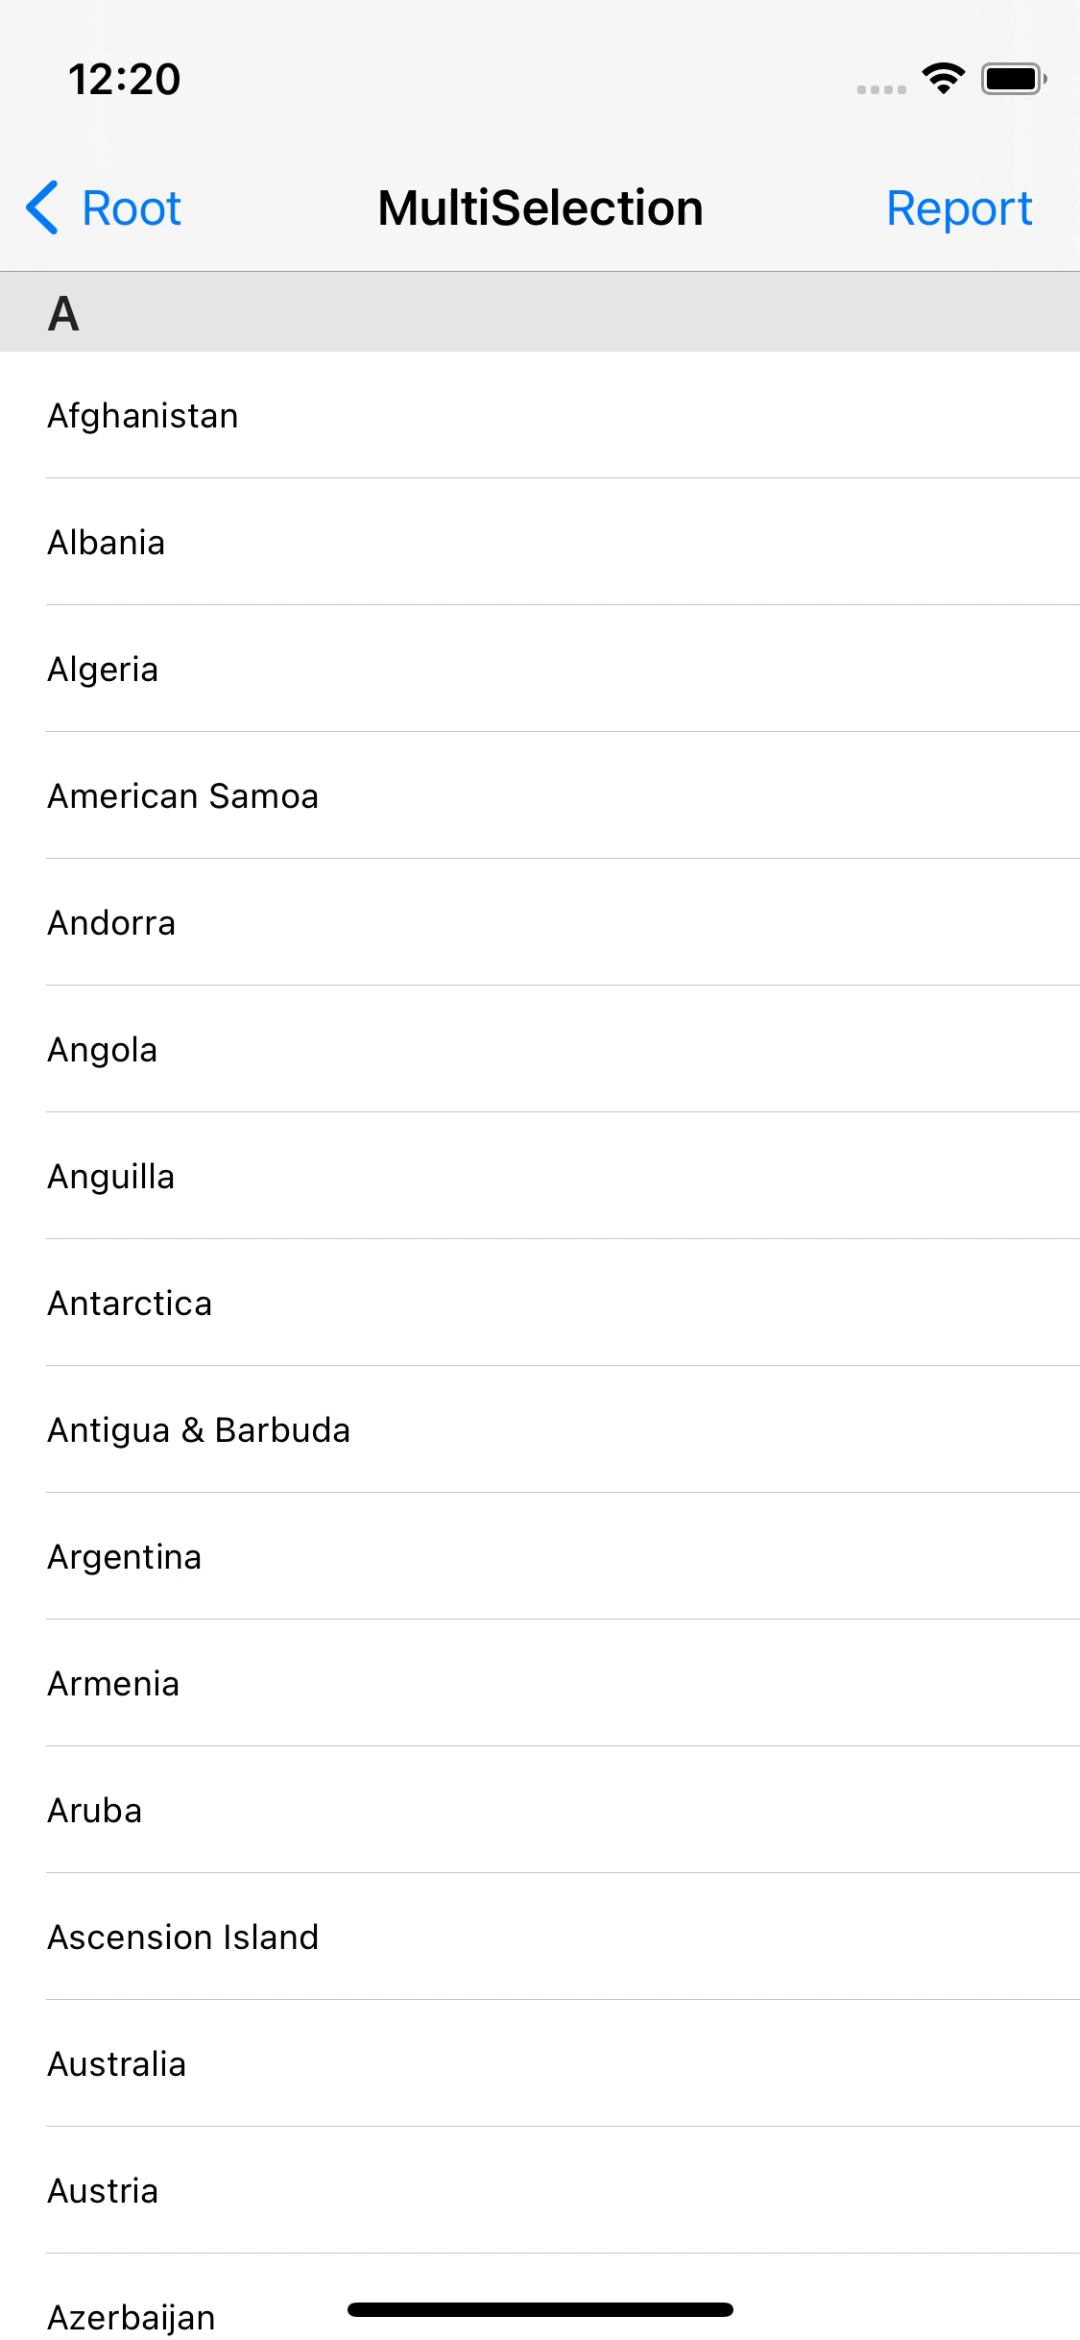
의도한 대로 동작하는 것을 확인할 수 있다.
선택된 셀의 정보는 tableView 내에 저장되고,
따라서 재사용 메커니즘에서 자유롭지 않아 화면에서 사라진 셀을 다시 불러올 경우 잘못된 셀에 체크마크가 나타날 가능성이 존재한다.
하지만 seSelected 메소드는 셀이 선택될 때에 호출되고, 셀이 재사용되는 시점에도 호출되므로,
셀이 재사용될 때에 선택되어있는 indexPath와 대조해 데이터의 일관성을 유지한다.
'학습 노트 > iOS (2021)' 카테고리의 다른 글
| 091 ~ 096. Reordering Cell, Prefetching API, Table View Controller and Static Cell. (0) | 2021.10.05 |
|---|---|
| 087 ~ 090. Edit Mode, Row Action and Swipe Action (0) | 2021.10.01 |
| 076 ~ 080. Accessory View, Self Sizing and Custom Cell (0) | 2021.09.08 |
| 070 ~ 075. Table View, Multi Section, Separator and Table View Cell (0) | 2021.09.07 |
| 062 ~ 069. Handling Date (0) | 2021.08.30 |


