기본 UI 구성하기 #6
FloatingButton & NewTweetView
FloatingButton

메인 화면 어디서든 새 글을 작성할 수 있도록 FeedView 위에 표시되는 FloatingButton을 생성한다.
Source
struct FeedView: View {
    var body: some View {
        ZStack(alignment: .bottomTrailing) {
            ScrollView {
                LazyVStack {
                    ForEach(0 ... 20, id: \.self) { _ in
                        TweetRowView()
                            .padding()
                    }
                }
            }

            Button {
                print("this is Floating Button Function")
            } label: {
                Image("tweet")
                    .resizable()
                    .renderingMode(.template)
                    .frame(width: 28, height: 28)
                    .padding()
            }
            .background(Color(.systemBlue))
            .foregroundColor(.white)
            .clipShape(Circle())
            .padding()
        }
    }
}
FeedView를 담당하는 ScrollView를 ZStack에 Embed 하고 Button을 디자인해 추가하기만 하면 된다.
Action은 추구 NewTweetView를 연결할 수 있도록 표시만 해 둔다.
NewTweetView


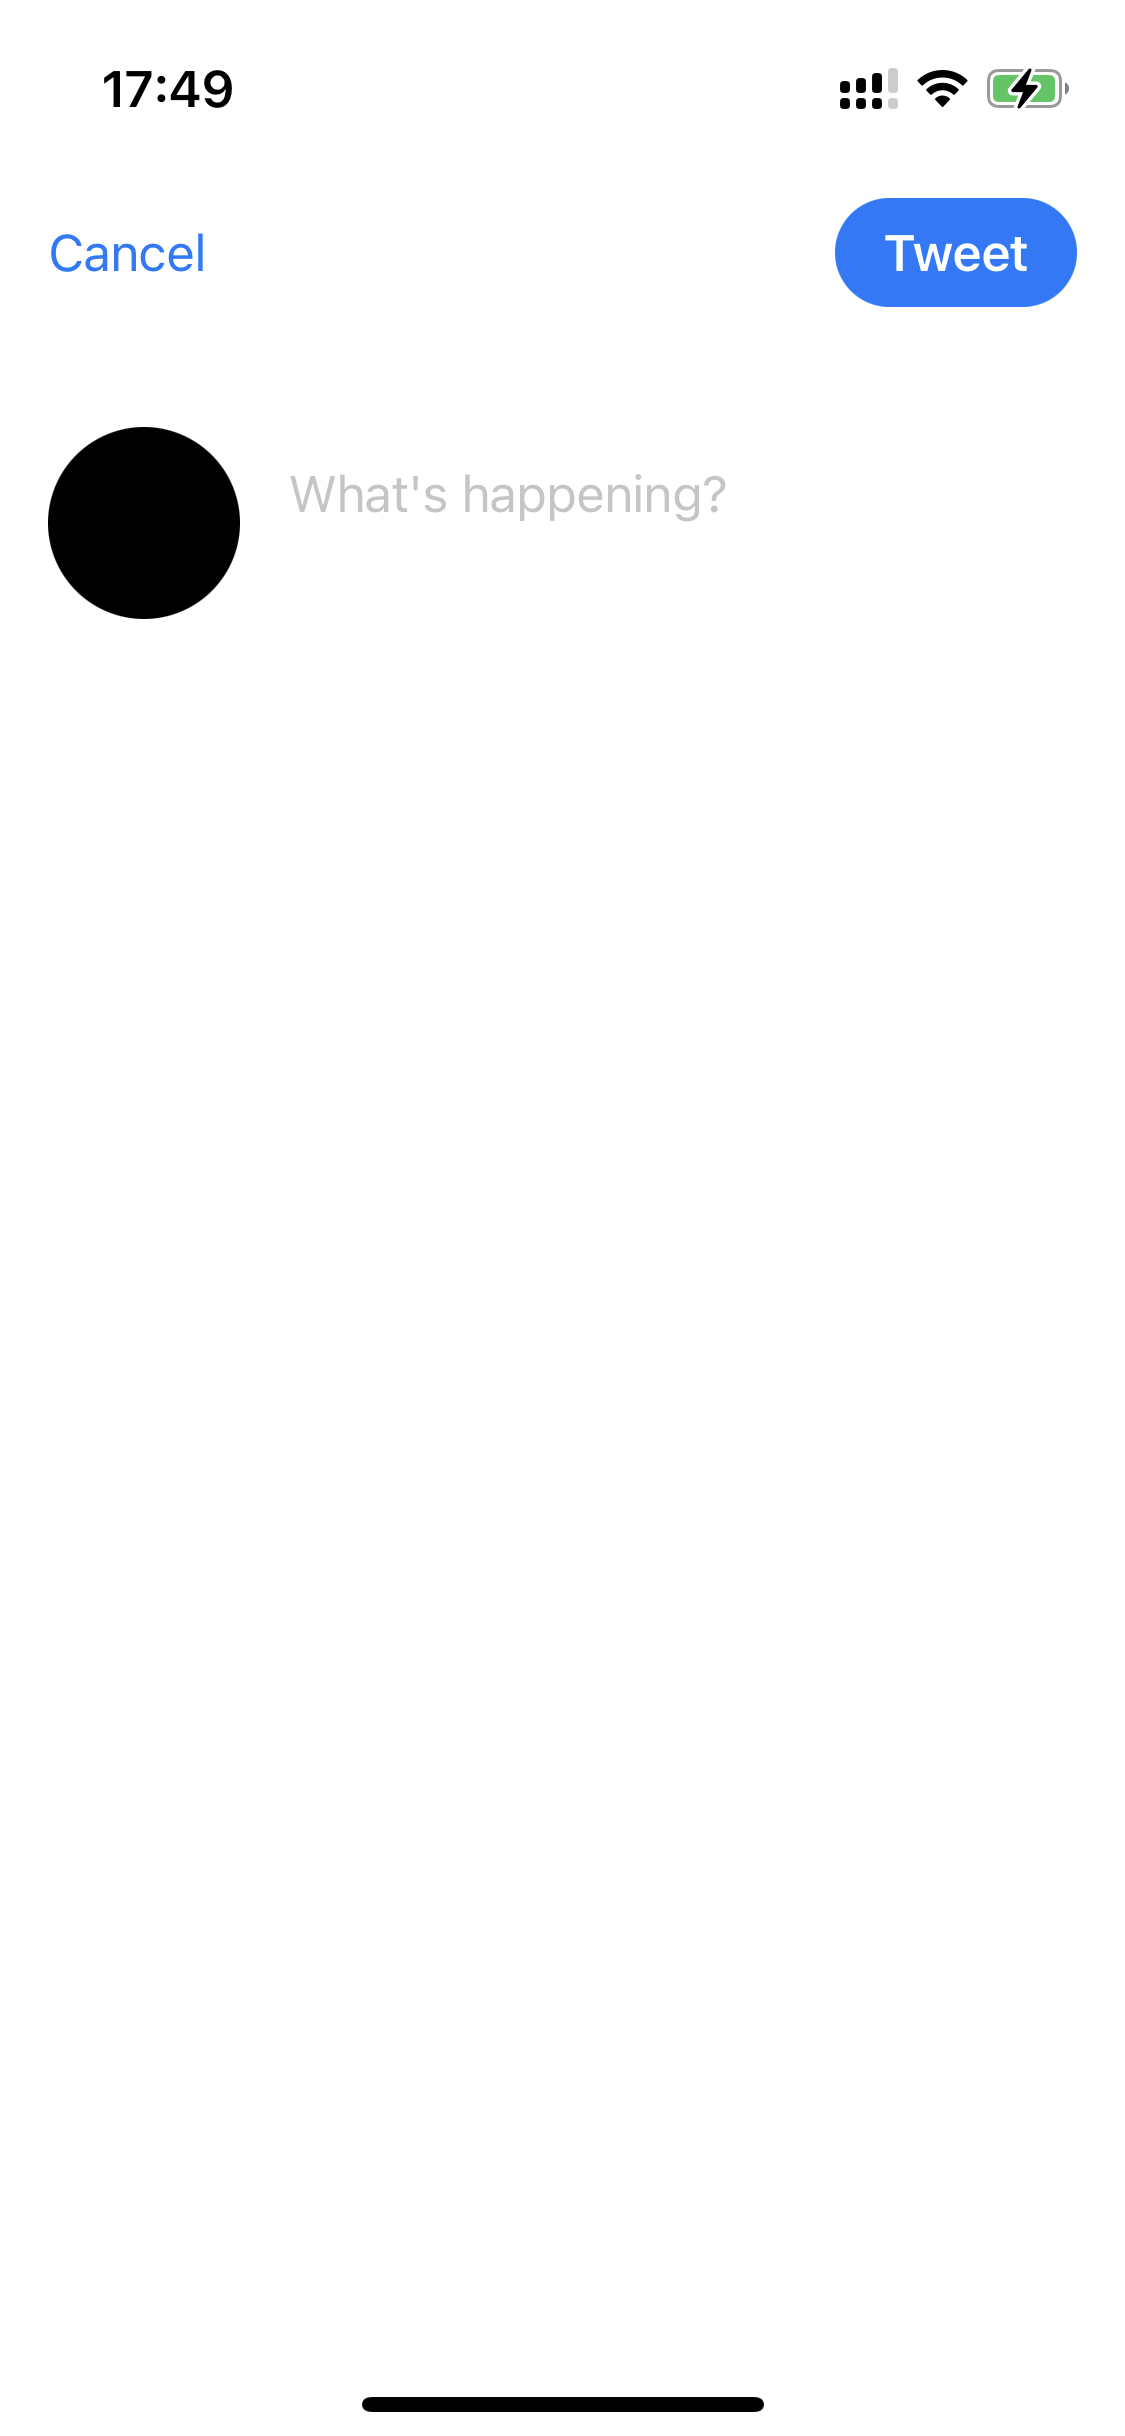
NewTweetView는 새 Tweet를 작성하는 화면이다.
상단에 취소 버튼과 Tweet 버튼이 존재하고,
그 아래로 프로필 사진과 글을 작성할 TextEditor가 존재한다.
Source
struct NewTweetView: View {
    @State private var caption = ""
    @Environment(\.dismiss) var dismiss

    var body: some View {
        VStack {
            HStack {
                Button {
                    dismiss()
                } label: {
                    Text("Cancel")
                        .foregroundColor(Color(.systemBlue))
                }

                Spacer()

                Button {
                    print("tweet")
                } label: {
                    Text("Tweet")
                        .bold()
                        .foregroundColor(.white)
                        .padding(.horizontal)
                        .padding(.vertical, 8)
                        .background(Color(.systemBlue))
                        .clipShape(Capsule())
                }
            }
            .padding()

            HStack(alignment: .top) {
                Circle()
                    .frame(width: 64, height: 64)

                TextArea("What's happening?", text: $caption)
            }
            .padding()
        }
    }
}
VStack으로 버튼과 아래의 영역을 나누고,
프로필 사진과 TextEditor를 나란히 표시하기 위해 HStack을 한 번 더 사용한다.
TextEditor에 해당하는 TextArea는 State 변수인 caption을 Binding 파라미터로 전달하게 된다.
NewTweetView
| TextArea

Source
struct TextArea: View {
    @Binding var text: String
    let placeholder: String

    init(_ placeholder: String, text: Binding<String>) {
        self.placeholder = placeholder
        self._text = text
        UITextView.appearance().backgroundColor = .clear
    }

    var body: some View {
        ZStack(alignment: .topLeading) {
            TextEditor(text: $text)
                .padding(4)

            if text.isEmpty {
                Text(placeholder)
                    .foregroundColor(Color(.placeholderText))
                    .padding(.horizontal, 8)
                    .padding(.vertical, 12)
            }
        }
        .font(.body)
    }
}
TextArea는 파라미터로 전달된 파라미터를 업데이트한다.
별 특별해 보일 것 없어 보이는 이 코드에 약간의 트릭이 숨겨져 있다.
ZStack(alignment: .topLeading) {
    TextEditor(text: $text)
        .padding(4)

    if text.isEmpty {
        Text(placeholder)
            .foregroundColor(Color(.placeholderText))
            .padding(.horizontal, 8)
            .padding(.vertical, 12)
    }
}
.font(.body)
바로 이 부분이다.
UIKit과 다르게 SwiftUI의 TextEditor는 현재까지도 Placeholder를 지원하지 않는다.
따라서 TextEditor의 내용에 대해 분기해서 Placeholder를 대신하는 TextView를 표시하거나,
TextEditor를 표시하는 방식으로 Placeholder를 구현한다.
이 경우 Placeholder 대신 표시된 TextView가 TextEditor의 위에 위치하므로,
TextView의 영역을 터치하면 TextEditor가 반응하지 않는다.
해당 이벤트에 대해 TextEditor로 Responder를 옮겨주는 방식을 구현해 조금 더 나은 사용자 경험을 만들 수 있다.
이 부분은 이후에 추가할 수 있도록 하겠다.

위와 같이 TextEditor에 내용이 생기게 되면 TextView 위에 TextEditor가 표시되면서
자연스럽게 하나의 View처럼 동작한다.
FloatingButton에 연결하기
Source
struct FeedView: View {
    var body: some View {
        ZStack(alignment: .bottomTrailing) {
            ScrollView {
                LazyVStack {
                    ForEach(0 ... 20, id: \.self) { _ in
                        TweetRowView()
                            .padding()
                    }
                }
            }

            Button {
                print("this is Floating Button Function")
            } label: {
                Image("tweet")
                    .resizable()
                    .renderingMode(.template)
                    .frame(width: 28, height: 28)
                    .padding()
            }
            .background(Color(.systemBlue))
            .foregroundColor(.white)
            .clipShape(Circle())
            .padding()
        }
    }
}
앞서 작성한 FloatingButton의 코드이다.
struct FeedView: View {
    @State private var showNewTweetView = false

    var body: some View {
        ZStack(alignment: .bottomTrailing) {
            ScrollView {
                LazyVStack {
NewTweetView를 표시할 수 있도록 SideMenu와 같이 Trigger의 역할을 할 State 변수가 필요하다.
Button {
    showNewTweetView.toggle()
} label: {
    Image("tweet")
        .resizable()
        .renderingMode(.template)
        .frame(width: 28, height: 28)
        .padding()
}
FloatingButton을 눌렀을 때 이 상태를 변화시키면 된다.
NewTweetView를 표시하는 방식은 두 가지가 있다.
fullScreen과 sheet 방식인데 선언 방식은 다음과 같다.
//FullScreen
.fullScreenCover(isPresented: $showNewTweetView) {
    NewTweetView()
}

//Sheet
.sheet(isPresented: $showNewTweetView) {
    NewTweetView()
}
Binding으로 방금 선언했던 State 변수를 전달하면 된다.
Button {
    showNewTweetView.toggle()
} label: {
    Image("tweet")
        .resizable()
        .renderingMode(.template)
        .frame(width: 28, height: 28)
        .padding()
}
.background(Color(.systemBlue))
.foregroundColor(.white)
.clipShape(Circle())
.padding()
.fullScreenCover(isPresented: $showNewTweetView) {
    NewTweetView()
}
선언 위치는 위와 같다.


각각의 결과는 위와 같다.
'프로젝트 > Twitter Clone App (w∕Firebase)' 카테고리의 다른 글
| 08. 기본 UI 구현하기 #8 (0) | 2022.12.02 |
|---|---|
| 07. 기본 UI 구성하기 #7 (0) | 2022.12.02 |
| 05. 기본 UI 구성하기 #5 (0) | 2022.11.30 |
| 04. 기본 UI 구성하기 #4 (0) | 2022.11.24 |
| 03. 기본 UI 구성하기 #3 (0) | 2022.11.23 |


