Adaptive Layout
Adaptive Layout은 모든 기기와 실행 환경에서 동작할 수 있는 하나의 UI를 개발하는 방법.
혹은 이에 필요한 기술이다.
iOS 8의 등장과 함께 Adaptive Layout이 등장했다.
이전에는 Storyboard가 아이폰과 아이패드로 분리되어있었지만 이후엔 기기에서 독립적인 Univeral Storyboard를 사용한다.
추가적으로 Size Class, Trait Collection, Auto Layout을 결합해 모든 기기의 환경에서 적용할 수 있는 단일 Layout을 구성한다.
따라서 Adaptive Layout에서 아이패드와 아이패드의 구분은 의미가 없고, Rotation과 Interface Orientation도 사용되지 않는다.
Size Class를 사용해 View를 배치할 수 있는 공간의 크기를 논리적으로 구분하고,
Trait Collection을 통해 세부적인 실행 환경을 구분한다.
Adaptive Layout은 Layout 뿐만이 아닌 View의 계층과 화면 전환에도 영향을 준다.
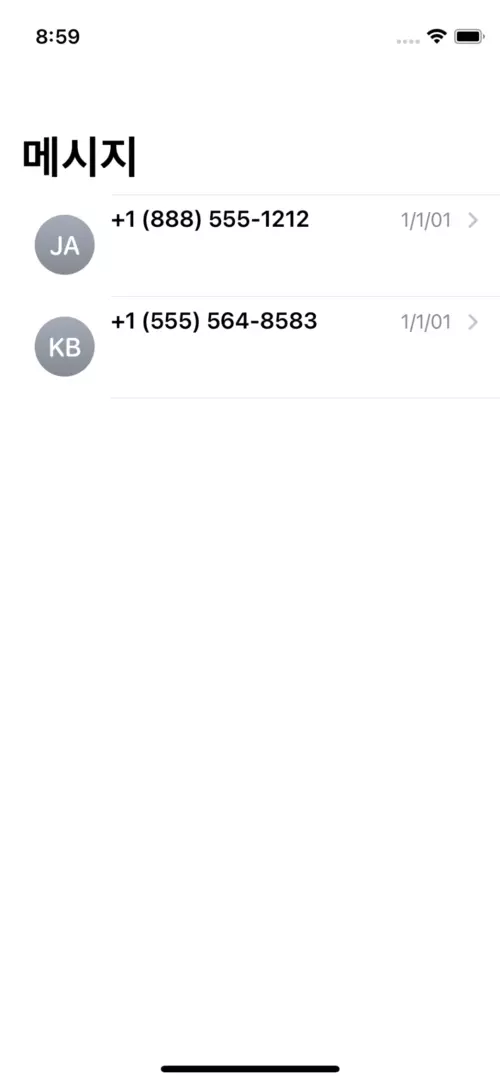
아이폰과 같이 너비가 좁은 환경에서는 목록과 내용을 따로 표시하고 Push, Pop 방식으로 전환된다.

반면 아이패드와 같이 너비가 넓은 환경의 경우 목록과 내용이 함께 표시되고,
선택한 항목에 따라 오른쪽의 화면이 교체된다.
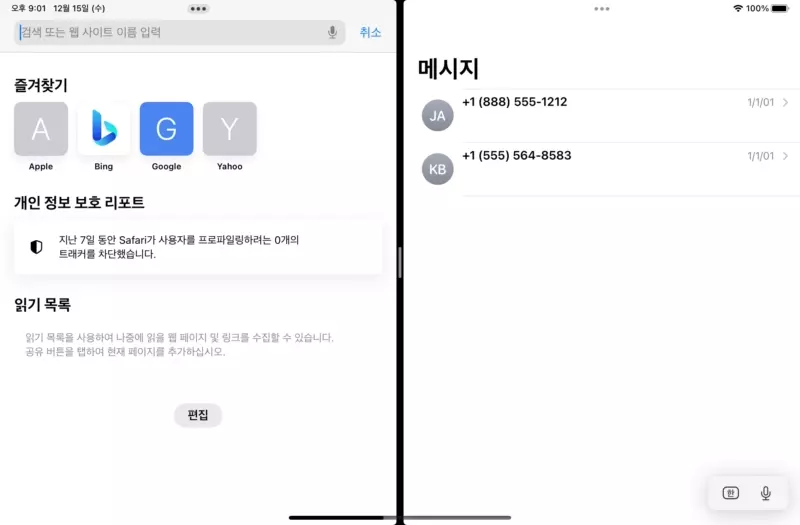
Split View 환경에서는 다시 목록과 내용을 따로 표시한다.


Safari의 공유 버튼을 터치해도 아이폰과 Split View 환경에서는 Action Sheet 방식으로 표시하지만,
아이패드의 전체 화면 환경에서는 Pop Over 방식으로 표시한다.
이렇게 환경에 따라 적합한 방식으로 유동적으로 동작하는 앱을 만드는 것이 Adaptive Layout이다.
Adaptive Layout을 구성하는 중요 요소는 다음과 같다.
- Auto Layout
- Size Class
- Trait Collection
이 중 Auto Layout을 제외한 Size Class와 Trait Collection을 다룬다.
Size Class
Size Class는 Interface의 크기를 두 개로 구분해 표현한다.
현재는 Regular와 Compact 두 개를 제공한다.
Regular는 Interface의 너비나 높이가 비교적 크다는 것을 의미한다.
Compact는 비교적 작다는 것을 의미한다.
Horizontal Size Class와 Vertical Size Class를 통해 너비와 높이를 개별적으로 지정한다.
경우에 따라 지정하지 않고 Any를 사용하기도 한다.
| Device | Portrait | Landscape |
| 12.9" iPad Pro | Regular width, regular height | Regular width, regular height |
| 11" iPad Pro | Regular width, regular height | Regular width, regular height |
| 10.5" iPad Pro | Regular width, regular height | Regular width, regular height |
| 9.7" iPad | Regular width, regular height | Regular width, regular height |
| 7.9" iPad mini | Regular width, regular height | Regular width, regular height |
| iPhone 12 Pro Max | Compact width, regular height | Regular width, compact height |
| iPhone 12 Pro | Compact width, regular height | Compact width, compact height |
| iPhone 12 | Compact width, regular height | Compact width, compact height |
| iPhone 12 mini | Compact width, regular height | Compact width, compact height |
| iPhone 11 Pro Max | Compact width, regular height | Regular width, compact height |
| iPhone 11 Pro | Compact width, regular height | Compact width, compact height |
| iPhone 11 | Compact width, regular height | Regular width, compact height |
| iPhone XS Max | Compact width, regular height | Regular width, compact height |
| iPhone XS | Compact width, regular height | Compact width, compact height |
| iPhone XR | Compact width, regular height | Regular width, compact height |
| iPhone X | Compact width, regular height | Compact width, compact height |
| iPhone 8 Plus | Compact width, regular height | Regular width, compact height |
| iPhone 8 | Compact width, regular height | Compact width, compact height |
| iPhone 7 Plus | Compact width, regular height | Regular width, compact height |
| iPhone 7 | Compact width, regular height | Compact width, compact height |
| iPhone 6s Plus | Compact width, regular height | Regular width, compact height |
| iPhone 6s | Compact width, regular height | Compact width, compact height |
| iPhone SE | Compact width, regular height | Compact width, compact height |
| iPod touch 5th generation and later | Compact width, regular height | Compact width, compact height |
기기들의 Size Class는 위와 같다.
쉽게 정리하면 아이패드는 모든 면이 Regular, 아이폰은 좁은 면이 Compact, 넓은 면이 Regular이다.
| Device | Mode | Portrait | Landscape |
| 12.9" iPad Pro | 2/3 split view | Compact width, regular height | Regular width, regular height |
| 1/2 split view | N/A | Regular width, regular height | |
| 1/3 split view | Compact width, regular height | Compact width, regular height | |
| 11" iPad Pro | 2/3 split view | Compact width, regular height | Regular width, regular height |
| 1/2 split view | N/A | Compact width, regular height | |
| 1/3 split view | Compact width, regular height | Compact width, regular height | |
| 10.5" iPad Pro | 2/3 split view | Compact width, regular height | Regular width, regular height |
| 1/2 split view | N/A | Compact width, regular height | |
| 1/3 split view | Compact width, regular height | Compact width, regular height | |
| 9.7" iPad | 2/3 split view | Compact width, regular height | Regular width, regular height |
| 1/2 split view | N/A | Compact width, regular height | |
| 1/3 split view | Compact width, regular height | Compact width, regular height | |
| 7.9" iPad mini 4 | 2/3 split view | Compact width, regular height | Regular width, regular height |
| 1/2 split view | N/A | Compact width, regular height | |
| 1/3 split view | Compact width, regular height | Compact width, regular height |
아이패드의 경우 Split View로 멀티 윈도우를 사용할 수 있다.
화면 분할 비율에 따라 달라지며, 기기의 방향에 따라서도 달라진다.
Trait Collection
Trait Collection은 앱이 실행되는 환경에 대한 다양한 정보를 다룬다.
Size Class와 함께 Display Scale, Devide Family를 구분하는 User Interface Idiom 등을 포함한다.
주로 Size Class보다 더 세세하게 사용 환경을 구분해야 할 때 사용한다.
UITraitCollection Class로 구현되어있고,
UITraitEnvironment 프로토콜을 채용한 모든 객체에서 현재 Trait Collection을 얻을 수 있다.
Storyboard로 Adaptive Layout 구현하기.


사용할 Scene에는 Image View와 Text View가 존재한다.
모두 Safe Area의 leading 과 trailing에서 20pt 간격으로, top과 bottom과는 0pt의 간격을 두고 배치되고,
Image View의 높이는 200pt이고, View 간의 간격은 20pt이다.
지금과 같이 Storyboard가 아이폰으로 표시된다고 아이폰 전용 UI가 되는 것은 아니다.
앞서 말했던 대로 Universal UI로 구현된다.

만약 보기 원하는 대상 기기가 있다면 좌측 하단에서 변경할 수 있다.


실행해 보면 기기의 방향에 관계 없이 Image View는 220pt의 높이를 가지고, 나머지 영역을 Text View가 차지한다.
덕분에 Landscape 상태에서는 Text를 표시할 공간이 좁아 답답하다.
따라서 Adaptive Layout을 사용해 Landscape 상태에서는 Image View를 왼쪽에, Text View는 오른쪽에 표시하도록 구현한다.
Adaptive Layout은 Size Class를 통해 Frame을 판단하는데,
아이폰의 Landscape 상태에서의 Size Class 값은 Vertical이 Compact이다.
따라서 이를 활용해 구현하면 된다.
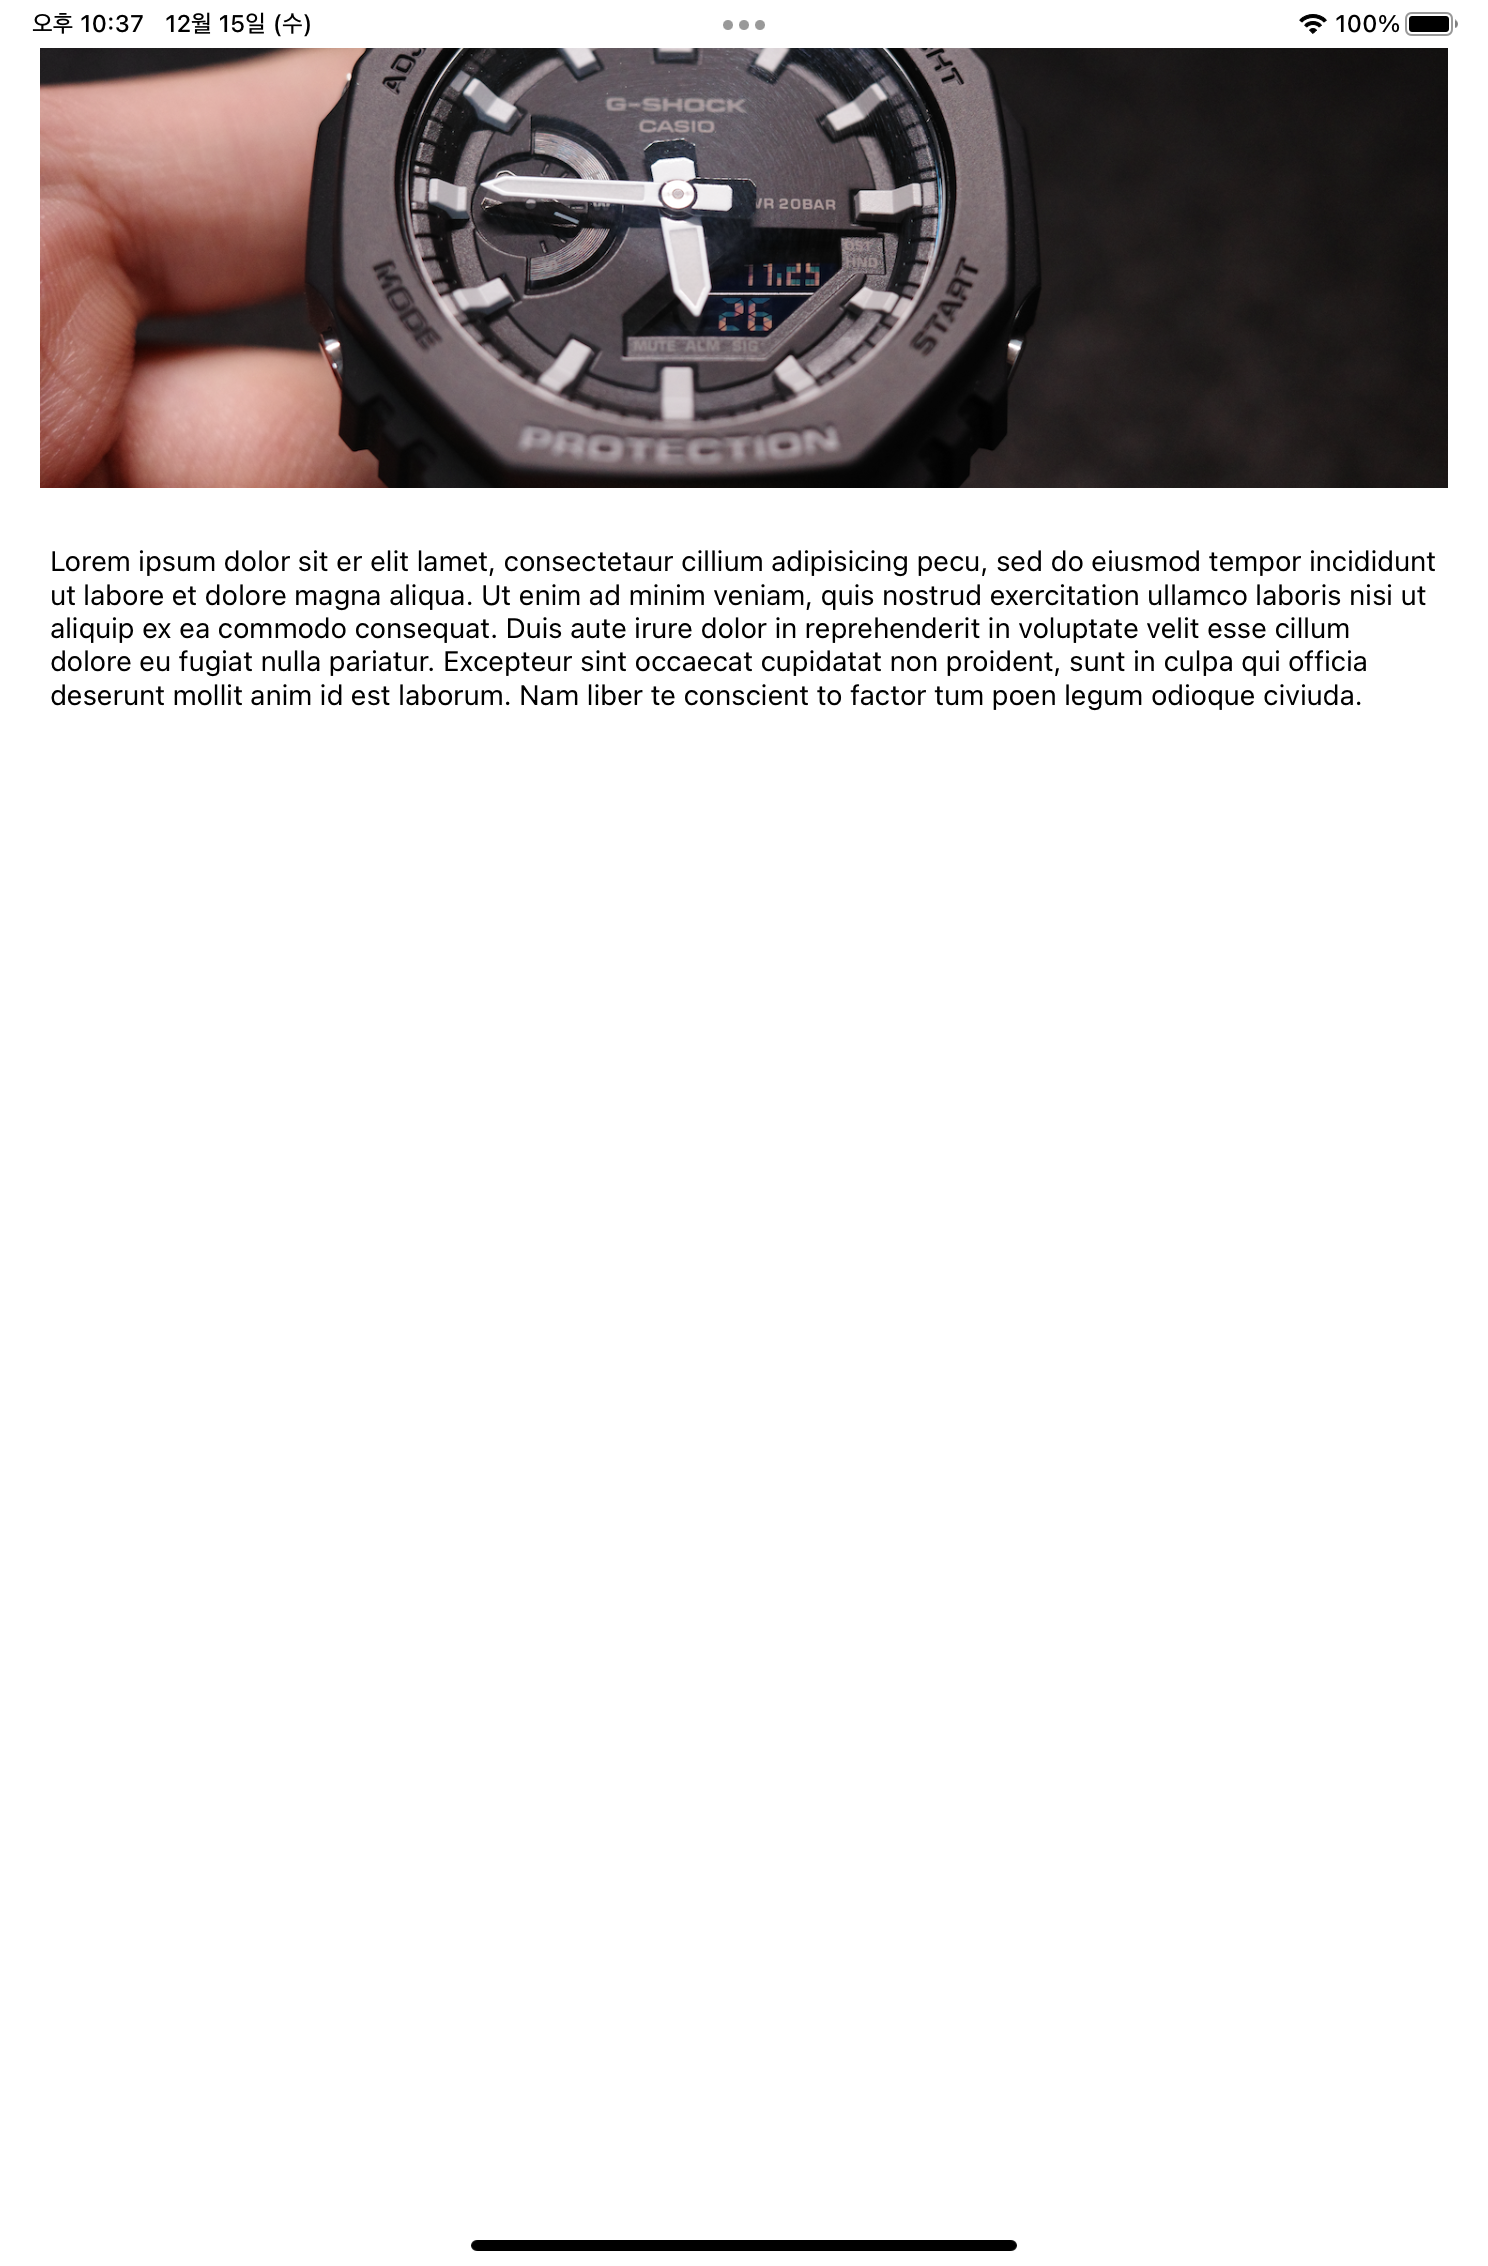
반대로 아이패드에서는 상대적으로 화면이 크기 때문에 Image View와 Text의 크기가 더 커도 문제가 되지 않는다.
아이패드에서는 Image View와 Text View가 같은 높이로 표시되고, 더 큰 폰트를 사용하도록 구현한다.

Adaptive Layout을 사용하기 위해서는 Storyboard의 File Inspector에서 Trait Variations를 활성화해야 한다.
이렇게 해야 Size Class의 정보와 Trait Collection의 정보를 함께 저장할 수 있다.
View 수평으로 배치하기

Image View에는 leading, trailing, top 제약과 height 제약이 추가되어있고,
Landscape 상태에서는. height와 trailing 제약을 삭제하고 width와 bottom 제약이 필요하다.


trailing 제약의 attribute로 이동해 가장 아래 단락의 '+' 버튼을 누른다.
이후 높이에 따라 분기할 수 있도록 Height만 Compact로 변경하고 Variation을 추가한다.
이후 Installed를 해제해 해당 분기에는 적용을 해제하도록 하면 된다.

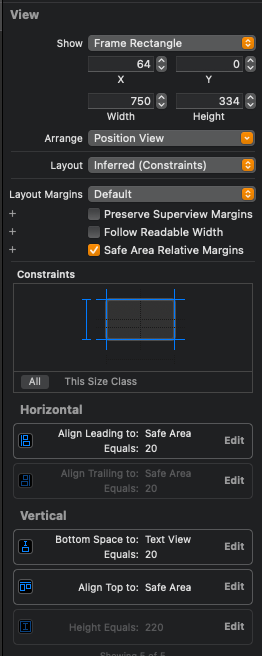
같은 방식으로 height 제약도 수정하고 Constraints를 All로 변경하고 확인해 보면,
Landscape 상태의 Storyboard에서는 해당 제약들이 비활성화된 것을 볼 수 있다.

이는 Document Outline에서도 동일하게 확인할 수 있다.

같은 방식으로 Text View의 제약도 비활성화한다.
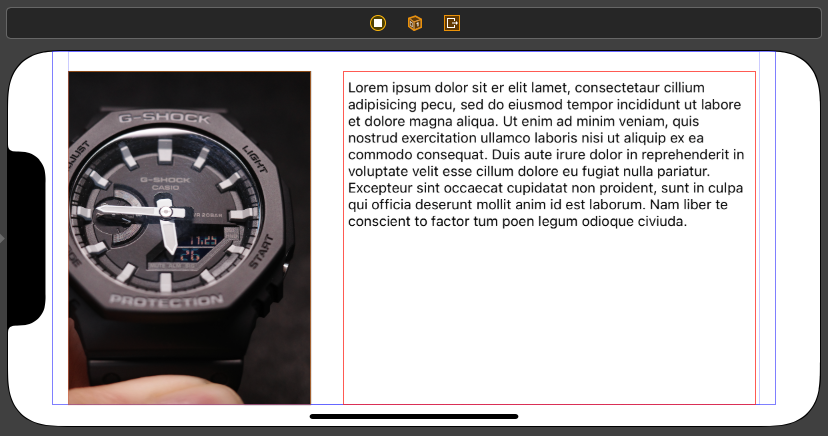
이후에는 대략적인 위치로 View들을 배치하고 새롭게 사용할 제약을 추가한다.

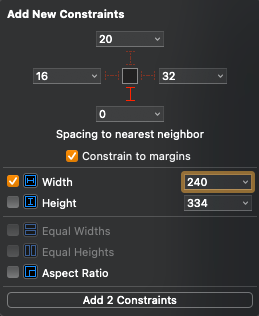


그리고 새롭게 bottom 제약과 너비 제약을 추가한다.
이렇게 되면 위의 사진처럼 상단에 여백 없이 붙게 되는데,
이는 Portrait 상태에서 추가했던 제약이 Safe Area에 0pt로 정렬되기 때문이다.
따라서 해당 제약으로 이동해 Constant 옆에 있는 '+' 버튼을 눌러 같은 방식으로 분기를 설정한 후에 값을 20으로 변경해주면
아래의 사진과 같이 적절한 여백을 두고 Image View가 표시된다.


Text View에도 top, leading 제약을 추가한다.
이때 잊지 말아야 할 것은 새롭게 추가한 제약들이 이전의 제약들과 동일하게 Portrait 상태에서도 적용된다는 점이다.
따라서 새로 추가한 제약들도 분기할 수 있도록 제약을 수정해야 한다.

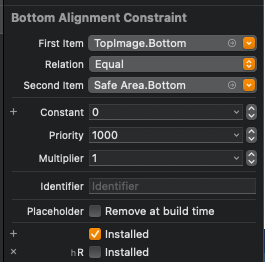


수정된 모습은 위와 같고,
Landscape 상태에서도, Portrait 상태에서도 의도한 대로의 배치를 보여주게 된다.
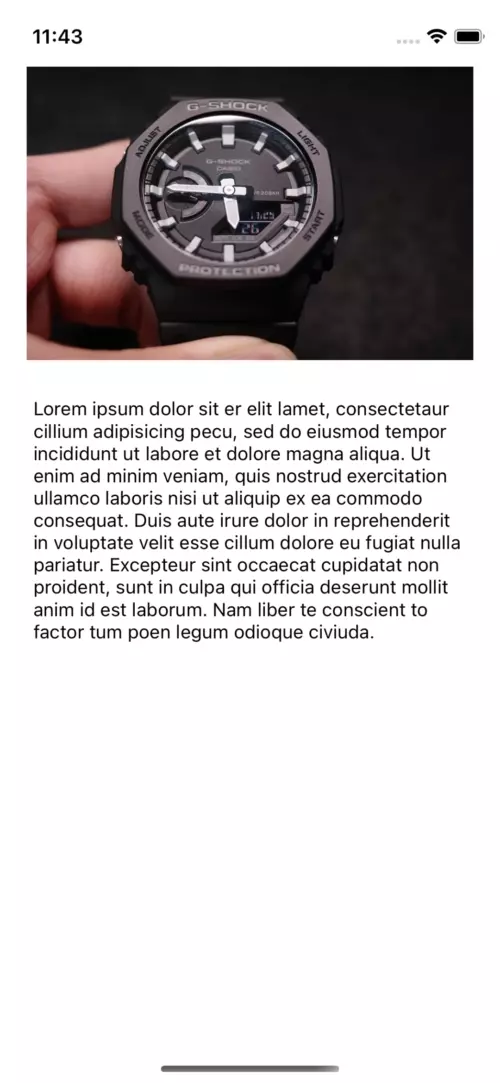
실제 시뮬레이터에서도 변화에 따라 의도한 배치를 표시한다.
아이패드도 비슷한 방식으로 제약들을 수정한다.
아이패드의 Size Class는 Horizontally : Regular, Vertically : Regular라는 것을 주의하여 수정한다.
Image View의 height 제약을 비활성화하고, Text View와 연결하여 Equal Height를 추가한다.


수정된 Height 제약과 Equal Height 제약이다.

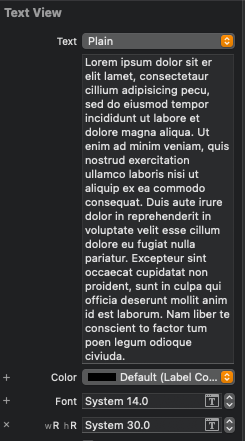
아이패드에서 Text View가 더 큰 폰트를 사용할 수 있도록
위와 같이 Font 옆의 '+' 버튼을 클릭해 분기를 설정한다. 폰트 크기는 30pt이다.


수정된 앱은 위와 같이 아이패드, 아이폰의 Portrait, Landscape 상태에서 모두 의도한 UI대로 표시된다.
즉 정리하자면 Size Inspector와 Attribute Instpector에서 '+' 버튼이 있는 속성들은 Variation을 설정할 수 있는 속성들이다.
위에서 진행한 것과 같은 방법으로 Variation을 적용해 실행 환경에 따라 유연한 UI를 만들 수 있다.
Code로 Adaptive Layout 구현하기.
UIKit에는 UIContentContainer 프로토콜이 선언되어있고,
해당 프로토콜에 View의 크기나 trait가 변경될 때 호출되는 메서드가 선언되어있다.

willTransition(to:with:) 메서드는 객체와 연관된 traits collection이 변경될 때마다 호출된다.

viewWillTransition(to:with:) 메서드는 View의 Frame이 변경될 때마다 호출된다.
UIView Controller는 UIContentContainer 프로토콜을 채용하고 있고, 앞의 두 메서드의 기본 구현을 포함한다.
Size Class의 변화를 감지하고, Text View의 폰트 크기를 변경하려면
View Controller 클래스에서 viewWillTransition 메서드를 오버 라이딩해야 한다.
//
//  ViewController.swift
//  Adaptive Layout Practice
//
//  Created by Martin.Q on 2021/12/15.
//

import UIKit

class ViewController: UIViewController {

	@IBOutlet weak var textContent: UITextView!


	override func viewDidLoad() {
		super.viewDidLoad()
		// Do any additional setup after loading the view.
	}

	override func willTransition(to newCollection: UITraitCollection, with coordinator: UIViewControllerTransitionCoordinator) {
		super.willTransition(to: newCollection, with: coordinator)

	}


}
코드에 Text View를 outlet으로 연결하고,
willTransition(to:with:) 메서드를 오버 라이딩한다.
이때 상위 구현을 반드시 호출해야 한다.
//
//  ViewController.swift
//  Adaptive Layout Practice
//
//  Created by Martin.Q on 2021/12/15.
//

import UIKit

class ViewController: UIViewController {

	@IBOutlet weak var textContent: UITextView!


	override func viewDidLoad() {
		super.viewDidLoad()
		// Do any additional setup after loading the view.
	}

	override func willTransition(to newCollection: UITraitCollection, with coordinator: UIViewControllerTransitionCoordinator) {
		super.willTransition(to: newCollection, with: coordinator)

		switch (newCollection.horizontalSizeClass, newCollection.verticalSizeClass) {
		case (.regular, .regular):
			textContent.font = UIFont.systemFont(ofSize: 30)
		default:
			textContent.font = UIFont.systemFont(ofSize: 14)
		}

		print("check")
	}


}
Size Class를 비교해 Text View의 폰트 크기를 변경한다.


아이폰에서는 (Regular, Compact) 이거나 (Compact, Regular)의 형태를 갖고, 이에 따라 폰트 크기는 14로 표시된다.
또한 화면을 전황할 때마다 해당 메서드가 호출되고 있음이 로그로 표시되기 때문에 제대로 동작하고 있음을 확인할 수 있다.

하지만 해당 코드는 아이패드에선 충돌이 발생한다.
아이패드는 전체 화면으로 앱을 실행할 경우 항상 Regular를 사용하기 때문에
지금처럼 Portrait와 Landscape을 구분해 처리하면 정상적으로 동작하지 않는다.
이 경우 viewWillTransition(to:with:) 메서드를 오버 라이딩해 첫 번째 파라미터로 전달되는 크기를 통해 구분해야 한다.
이는 추후에 다룬다.
Asset에 직접 Variation 추가하기.
앱에 추가되는 이미지는 보톤 Asset에 추가된다.
이 Asset은 기기의 종류, Scale, Size Class를 포함한 다양한 조건에 맞춰 Variation을 추가할 수 있다.
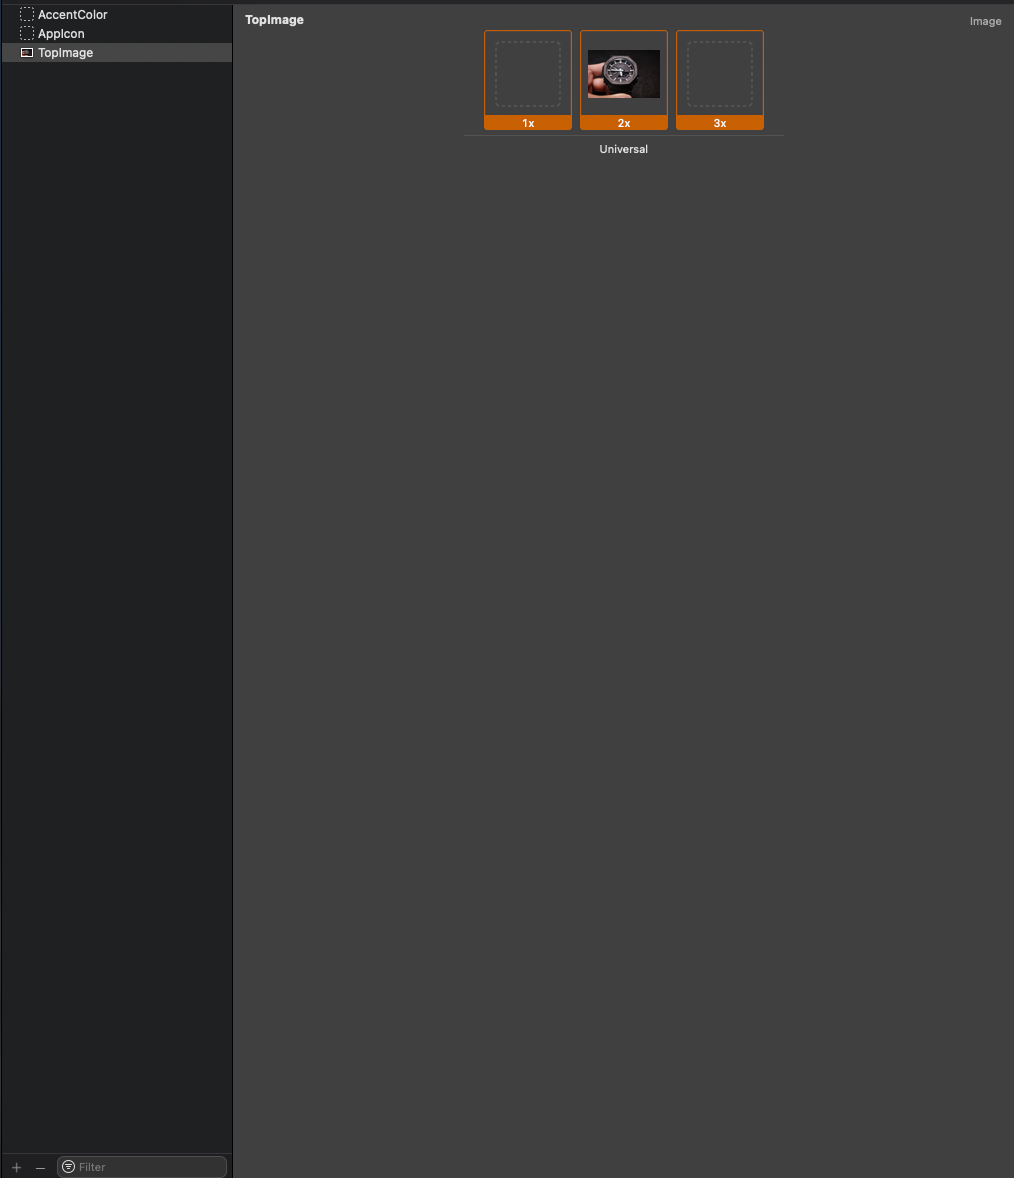
현재 Asset에 포함된 이미지 파일은 위와 같이 Univeral로 표시되어있다.
즉 기본 상태가 Univeral이다.
Univeral Asset은 모든 환경에서 사용되는 Asset을 의미한다.

해당 Asset을 선택하고 Attribute를 보면 Device 목록이 존재한다.

기기를 추가하고, Image Well에 새로운 이미지를 추가하면 해당 기기에서는 그 이미지가 표시된다.
즉, 위와 같은 상황에서는 아이폰에서 오른쪽의 이미지를, 그 외의 기기에서는 왼쪽의 이미지를 표시한다.
기기 외에도 다양한 조건을 지정할 수 있다.

문제는 조건을 추가할수록 추가해야 할 이미지가 순식간에 늘어남으로 필요한 조건만 사용하는 것이 좋다.
'학습 노트 > iOS (2021)' 카테고리의 다른 글
| 163. Constraints with Code #1 (0) | 2021.12.16 |
|---|---|
| 162. Auto Layout Practice #2 (0) | 2021.12.16 |
| 160. Auto Layout Practice #1 (0) | 2021.12.15 |
| 159. Layout Margin & Layout Guide (0) | 2021.12.14 |
| 157 ~ 158. Constraint (0) | 2021.12.12 |


