Activity Indicator
작업 완료 시점을 정확히 알 수 없는 상태에서 작업이 진행 중이라는 피드백을 주기 위해 사용한다.
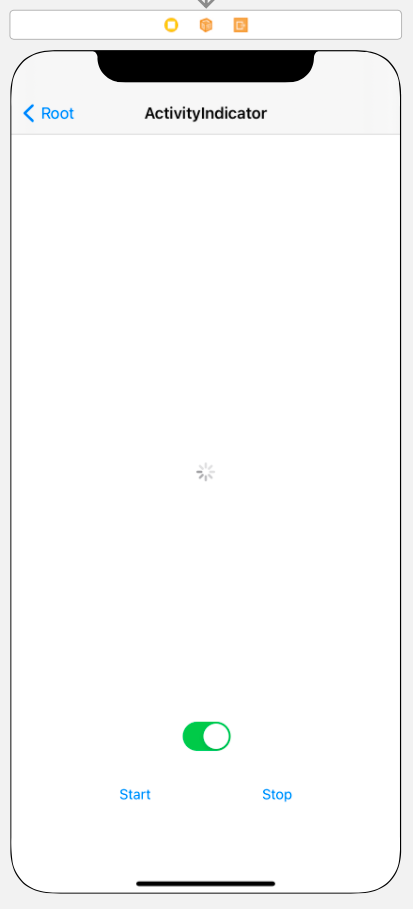
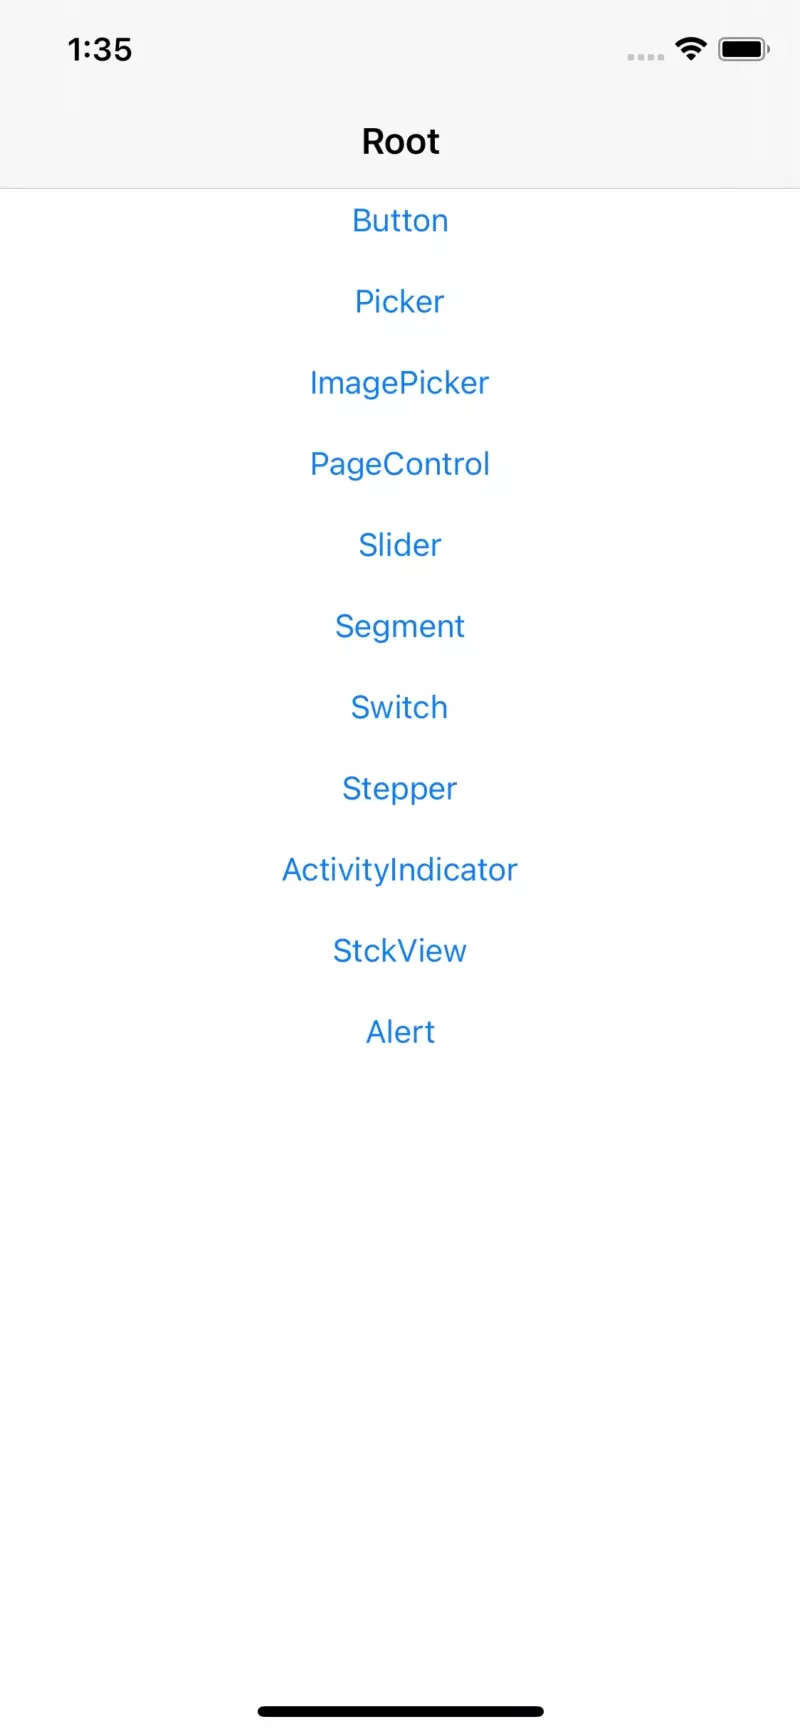
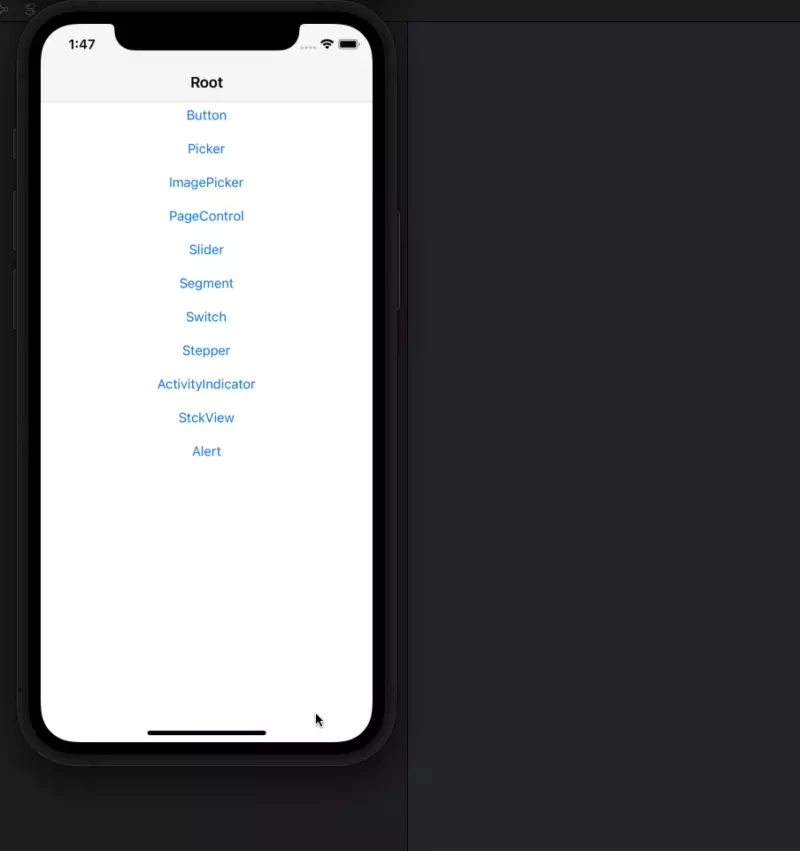
화면 구성은 위와 같다.
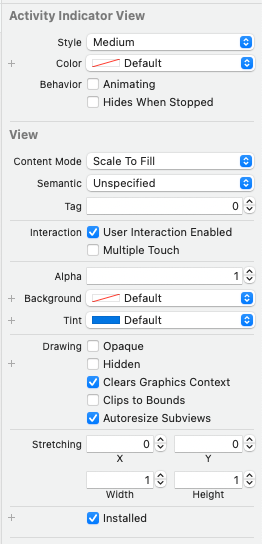
- Style
iOS 13부턴 위에 존재하는 옵션을 사용한다.
Activity Indicator의 크기를 Large와 Medium으로 변경할 수 있다.
iOS 13 이전엔 아래에 존재하는 옵션을 사용했다.
Activity Indicator의 스타일을 기본 크기의 흰색, 회색과 큰 크기의 흰색으로 설정할 수 있다. - Color
Activity Indicator의 색상을 변경할 수 있다. - Animating
해당 옵션이 활성화되지 않았다면 직접 메서드를 호출해 애니메이션을 시작해야 한다.
활성화되어 있다면 표시되는 순간 자동으로 애니메이션이 시작된다. - Hides When Stopped
애니메이션이 실행되는 동안에만 화면에 표시된다.
목표는 아래의 버튼을 눌러 애니메이션을 재생/정지시키고,
스위치로 Hides When Stopped 옵션을 조작해 변화를 확인한다.
//
//  ActivityIndicatorViewController.swift
//  controltest
//
//  Created by Martin.Q on 2021/08/13.
//

import UIKit

class ActivityIndicatorViewController: UIViewController {
    @IBOutlet weak var ActivityIndicator: UIActivityIndicatorView!
    @IBOutlet weak var switchBtn: UISwitch!
    @IBOutlet weak var startBtn: UIButton!
    @IBOutlet weak var stopBtn: UIButton!

    @IBAction func switchFunc(_ sender: UISwitch) {
    }

    @IBAction func startAction(_ sender: Any) {
    }
    @IBAction func stopAction(_ sender: Any) {
    }


    override func viewDidLoad() {
        super.viewDidLoad()
    }
}
코드와의 연결 관계는 위와 같다.
override func viewDidLoad() {
	super.viewDidLoad()
	switchBtn.isOn = ActivityIndicator.hidesWhenStopped
	ActivityIndicator.startAnimating()
}
뷰 진입 시 초기화를 진행한다.
ActivityIndicator에는 isAnimating 속성과 startAnimating 메서드가 존재하는데,
isAnimating 속성은 직역하면 '애니메이션 중인가'를 나타내며 현재의 상태를 나타내는 읽기 전용 속성이다.
상태를 변경하려면 startAnimating 메서드를 사용해야 한다.
@IBAction func switchFunc(_ sender: UISwitch) {
	ActivityIndicator.hidesWhenStopped = sender.isOn
}
스위치의 상태를 ActivityIndicator의 hidesWhenStopped 속성과 동기화하도록 코드를 구현한다.
@IBAction func startAction(_ sender: Any) {
	if !ActivityIndicator.isAnimating {
		ActivityIndicator.startAnimating()
	}
}
@IBAction func stopAction(_ sender: Any) {
	if ActivityIndicator.isAnimating {
		ActivityIndicator.stopAnimating()
	}
}
각각의 버튼은 ActivityIndicator의 애니메이션 재생 여부를 판단해 재생/정지할 수 있도록 구현한다.
//
//  ActivityIndicatorViewController.swift
//  controltest
//
//  Created by Martin.Q on 2021/08/13.
//

import UIKit

class ActivityIndicatorViewController: UIViewController {
    @IBOutlet weak var ActivityIndicator: UIActivityIndicatorView!
    @IBOutlet weak var switchBtn: UISwitch!
    @IBOutlet weak var startBtn: UIButton!
    @IBOutlet weak var stopBtn: UIButton!

    @IBAction func switchFunc(_ sender: UISwitch) {
        ActivityIndicator.hidesWhenStopped = sender.isOn
    }

    @IBAction func startAction(_ sender: Any) {
        if !ActivityIndicator.isAnimating {
            ActivityIndicator.startAnimating()
        }
    }
    @IBAction func stopAction(_ sender: Any) {
        if ActivityIndicator.isAnimating {
            ActivityIndicator.stopAnimating()
        }
    }

    override func viewDidLoad() {
        super.viewDidLoad()
        switchBtn.isOn = ActivityIndicator.hidesWhenStopped
        ActivityIndicator.startAnimating()
    }
}
최종적인 코드의 모습은 위와 같다.
결과

Hide When Stopped 속성이 비활성화되는 경우 애니메이션이 재생/정지 여부와 관계없이 화면에 표시되지만,
활성화되면 애니메이션이 정지됨과 동시에 화면에서 ActivityIndicator가 사라진다.
Progress View
사용자에게 작업의 진행속도와 완료 시점을 보여주기 위해 사용한다.

화면 구성은 위와 같다.
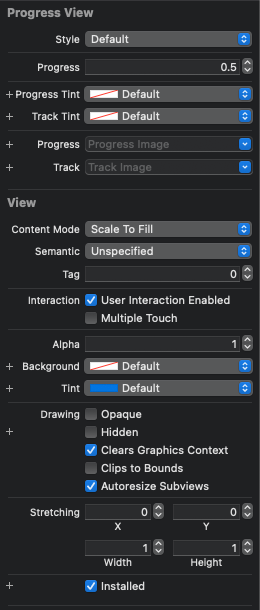
- Style
Progress View의 외관을 설정한다.
대부분의 경우 Default를 사용한다.
ToolBar에서 사용하는 경우 Bar를 사용하기도 한다. - Progress
0.0 ~ 1.0 사이의 값을 가진다. - Progress Tint
Bar의 색상을 변경한다. - Track Tint
Track의 색상을 변경한다. - Progress, Track
Bar와 Track의 이미지를 변경하지만 거의 사용하지 않는다.
ProgressView의 높이가 고정되어 있고, 너무 가늘어서 Tint와 구분되지 않는다.
목표는 아래의 버튼을 눌러 progress를 진행시키고, 변화를 관찰한다.
//
//  ProgressViewViewController.swift
//  controltest
//
//  Created by Martin.Q on 2021/08/13.
//

import UIKit

class ProgressViewViewController: UIViewController {
    @IBOutlet weak var progress: UIProgressView!

    @IBAction func updateBtn(_ sender: Any) {

    }

    override func viewDidLoad() {
        super.viewDidLoad()
    }
}
코드와의 연결 관계는 위와 같다.
override func viewDidLoad() {
	super.viewDidLoad()

	progress.progress = 0.0

	progress.trackTintColor = UIColor.black
	progress.progressTintColor = UIColor.orange
}
뷰가 로드되면 초기화를 진행한다.
progressView의 진행 상태를 0.0으로,
track과 progressBar의 색상을 각각 검은색과 주황색으로 변경한다.
@IBAction func updateBtn(_ sender: Any) {
	progress.progress = 0.8
}
버튼을 누르면 진행상태를 0.0에서 0.8로 업데이트한다.
원래대로라면 작업의 진행 상황에 따라 개별적으로 progress속성을 업데이트해 주어야 함을 명심하자.
결과
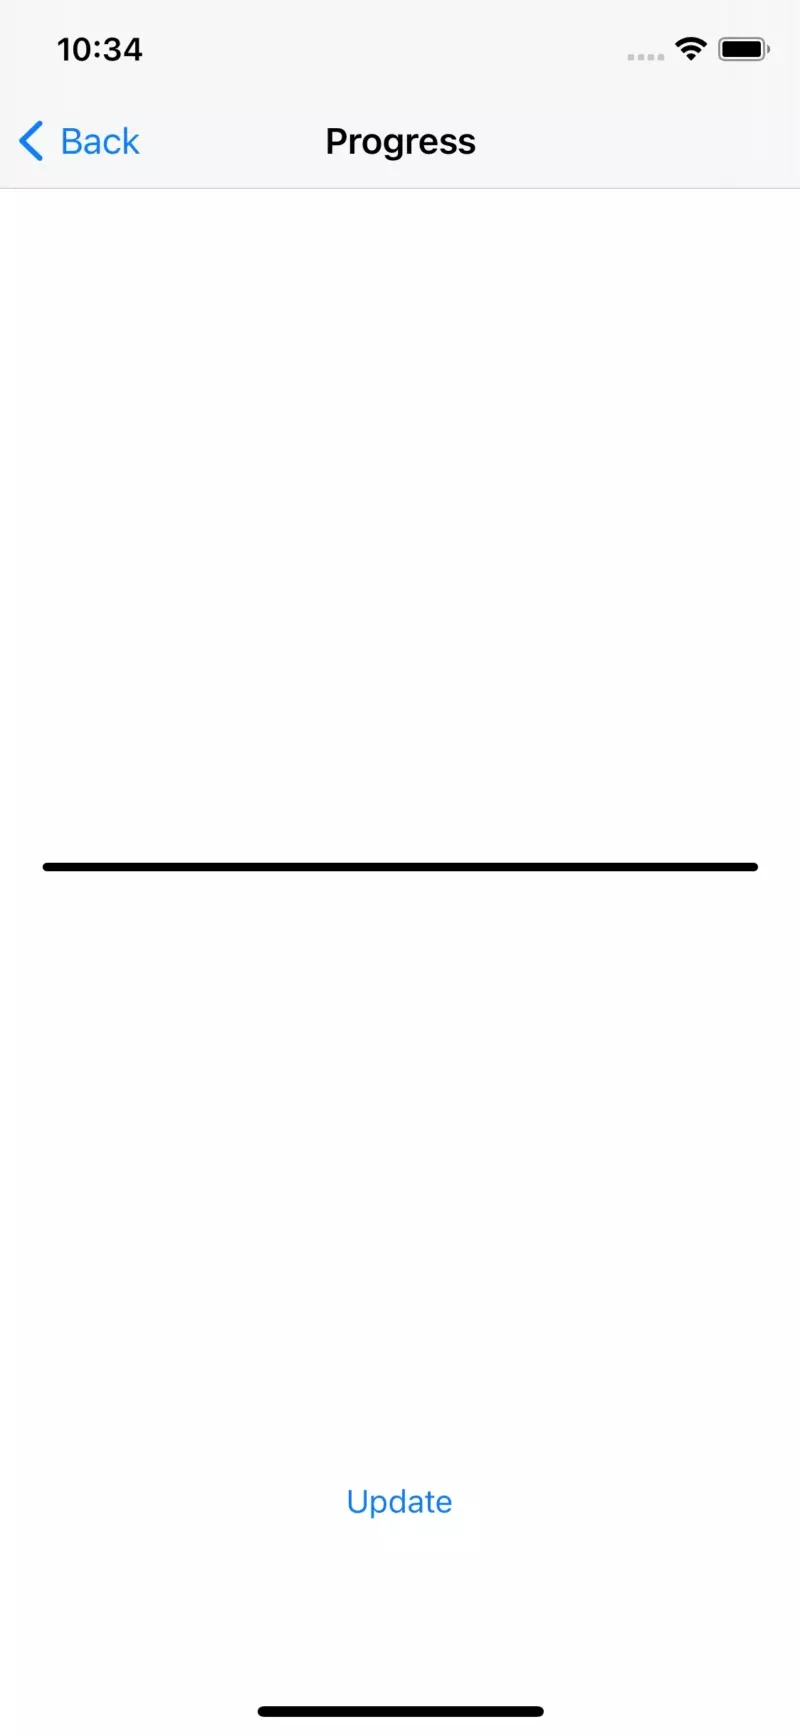
위와 같이 progress 속성을 직접 변경하면 애니메이션 효과 없이 단번에 진행상태가 변하는 것을 확인할 수 있다.
@IBAction func updateBtn(_ sender: Any) {
	progress.setProgress(0.8, animated: true)
}
하지만 setProgress 메소드를 사용하면
결과
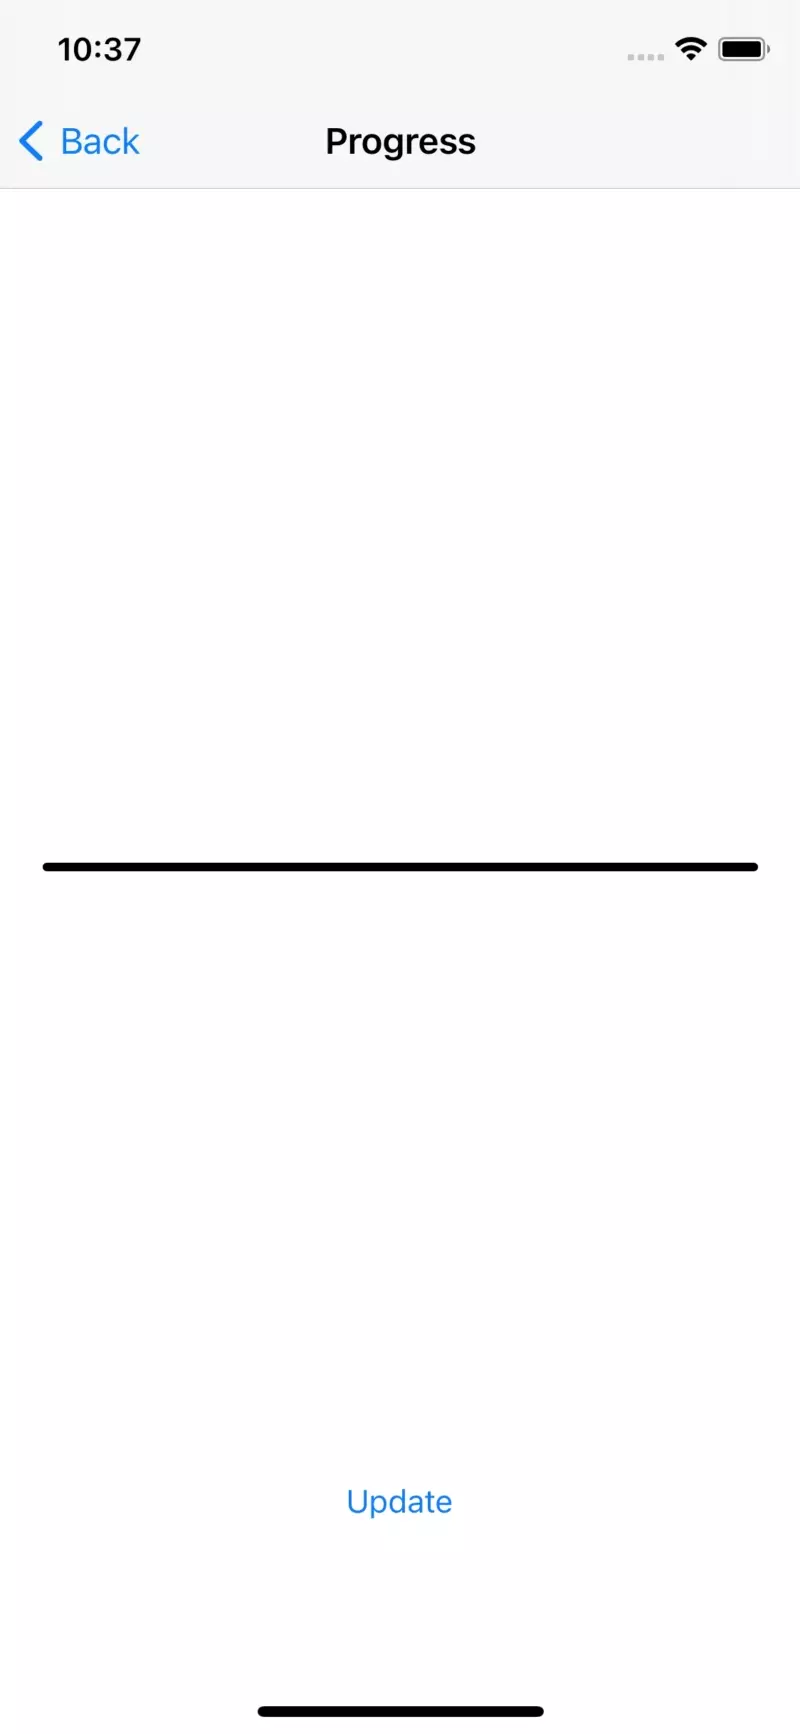
이처럼 진행 애니메이션을 사용할 수 있다.
Stack View
여러 View를 수직이나 수평으로 배치하는 ContainerView이다.
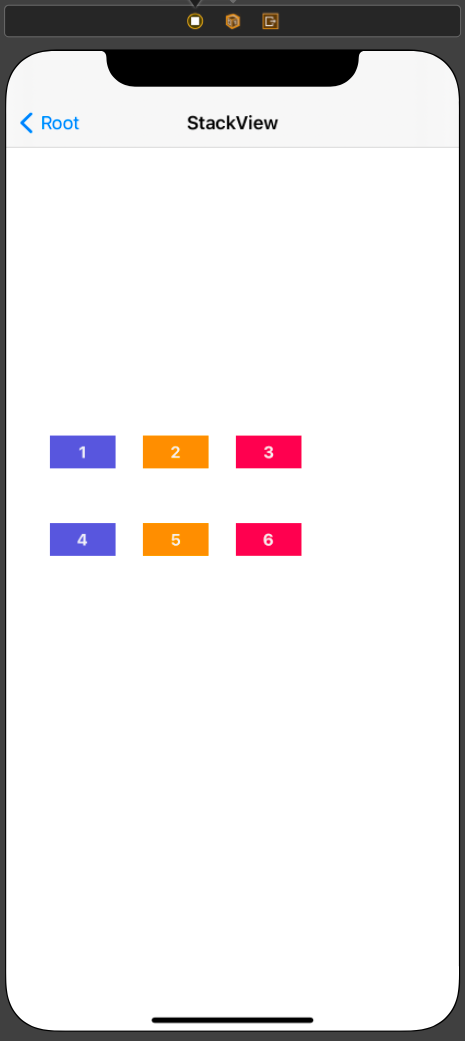
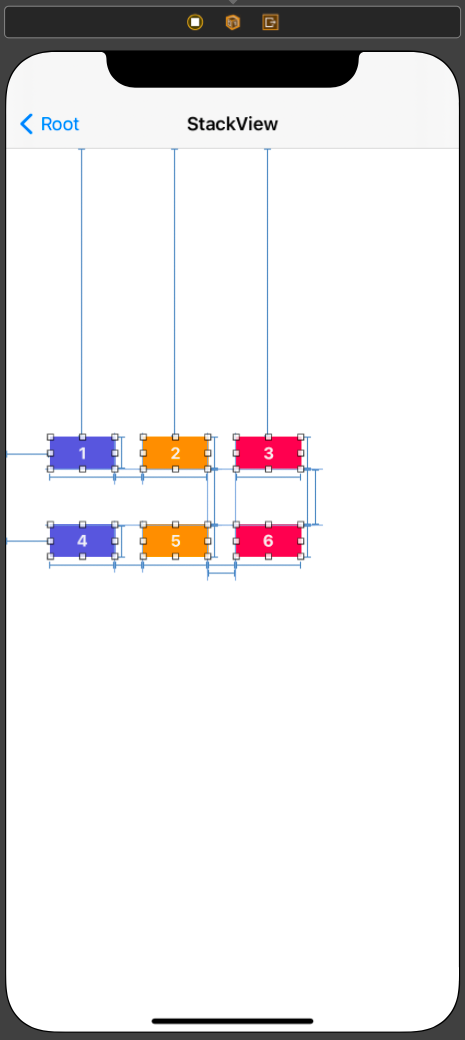
버튼 6개를 일정한 사이즈에 일정한 간격으로 배치해야 한다고 가정하면,
위와 같이 모든 제약을 직접 추가해 줘야 한다.
어려운 일은 아니지만 꽤나 번거롭고, 실수가 생길 가능성이 높다.
또한, 배열을 변경 하거나 코드를 통해 동적으로 설정하는 경우 머리가 터지는 상황이 생기게 된다.
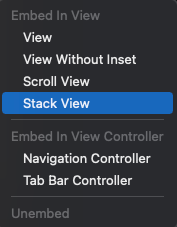
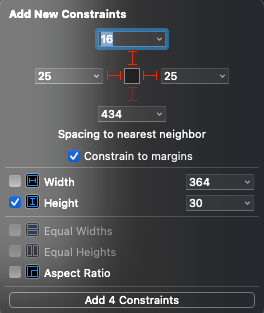
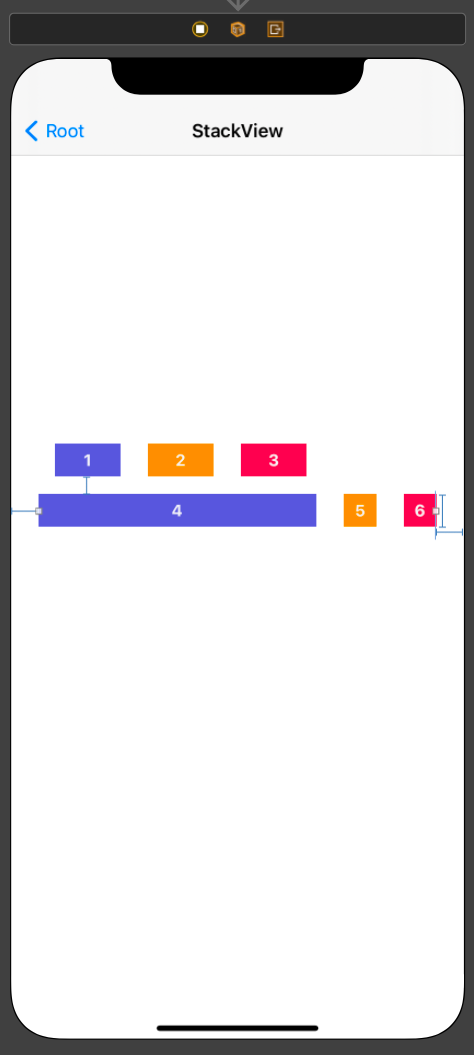
일반 View로 embed 했을 때와는 다르게 subView에 일일이 추가하는 것이 아닌 stackView 자체에 제약을 추가한다.
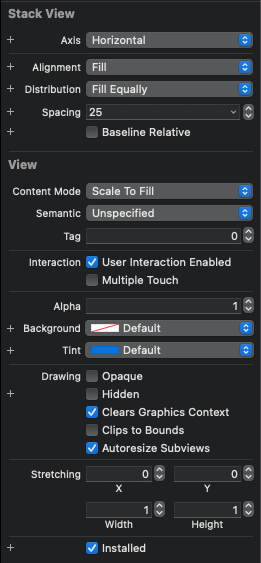
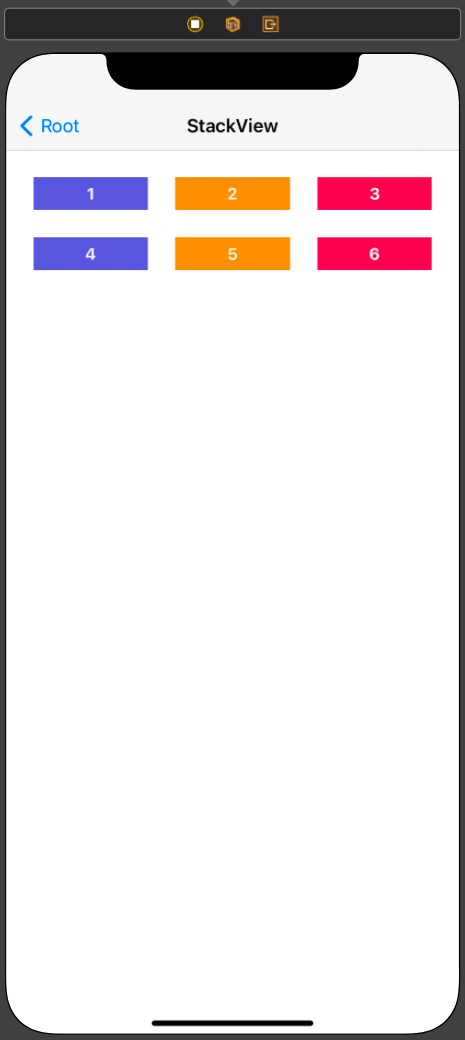
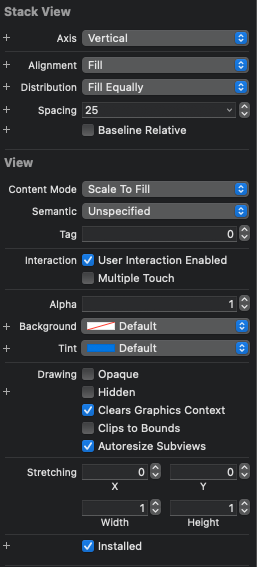
Distribution을 Fill Equally로 변경하고,
Spacing을 25로 변경한 뒤, StackView의 제약사항을 추가하면 오른쪽처럼 순식간에 제약조건 추가가 완료된다.
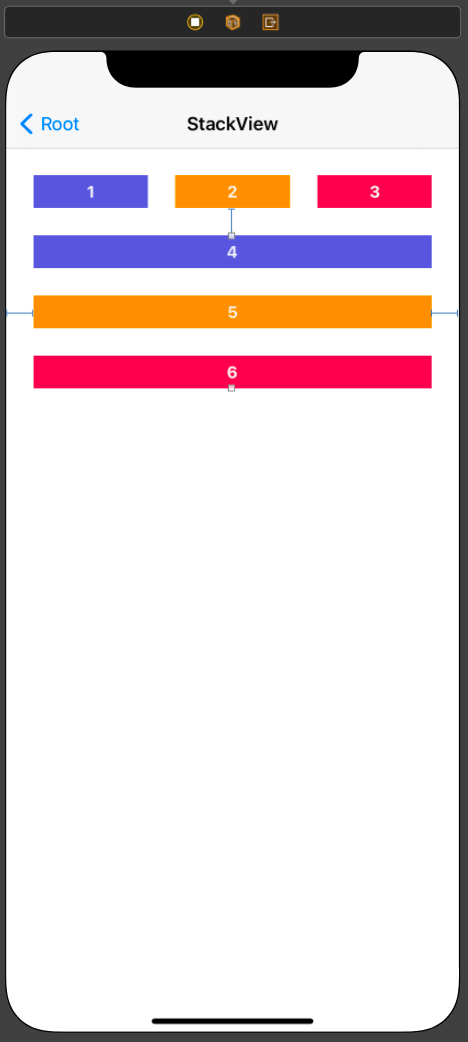
또한, 배치를 바꾸더라도 Axis 속성을 변경하는 것만으로도 충분히 괜찮은 결과를 얻을 수 있다.
StackView는 속성기반으로 subView를 배치하고, 필요한 제약을 자동으로 추가한다.
직접 제약을 생성할 경우 이 자동 제약과 충돌하지 않도록 주의해야 한다.
또한, StackView 자체의 제약은 직접 추가해야 한다.
Axis
배치 방향을 결정하는 속성이다.
Horizontal은 수평 배치, Vertical은 수직배치이다.
이하의 속성은 Axis에 따라 기능이 달라진다.
목표는 버튼에 StackView의 여러 속성을 연결시켜 Axis의 동적인 반응을 확인해 본다.
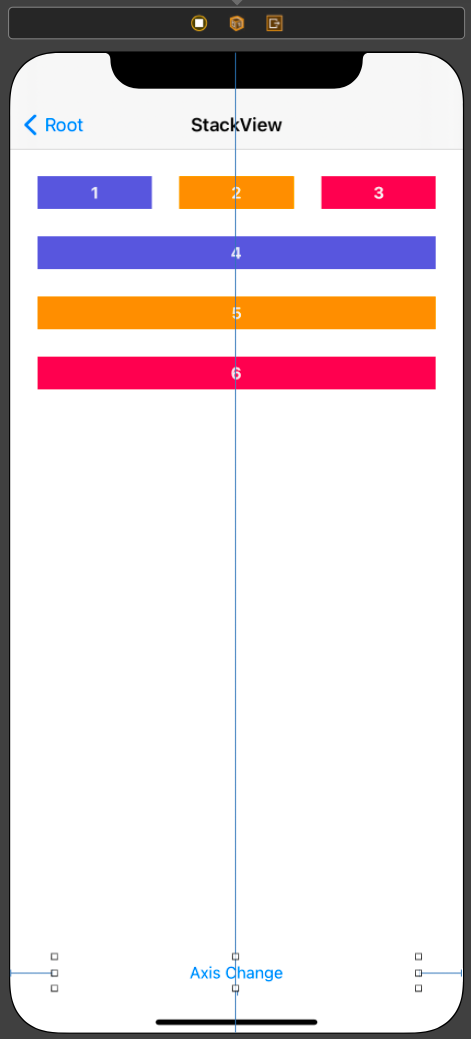
화면 구성은 위와 같다.
//
//  StackViewController.swift
//  controltest
//
//  Created by Martin.Q on 2021/08/13.
//

import UIKit

class StackViewController: UIViewController {
    @IBOutlet weak var stackView: UIStackView!

    @IBAction func AxisBtn(_ sender: Any) {
    }


    override func viewDidLoad() {
        super.viewDidLoad()
    }
}
씬과 코드의 연결은 위와 같다.
stackView를 outlet으로, 속성과 연결할 버튼은 action으로 연결했다.

stackview의 axis는 NSLayoutConstraint.Axis의 형식을 가지고 있고, Vertical과 Horizontal의 속성을 지닌다.
@IBAction func AxisBtn(_ sender: Any) {
	if stackView.axis == .horizontal {
		stackView.axis = .vertical
	} else {
		stackView.axis = .horizontal
	}
}
따라서 해당 속성을 확인해 반대되는 속성으로 변경해 주면 된다.
결과
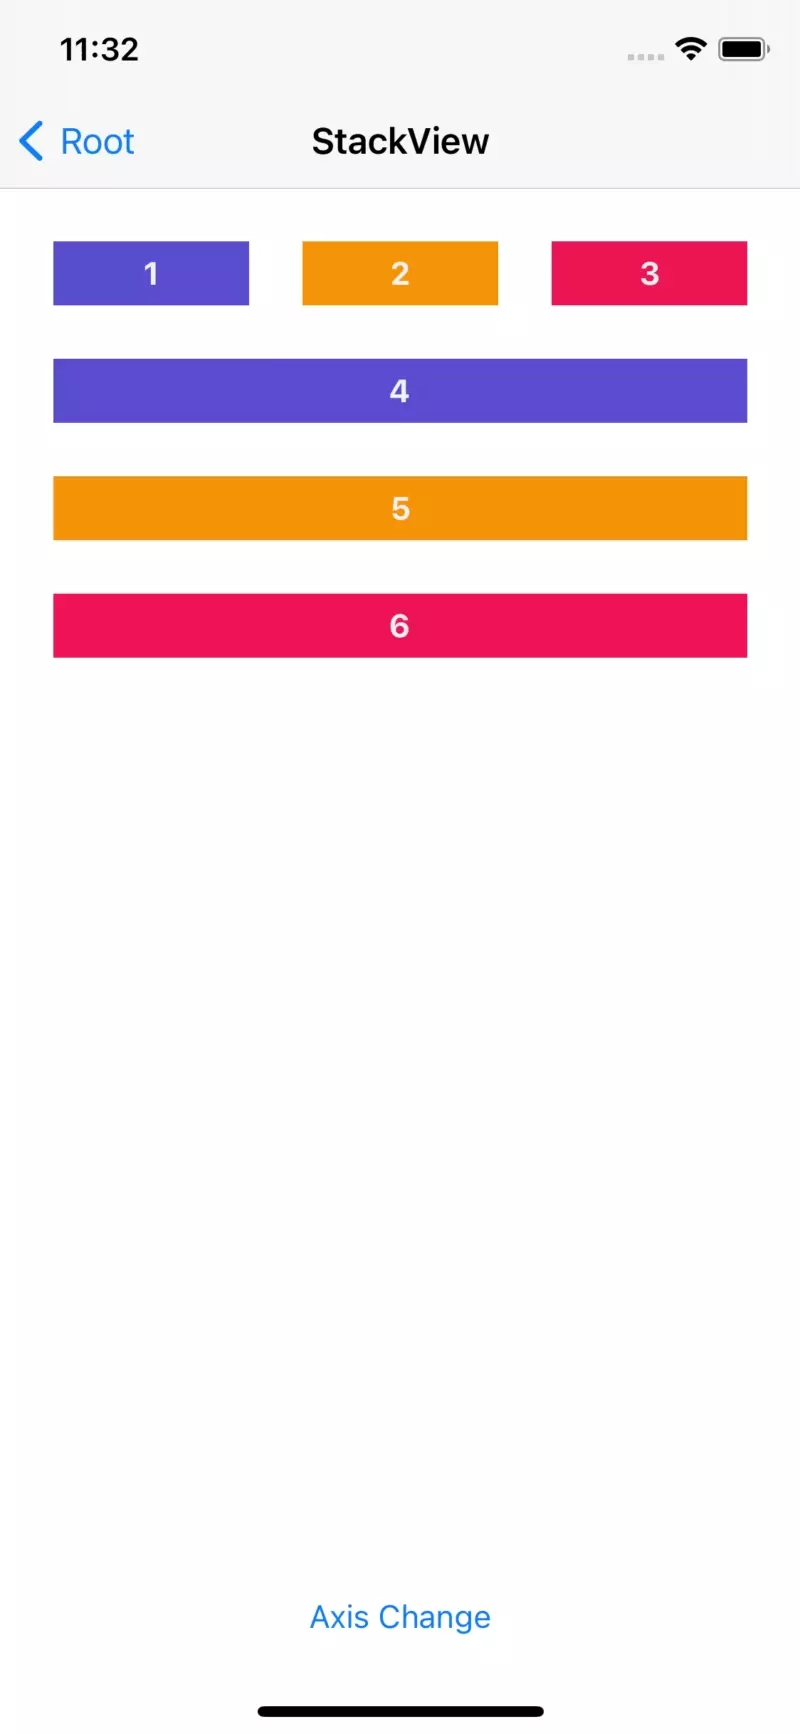
버튼을 누르면 Axis 속성이 Horizontal과 Vertical로 변하게 된다.
 @IBAction func AxisBtn(_ sender: Any) {
 	UIView.animate(withDuration: 0.3) { [self] in
 		if stackView.axis == .horizontal {
 			stackView.axis = .vertical
 		} else {
 			stackView.axis = .horizontal
 		}
 	}
 }
또한 StackView는 애니메이션을 지원해서 위와 같이 UIView의 animate 메서드와 함께 사용하게 되면
결과
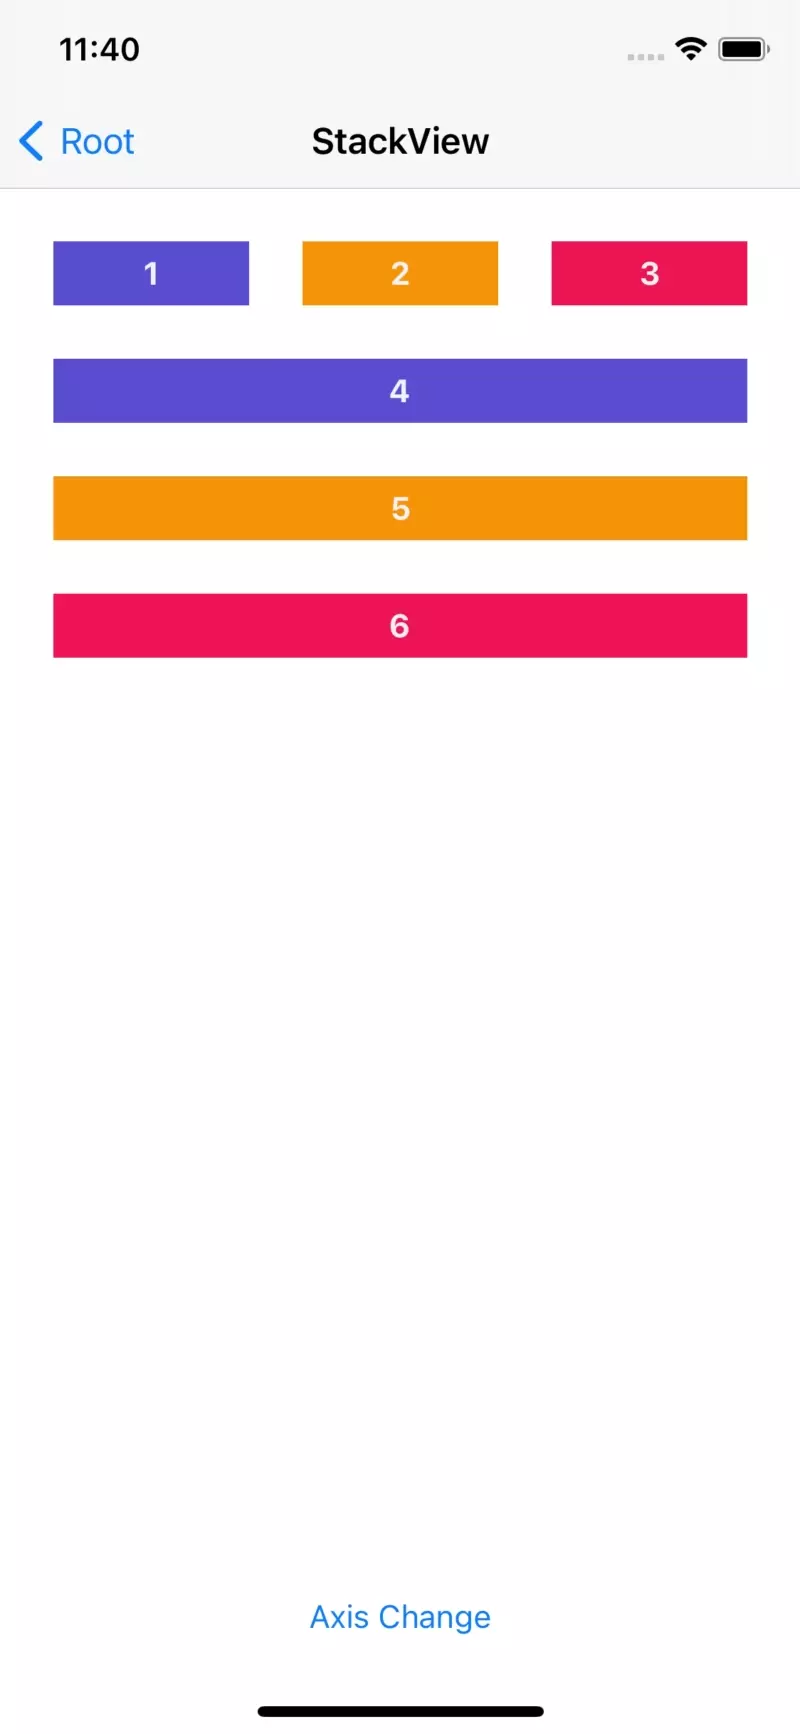
전환 시의 애니메이션까지 사용할 수 있다.
Alignment
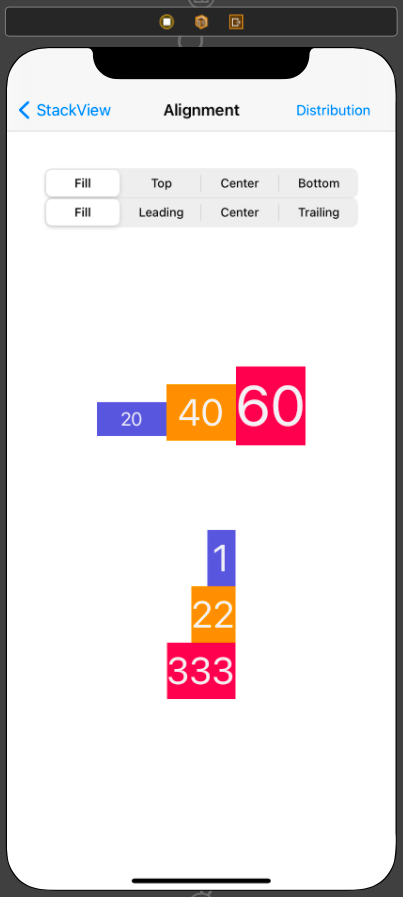
실습 화면 구성은 위와 같다.
Axis로 설정된 값과 수직을 이루는 축에서 View를 정렬할 방식을 결정한다.
Axis가 horizontal이라면 수직의 정렬 방식을 설정하고,
Axis가 Vertical이라면 수평의 정렬 방식을 설정한다.
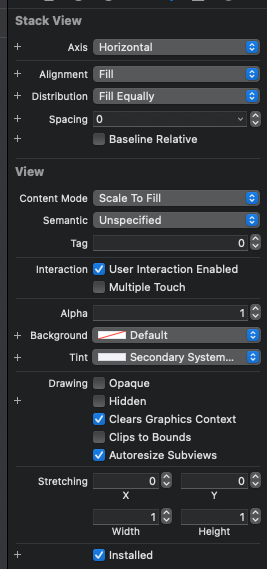
horizontal 설정의 attribute inspector를 보면,
배당 뷰에 한해서 Alignment는 subView의 높이와 수직 정렬 방식을 설정한다.
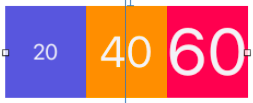
- Fill
subView가 StackView와 동일한 높이로 배치된다.
StackView와 subView가 모두 intrinsic size로 설정돼있기 때문에 가장 높이가 높은 View를 기준으로 크기가 결정된다.
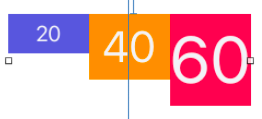
- Top
View들이 위쪽으로 정렬된다.
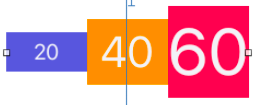
- Center
View들이 수직상의 중앙에 정렬된다.
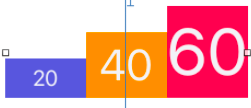
- Bottom
View들이 바닥으로 정렬된다.
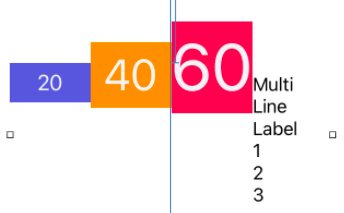
- First Baseline
text의 첫 번째 줄을 기준으로 View들이 정렬된다.
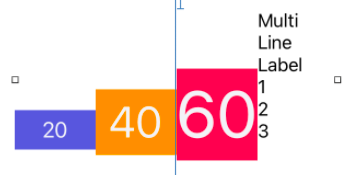
- Last Baseline
text의 마지막 줄을 기준으로 View들이 정렬된다.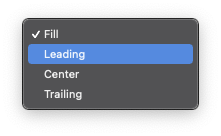
Vertical 상태에선 Align 속성이 다르게 표시된다.

- Fill
가장 넓이가 넓은 View를 기준으로 크기를 결정한다.

- Leading
왼쪽을 기준으로 View를 정렬한다.

- Center
수평상의 중앙에 View를 정렬한다.

- Trailing
오른쪽을 기준으로 View를 정렬한다.
//
//  StackAlignmentViewController.swift
//  controltest
//
//  Created by Martin.Q on 2021/08/14.
//

import UIKit

class StackAlignmentViewController: UIViewController {
    @IBOutlet weak var alignSegue: UISegmentedControl!
    @IBOutlet weak var alignSeg2: UISegmentedControl!
    @IBOutlet weak var horizonStack: UIStackView!
    @IBOutlet weak var verticalStack: UIStackView!


    @IBAction func alignSegAction(_ sender: UISegmentedControl) {
    }


    override func viewDidLoad() {
        super.viewDidLoad()
    }

}
코드 연결은 위와 같다.
segment는 valueChange 이벤트 시 반응할 수 있도록 sender를 UISegmentdControl로 지정한다.

alignment 속성의 형식은 열거형이다.
@IBAction func alignSegAction(_ sender: UISegmentedControl) {
	let option: [UIStackView.Alignment] = [.fill, .top, .center, .bottom]

	UIView.animate(withDuration: 0.3) {
		self.horizonStack.alignment = option[self.alignSeg.selectedSegmentIndex]
		self.verticalStack.alignment = option[self.alignSeg2.selectedSegmentIndex]
	}
}
열거형은 별도의 인덱스가 존재하지 않아 segment의 index와의 동기화 편의성을 위해 배열에 순차 저장한다.
이후 UIView의 animate 에소드를 사용해 애니메이션 효과를 부여하고,
alignment 속성을 segment의 인덱스와 동기화한다.
override func viewDidLoad() {
	super.viewDidLoad()
	alignSeg.selectedSegmentIndex = 0
	alignSeg2.selectedSegmentIndex = 0
	alignSegAction(alignSeg)
}
viewDidLoad에서는 초기화를 진행한다.
뷰가 로드되면 segment 값을 첫 번째 seg로 설정한다.
이후 정렬 코드를 호출해 stackView를 재배치할 수 있도록 구현한다.
결과

Distribution
Distribution은 Axis와 동일한 축에서 크기와 배치 방식을 지정한다.
Horizontal이라면 너비와 수평 배치 방식을 설정하고,
Vertical이라면 높이와 수직 배치 방식을 설정한다.
또한 Distribution은 Stack이 어떤 크기로 배치되는지에 따라 결과가 달라진다.
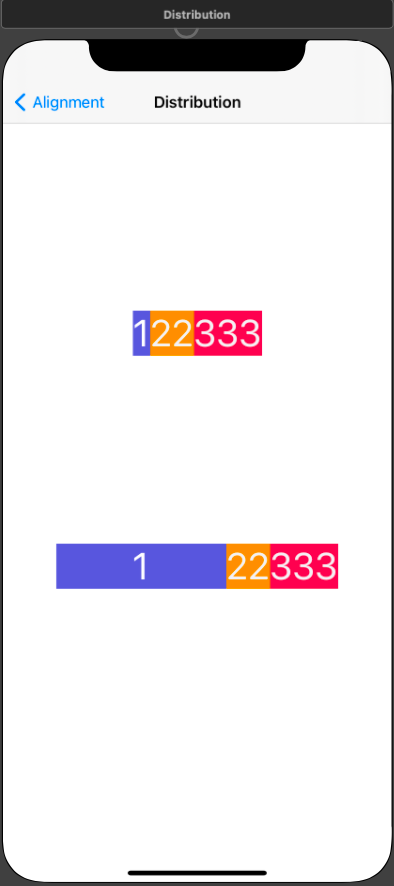
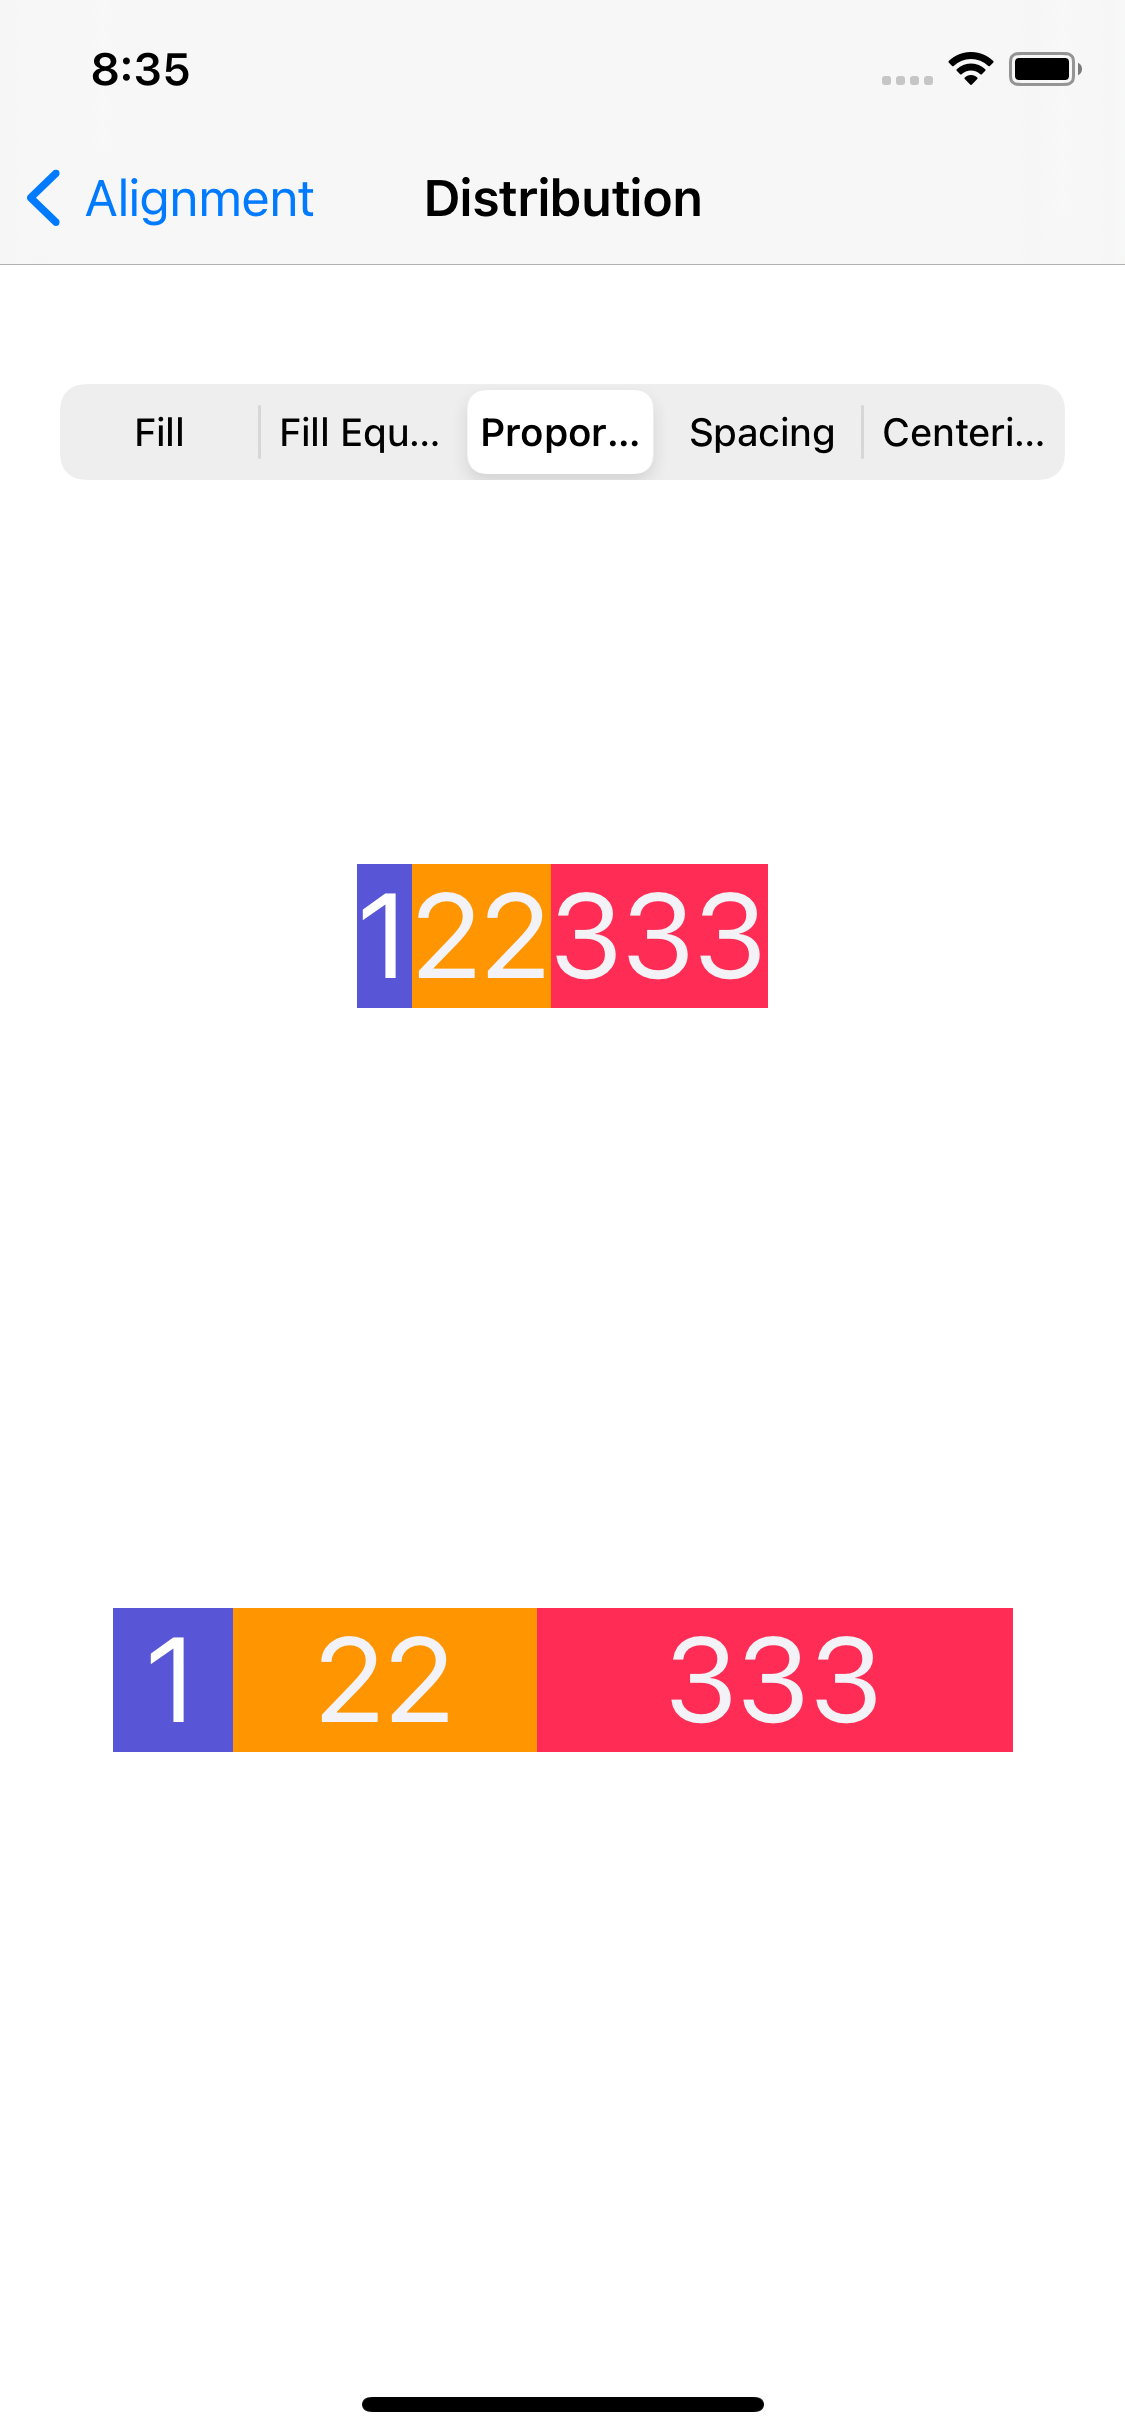
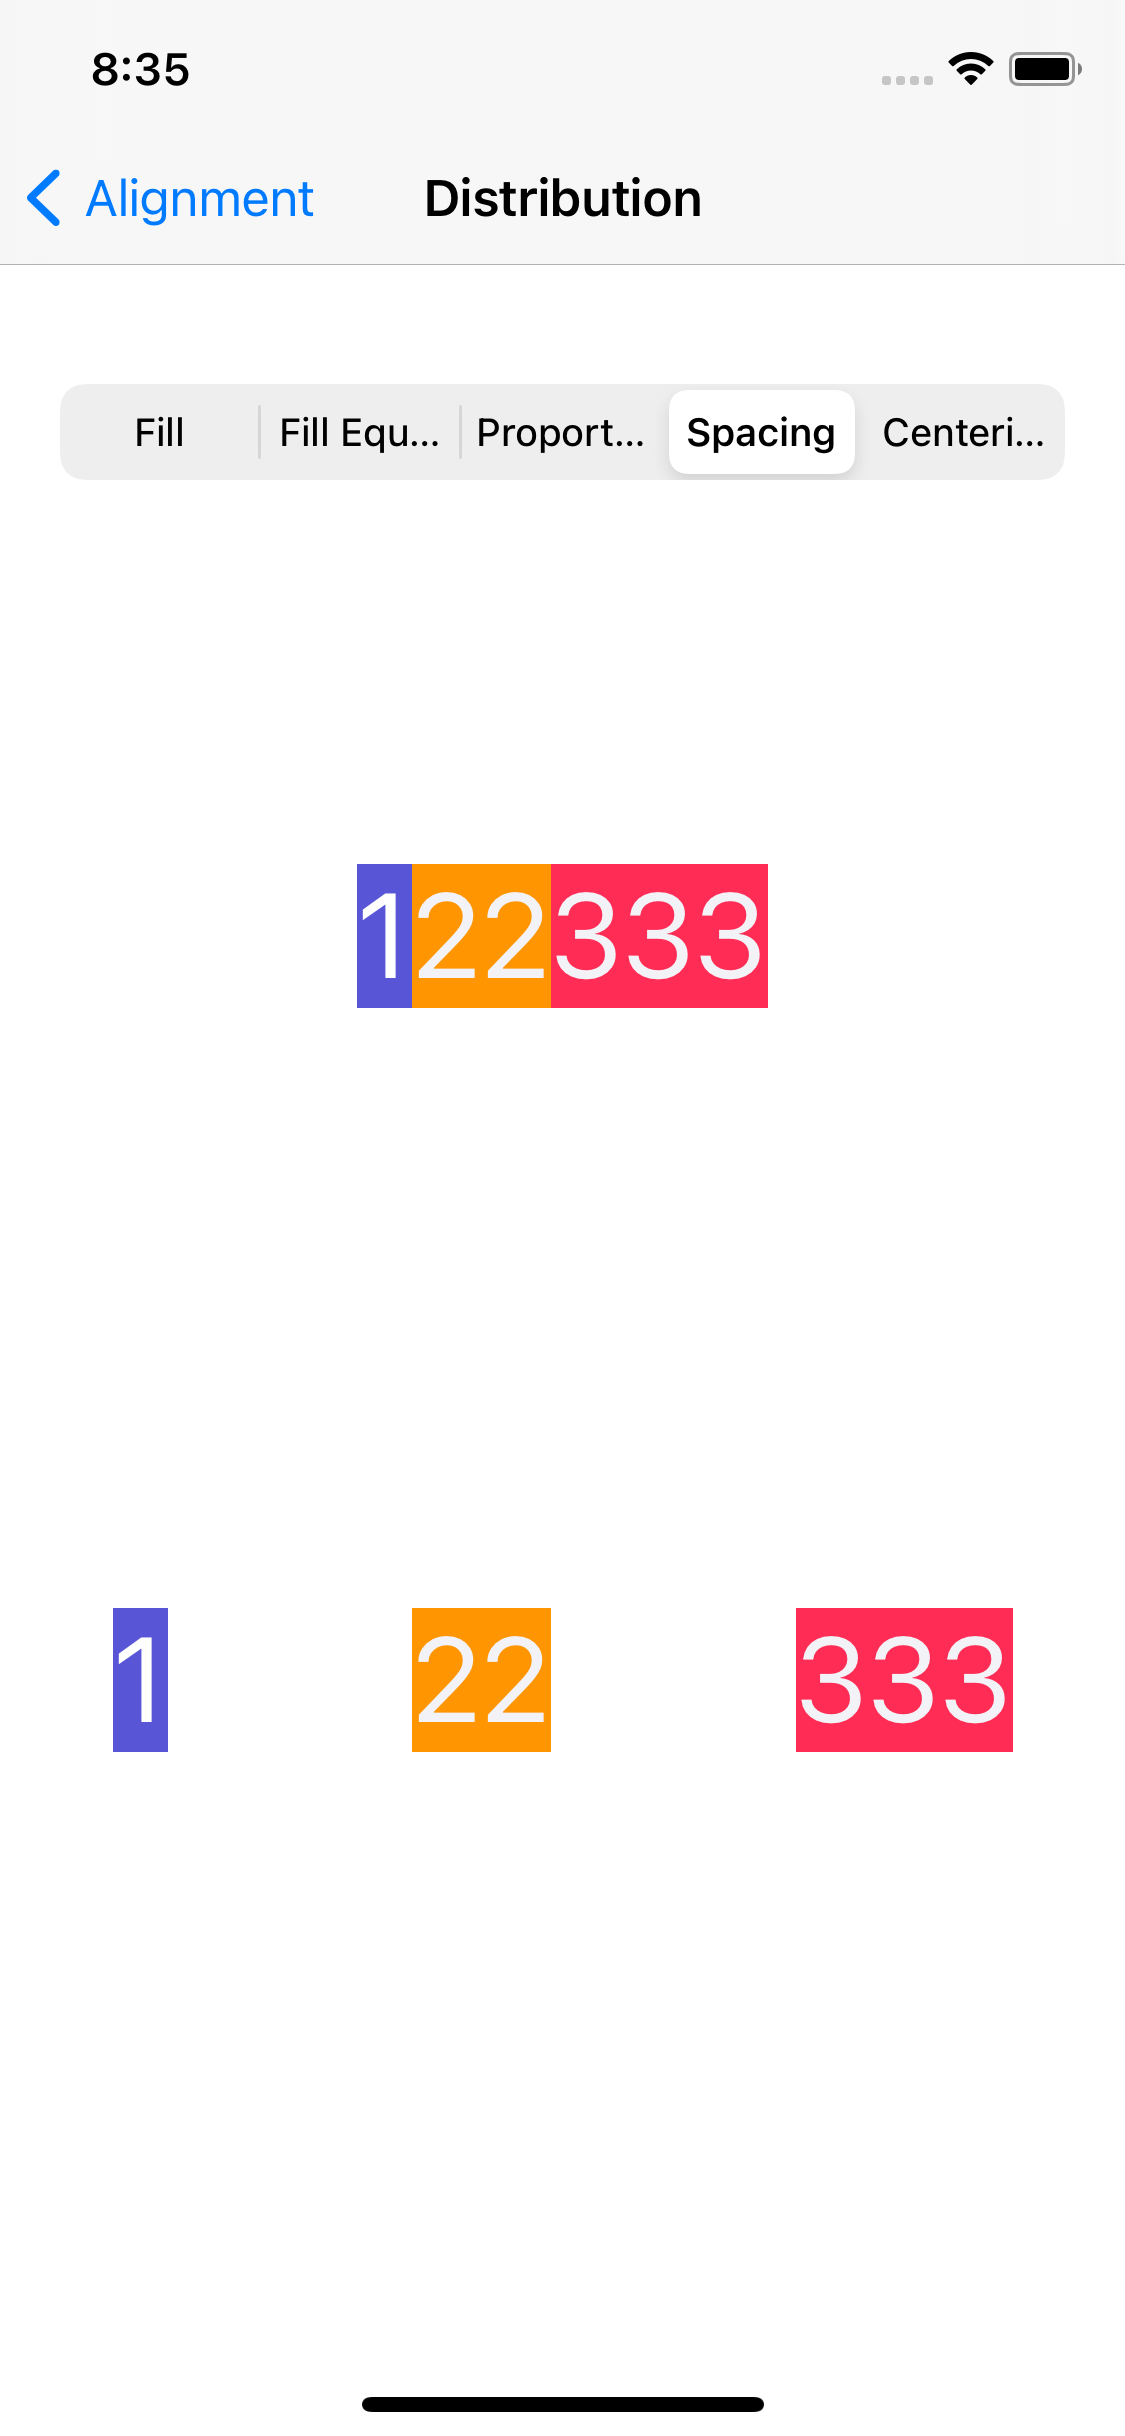
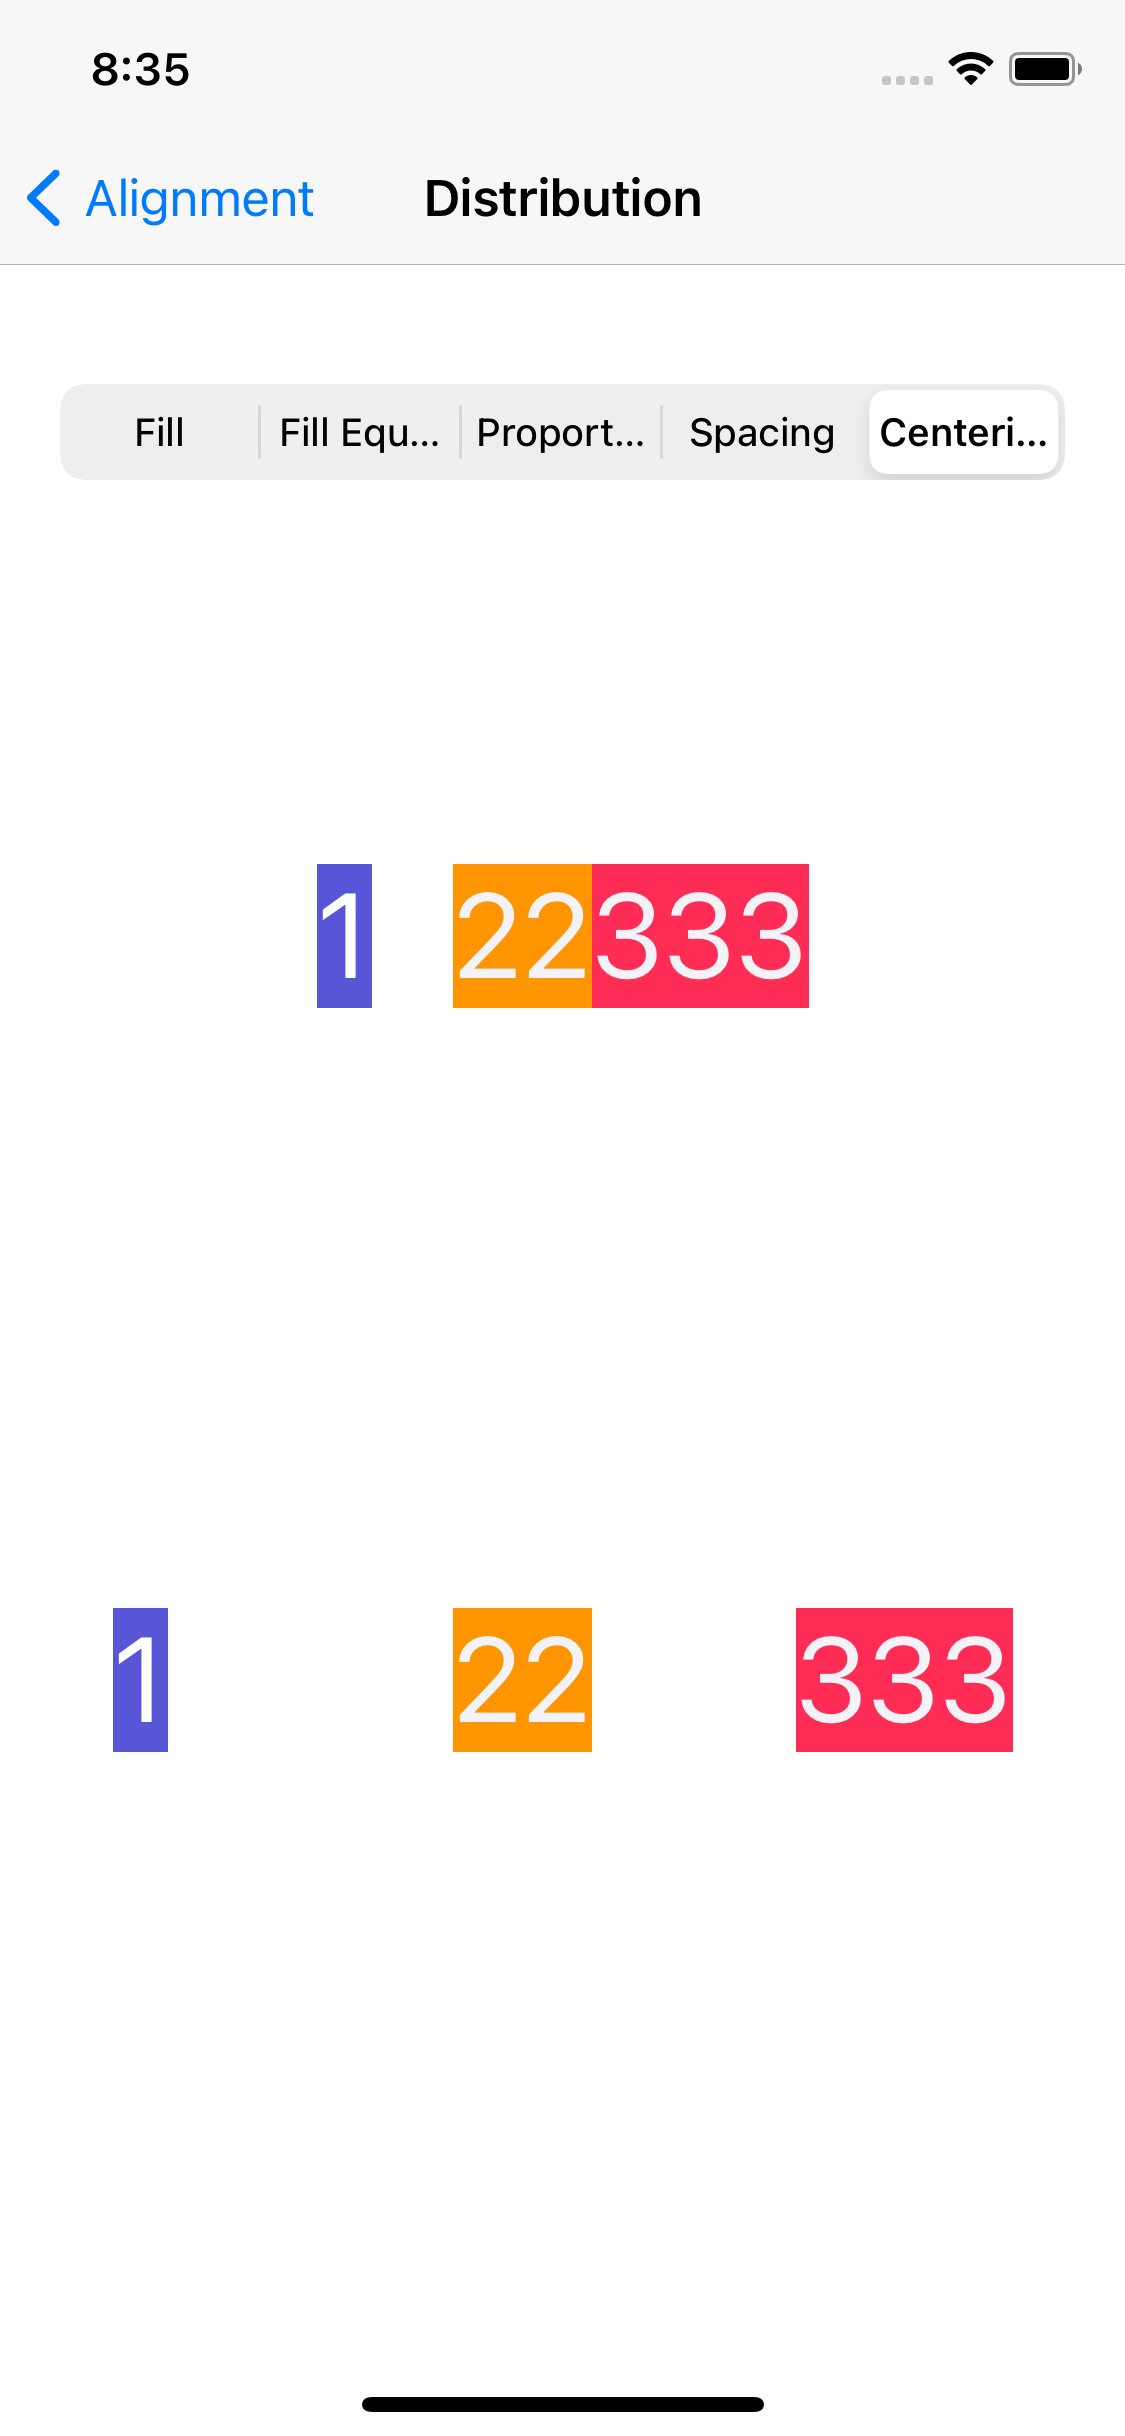
실습 화면은 위와 같다.
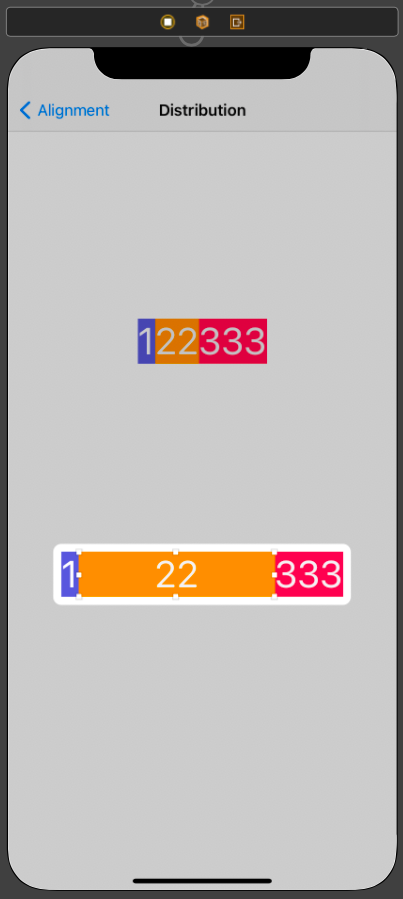
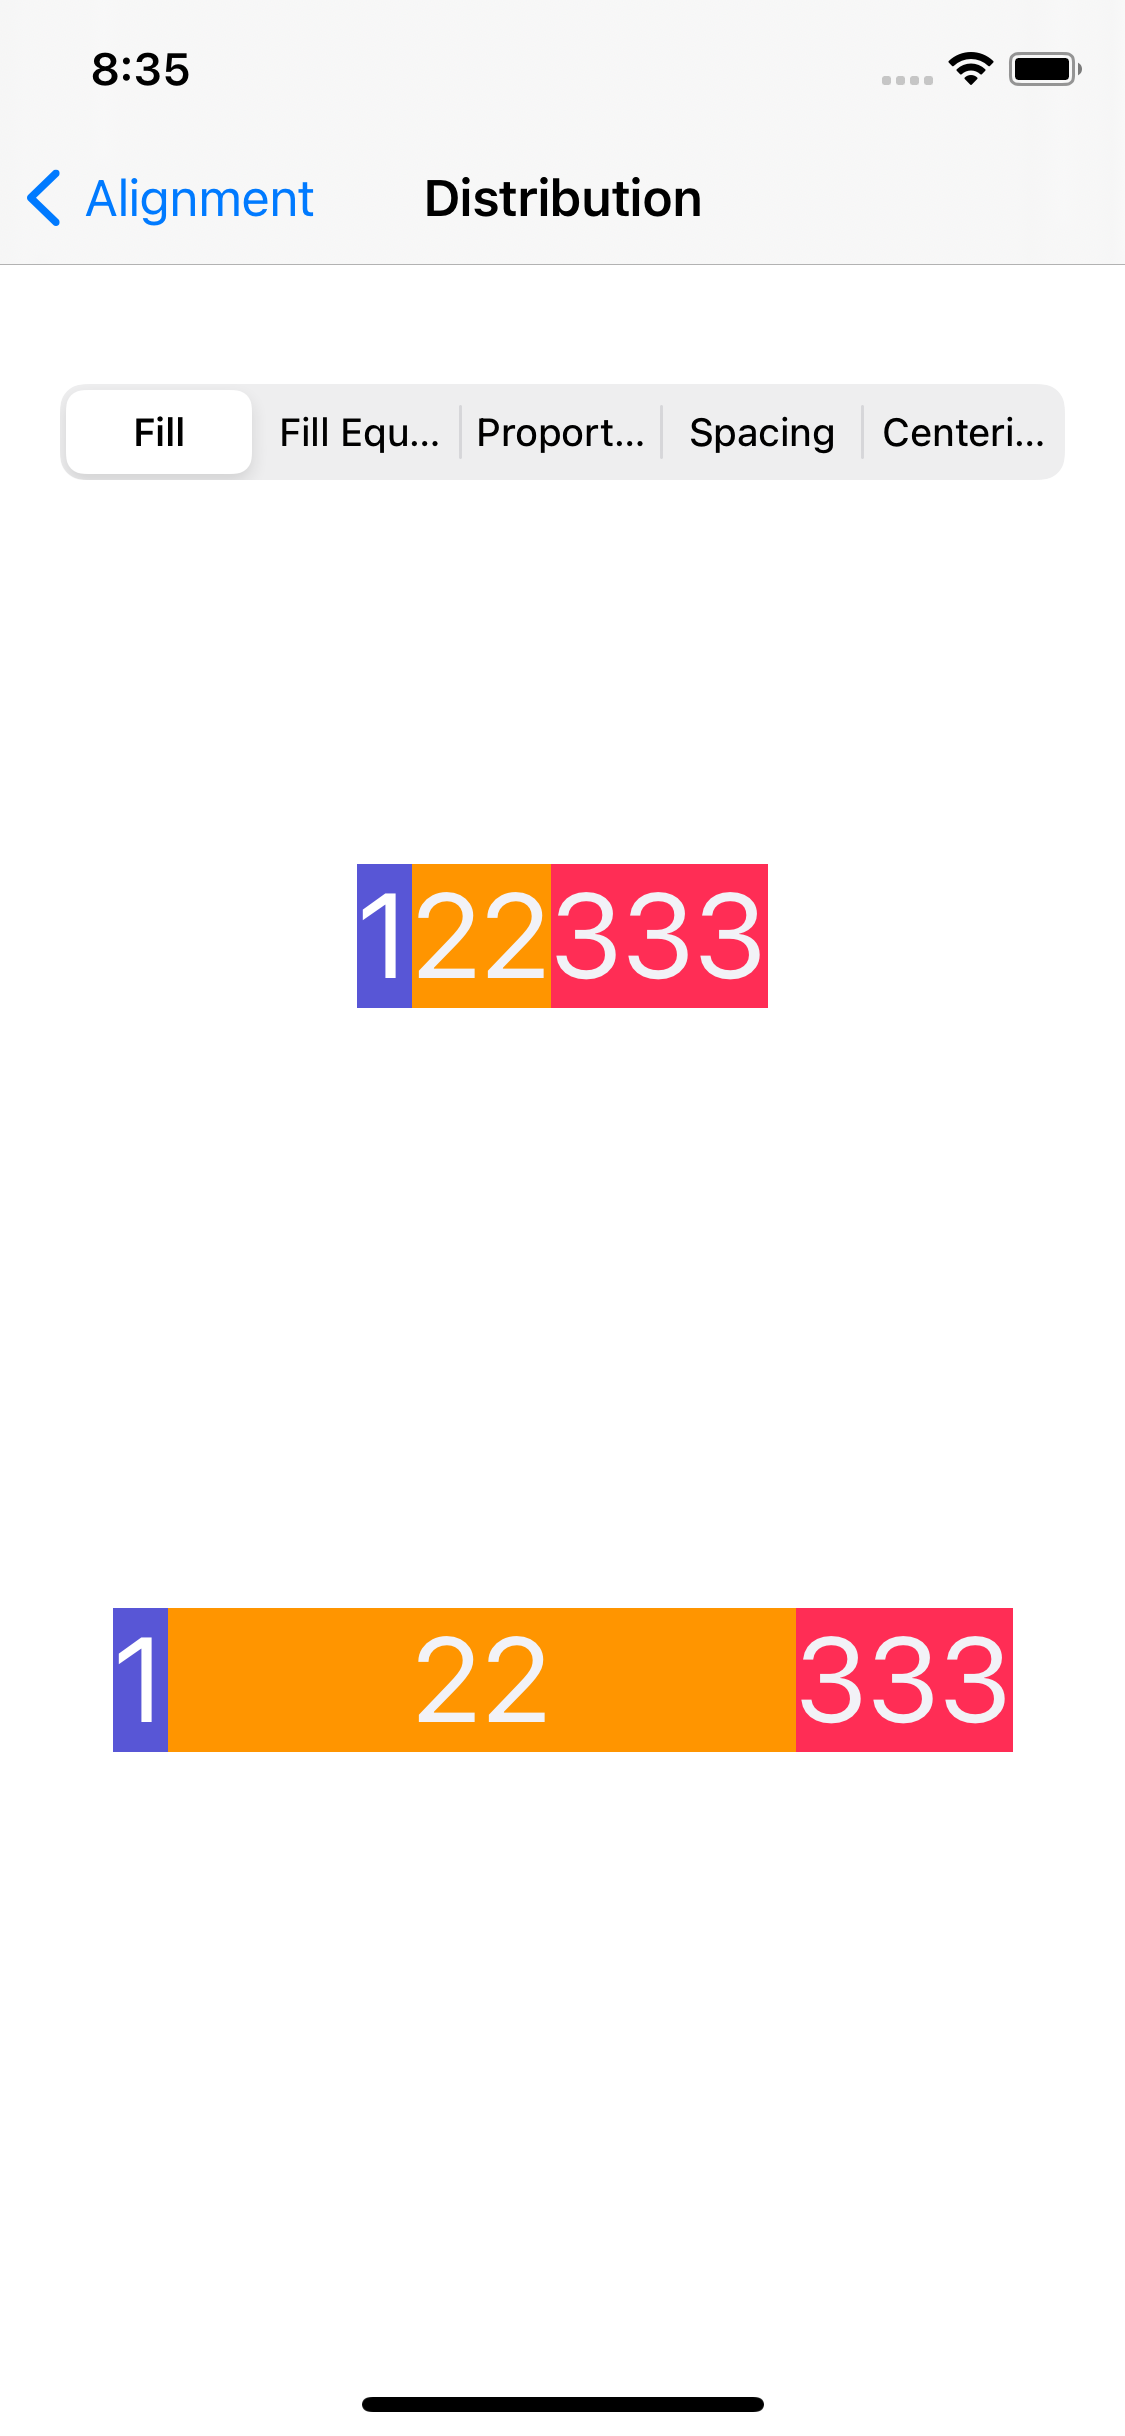
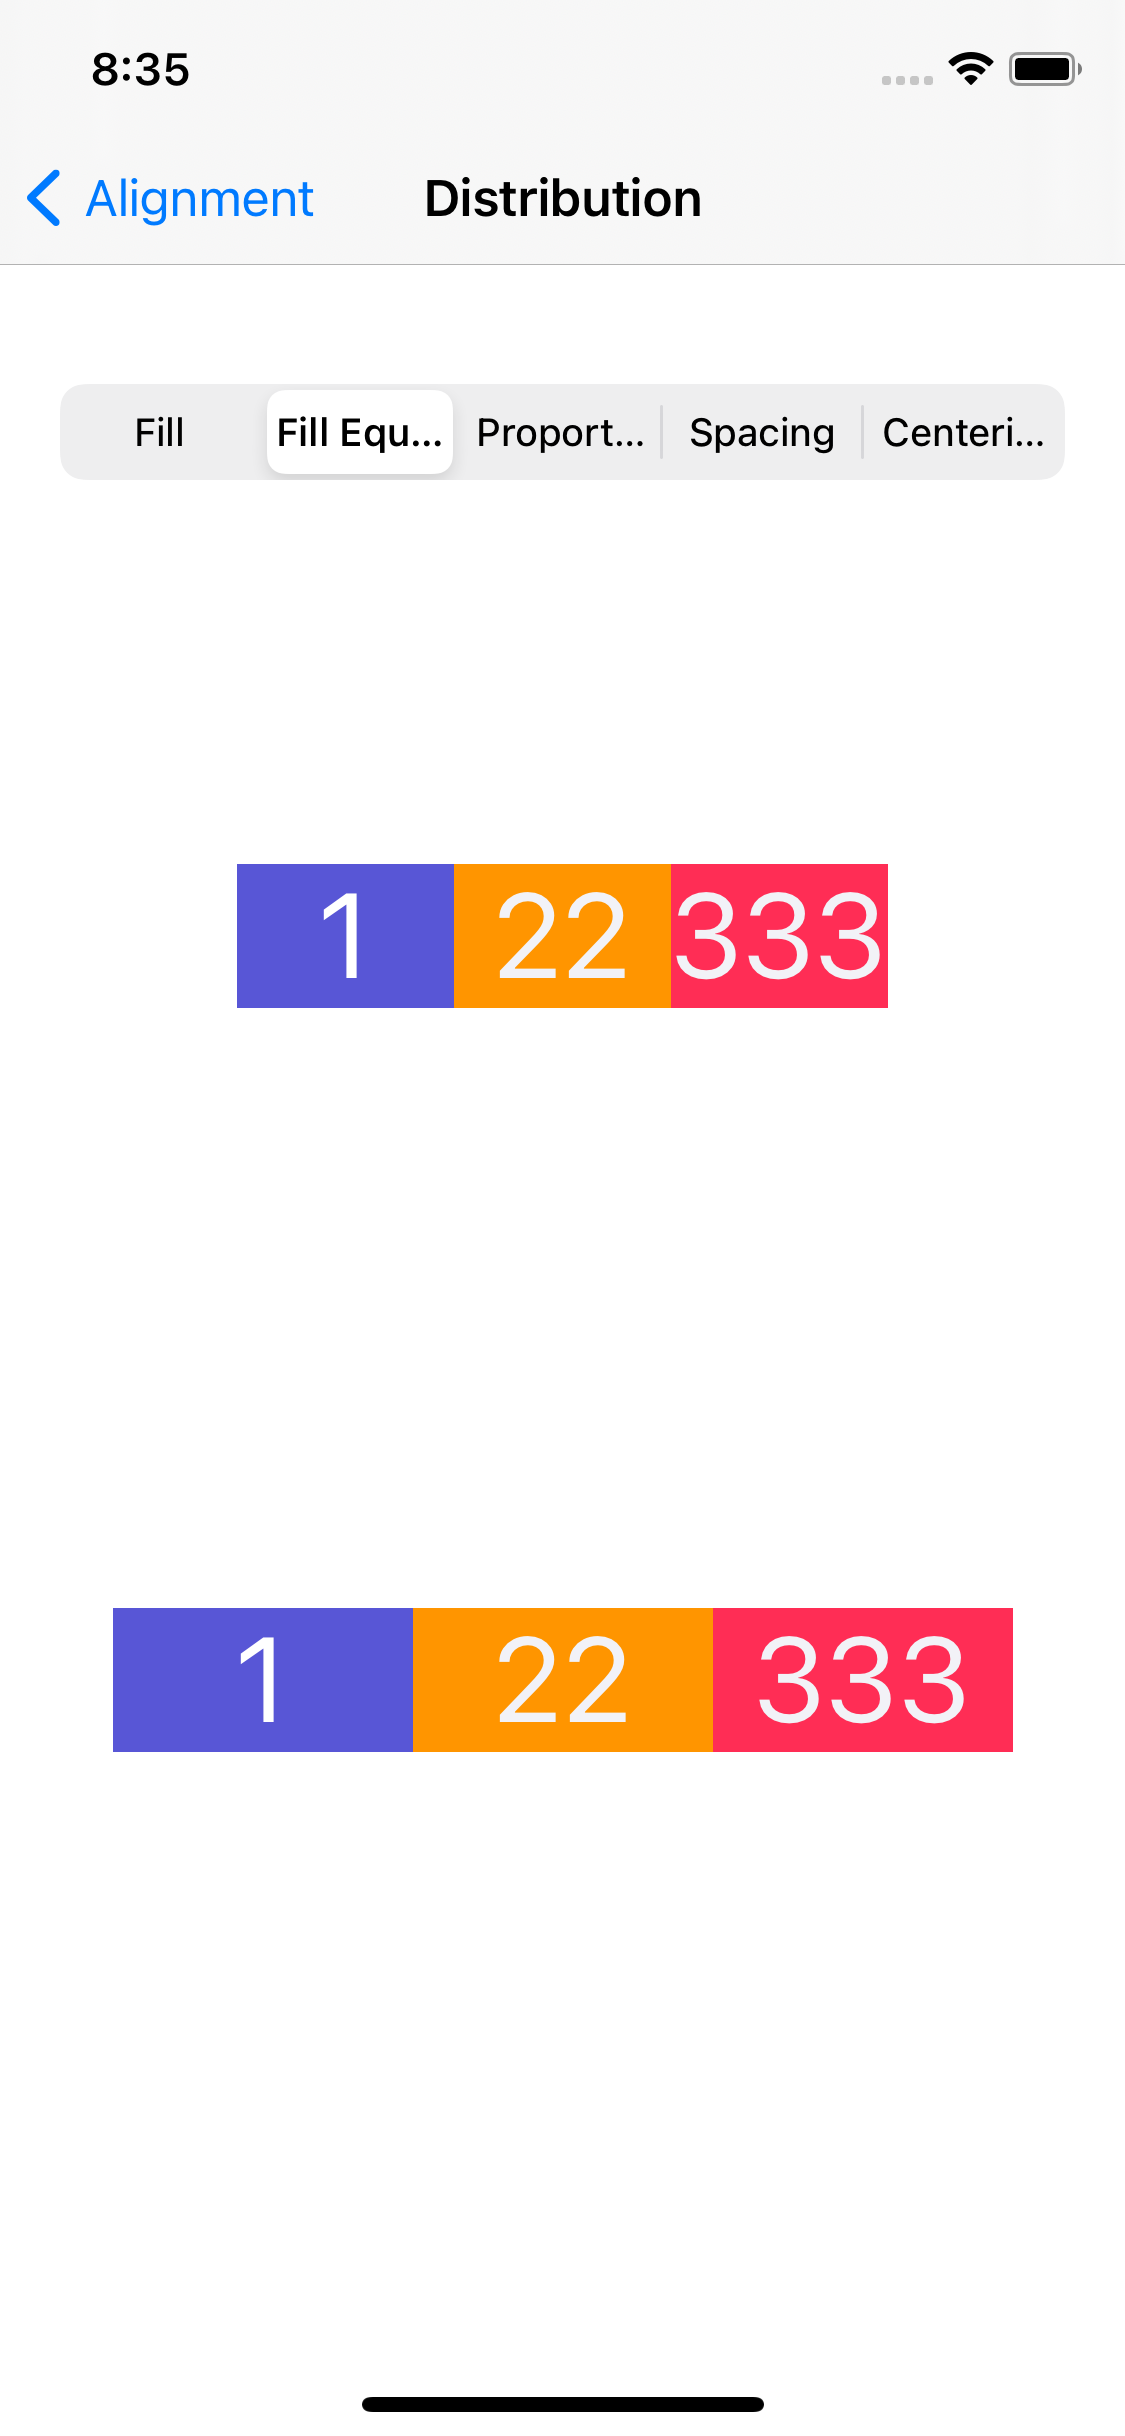
위의 stack은 intrinsic size로,
아래 stack은 너비 300으로 설정되어있다.
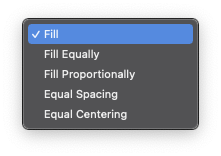
- Fill
기본값으로, subview 또한 고유의 크기(intrinsic size)를 가진다.
stack이 고정 너비를 가진다면 제약 오류가 발생한다.
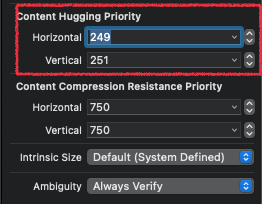
이 경우 Content Hugging Priority(CH), Content Compression Resistance Priority(CR)을 고려해
최종 너비를 결정한다.
storyboard에서 보이는 결과가 보장되지 않는다는 의미로
이를 해결하기 위해선 모든 subView의 CH와 CR을 서로 다르게 하거나,
모든 subVuew의 제약을 직접 추가해야 한다.
실습에선 CH를 조절하여 오류를 해결한다.
결과
- Fill Equally
모든 subView가 가장 큰 view을 기준으로 동일한 너비로 배치된다.
결과
- Fill Proportionally
stack이 intrinsic size를 가지면 Fill과 다를 바 없다.
intrinsic size에 따라 최종 너비가 결정된다.
결과
- Equal Spacing
stack이 intrinsic size를 가지면 Fill과 다를 바 없다.
subview를 intrinsic size로 배치하고, 남는 공간이 있다면 frame의 가장자리를 기준으로 동일한 간격으로 배치한다.
공간이 부족하다면 CR을 고려해 너비를 축소한다.
결과
- Equal Centering
subView의 중심 간의 간격이 동일해진다.
subview를 intrinsic size로 배치하고, 남는 공간이 있다면 frame의 중앙을 기준으로 동일한 간격으로 배치한다.
결과
Arranged SubView
StackView는 UIView를 상속받지만 몇 가지 다른 점이 존재한다.
View는 frame 내부에서 콘텐츠를 자유롭게 표현하고, subView도 자유롭게 배치한다.
하지만 stackView는 콘텐츠를 표현하는 기능이 제한되고 Arranged SubView 방식으로 subView를 관리한다.
stackView는 두 가지 배열을 가지고 있다.
UIClass로부터 상속받은 subviews 배열에 view가 추가되는 경우엔 subView에만 포함된다.
UIStackViewClass에 선언된 arrangedSubviews 배열은 subViews의 하위 집합이고,
따라서 arrangedSubviews 배열에 포함된 view는 반드시 subViews에 포함된다.
이러한 관계는 arrangedSubview는 subView의 속성에 영향을 받지만,
반대로는 성립하지 않는 결과로 이어진다.
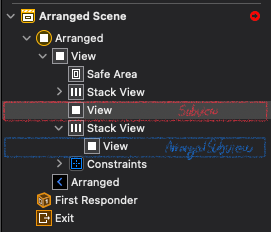
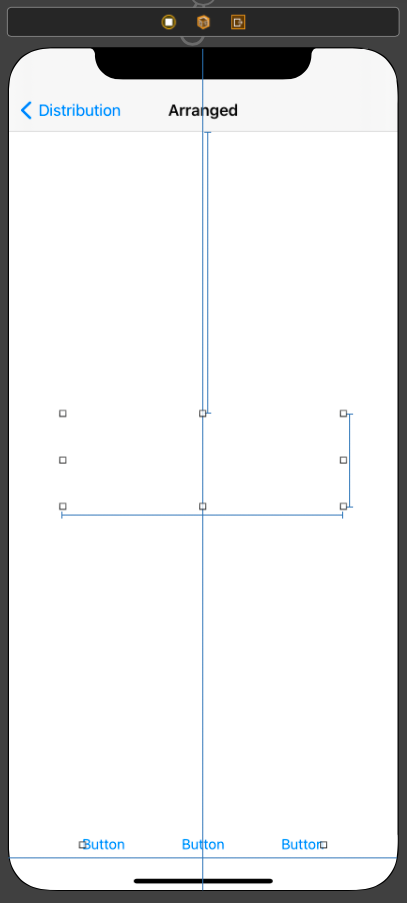
Stroyboard상에서 씬의 RootView에 View를 추가하면 SubView로 추가된다.
단, StackView에 View를 추가하면 Arranged SubView에 추가된다.
따라서 StackView의 SubView로 추가하고 싶다면 코드를 통해 추가해야 한다.
//
//  ArrangedViewController.swift
//  controltest
//
//  Created by Martin.Q on 2021/08/15.
//

import UIKit

class ArrangedViewController: UIViewController {
    @IBOutlet weak var stackView: UIStackView!

    @IBAction func addAction(_ sender: Any) {
    }
    @IBAction func insertAction(_ sender: Any) {
    }
    @IBAction func removeAction(_ sender: Any) {
    }


    override func viewDidLoad() {
        super.viewDidLoad()
    }
}
화면 구성과 코드 연결은 위와 같다.
extension ArrangedViewController {
	private func genView() -> UIView {
		let view = UIView()

		let r = CGFloat.random(in: 0.0 ... 256.0) / 255
		let g = CGFloat.random(in: 0.0 ... 256.0) / 255
		let b = CGFloat.random(in: 0.0 ... 256.0) / 255
		view.backgroundColor = UIColor(red: r, green: g, blue: b, alpha: 1.0)

		return view
	}
}
extension으로 메서드를 만들었다.
해당 메소드는 UIView를 하나 생성하고, backgroundColor를 무작위의 RGB 값으로 설정하는 메서드이다.
@IBAction func addAction(_ sender: Any) {
	let newView = genView()
	stackView.addArrangedSubview(newView)
}
add버튼은 새로운 View를 생성하고, 이를 addArrangedSubview 메서드를 사용해
stackView의 arrangedView배열의 마지막에 추가한다.
추가되는 순서는 view의 표시순서와 같아서 해당 View는 마지막이나 가장 위에 보이게 된다.
@IBAction func insertAction(_ sender: Any) {
	let newView = genView()
	stackView.insertArrangedSubview(newView, at: 0)
}
삽입은 insertArrangedSubview 메서드를 사용한다.
추가할 View와 추가할 위치의 index를 전달한다.
@IBAction func removeAction(_ sender: Any) {
	guard stackView.arrangedSubviews.count > 0 else {
		return
	}
	let rndIndex = Int.random(in: 0..<self.stackView.arrangedSubviews.count)
	let targetView = stackView.arrangedSubviews[rndIndex]
	stackView.removeArrangedSubview(targetView)
}
삭제는 무작위의 View를 삭제한다.
ArrangedView 배열이 비어있는지 확인하고,
범위 내의 무작위 번호를 선택해 해당 View를 ArrangedView 배열에서 삭제한다.
결과
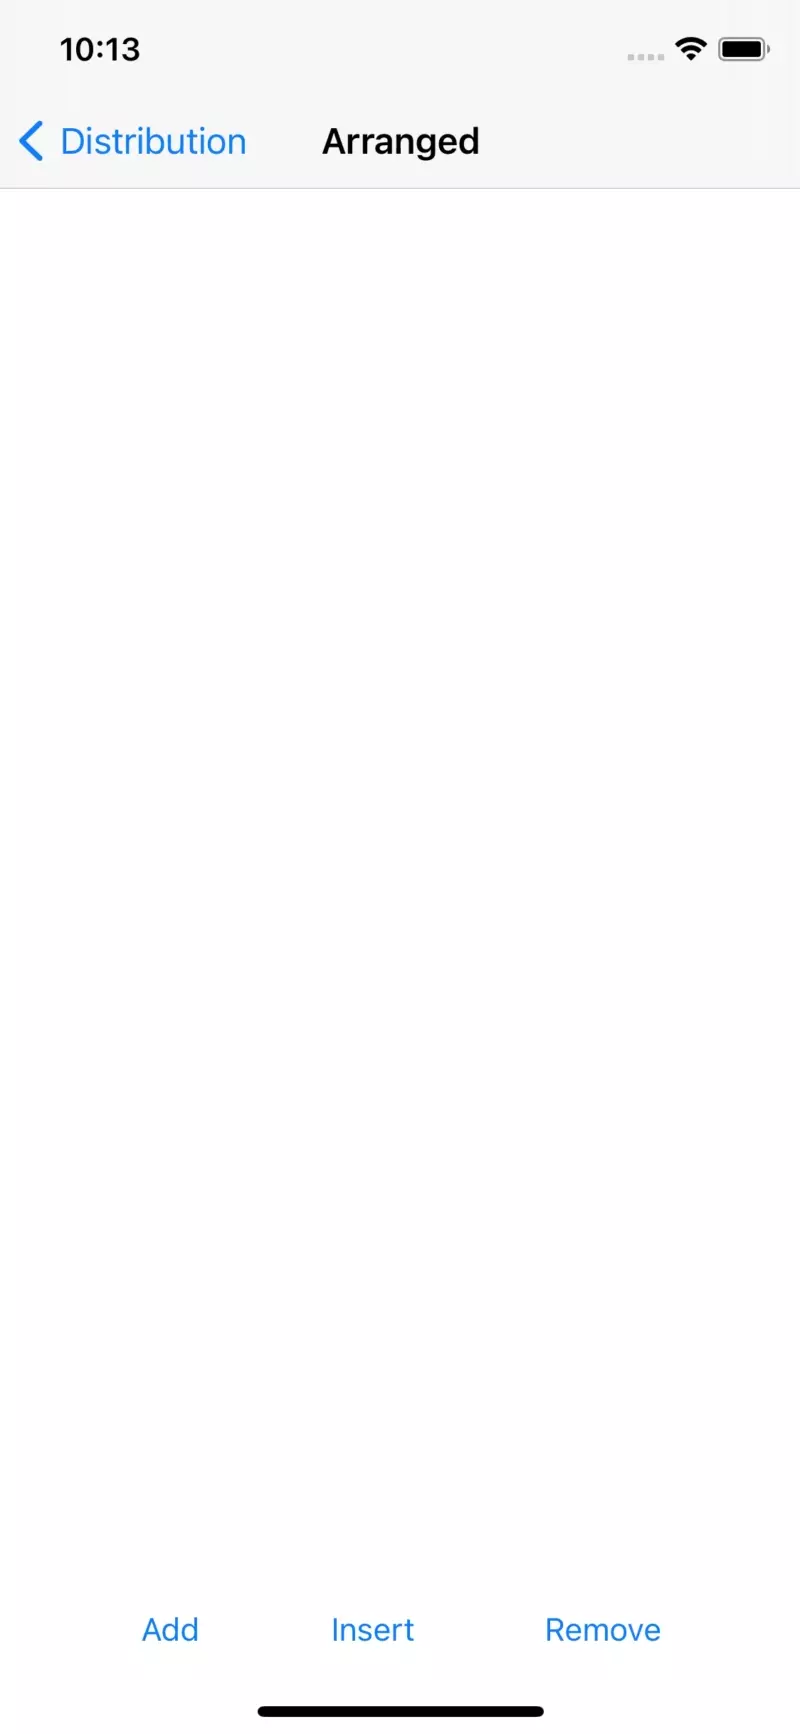
Add를 누르면 가장 오른쪽에 새로운 VIew가 추가되고,
Insert를 누르면 가장 왼쪽에 새로운 View가 추가된다.
Remove를 누르면 존재하는 View 중 무작위의 View가 삭제된다.
코드에서 사용한 AddArrangedSubview와 insertArrangedSubview 메서드는 ArrangedSubview와 Subview에 View를 추가한다.
하지만 삭제에 사용한 removeArrangedSubview 메서드는 ArrangedSubview는 삭제하지만 SubView는 삭제하지 않는다.
따라서 둘 다 삭제하고 싶다면 removeFromSuperview 메서드를 추가적으로 호출해야 한다.
@IBAction func addAction(_ sender: Any) {
	let newView = genView()
	stackView.addArrangedSubview(newView)

	UIView.animate(withDuration: 0.3) {
		self.stackView.layoutIfNeeded()
	}
}
애니메이션을 사용하는 경우
UIView의 animate 메소드를메서드를 호출한 다음, stackView의 layoutIfNeeded 메서드를 다시 호출해 애니메이션을 사용한다.
@IBAction func addAction(_ sender: Any) {
	let newView = genView()
	stackView.addArrangedSubview(newView)

	UIView.animate(withDuration: 0.3) {
		self.stackView.layoutIfNeeded()
	}
}
@IBAction func insertAction(_ sender: Any) {
	let newView = genView()
	stackView.insertArrangedSubview(newView, at: 0)

	UIView.animate(withDuration: 0.3) {
		self.stackView.layoutIfNeeded()
	}
}
@IBAction func removeAction(_ sender: Any) {
	guard stackView.arrangedSubviews.count > 0 else {
		return
	}
	let rndIndex = Int.random(in: 0..<self.stackView.arrangedSubviews.count)
	let targetView = stackView.arrangedSubviews[rndIndex]
	stackView.removeArrangedSubview(targetView)

	UIView.animate(withDuration: 0.3) {
		self.stackView.layoutIfNeeded()
	}
}
다른 버튼들도 동일한 코드를 추가해 준다.
결과
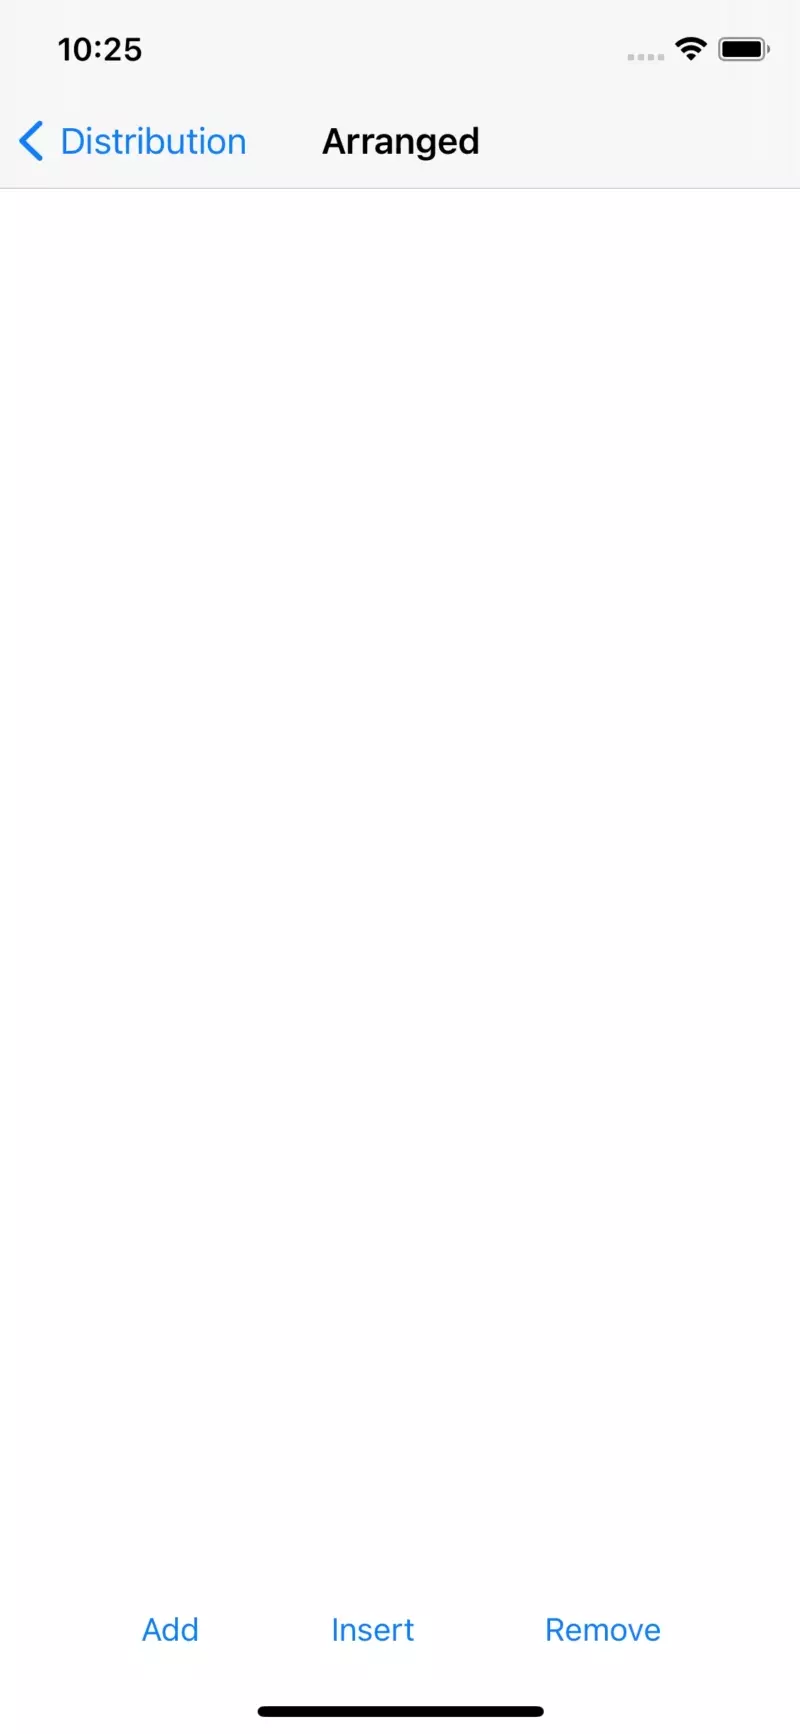
Add와 Insert는 애니메이션이 작동하지만 Remove는 작동하지 않는 걸 확인할 수 있다.
해당 문제의 원인은 다음과 같다.
@IBAction func removeAction(_ sender: Any) {
	guard stackView.arrangedSubviews.count > 0 else {
		return
	}
	let rndIndex = Int.random(in: 0..<self.stackView.arrangedSubviews.count)
	let targetView = stackView.arrangedSubviews[rndIndex]
    //#1
	stackView.removeArrangedSubview(targetView)
	//#2
	UIView.animate(withDuration: 0.3) {
		self.stackView.layoutIfNeeded()
	}
}
애니메이션이 반응하는 때가 stackView의 레이아웃이 반응할 때이다.
하지만 대상인 targetView는 이미 removeArrangedSubview로 삭제가 되면서 해당 메소드를 호출할 순서가 사라진다.
@IBAction func removeAction(_ sender: Any) {
	guard stackView.arrangedSubviews.count > 0 else {
		return
	}
	let rndIndex = Int.random(in: 0..<self.stackView.arrangedSubviews.count)
	let targetView = stackView.arrangedSubviews[rndIndex]

	UIView.animate(withDuration: 0.3) {
		targetView.isHidden = true
	} completion: {
		finished in
		self.stackView.removeArrangedSubview(targetView)
	}
}
따라서 targetView의 hidden 속성을 활성화해서 애니메이션을 실행하고,
completion 블록을 사용해 애니메이션이 종료되면 targetView를 삭제하도록 구현한다.
- 숨기기(W. 애니메이션)
- 삭제
결과
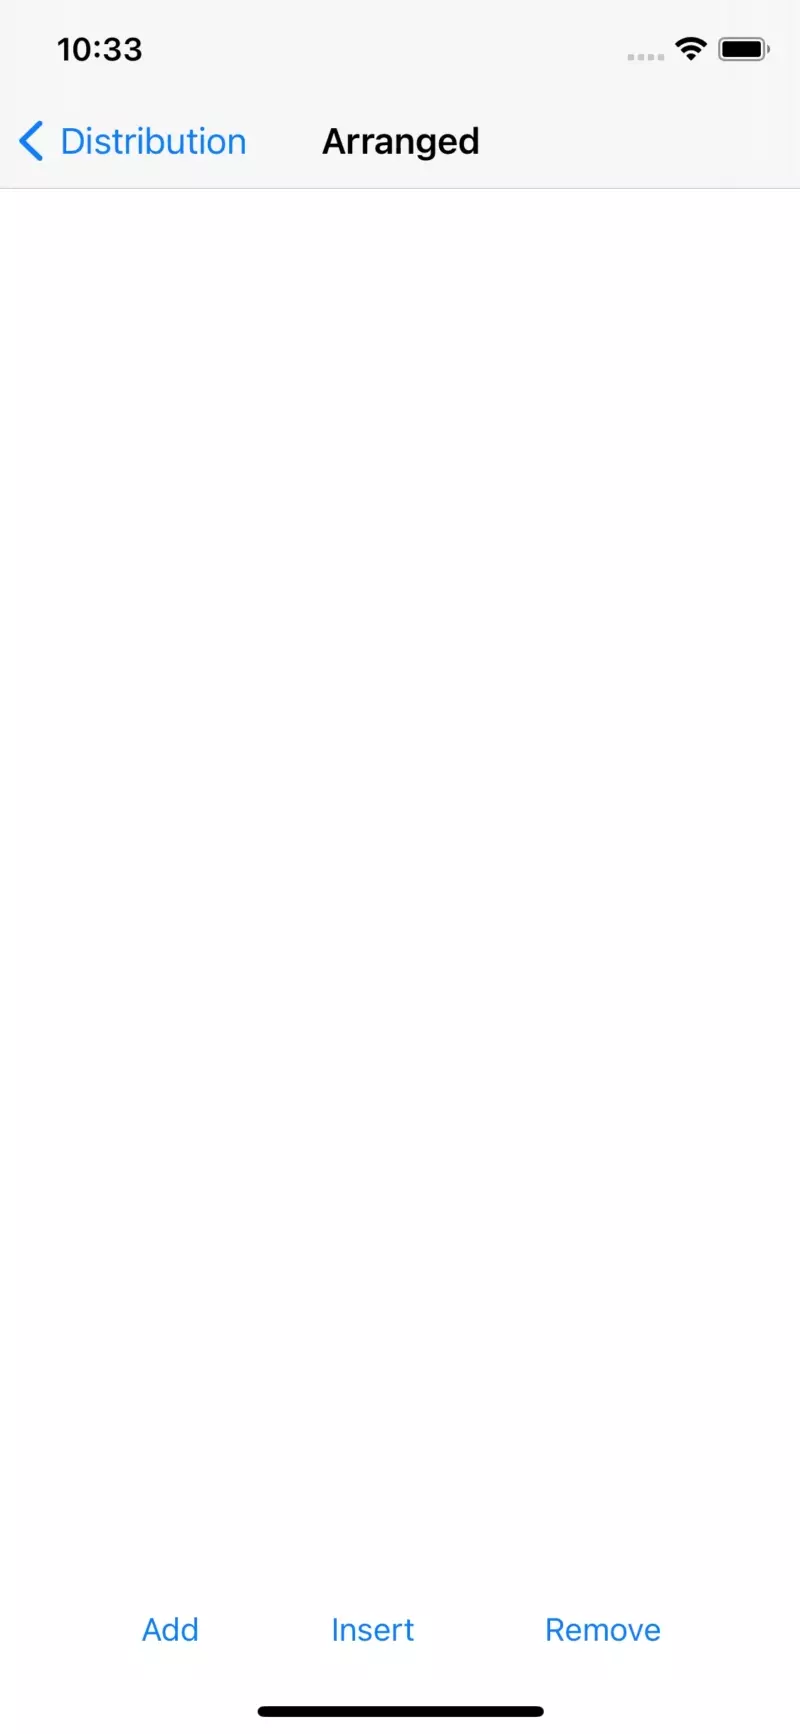
Remove버튼 동작시에도 애니메이션이 실행되는 것을 확인할 수 있다.
override func viewDidLoad() {
	super.viewDidLoad()
	let newView = genView()
	stackView.addSubview(newView)
}
이번엔 viewDidLoad 메서드에서 ArrangedSubview가 아닌 Subview를 추가해도
결과
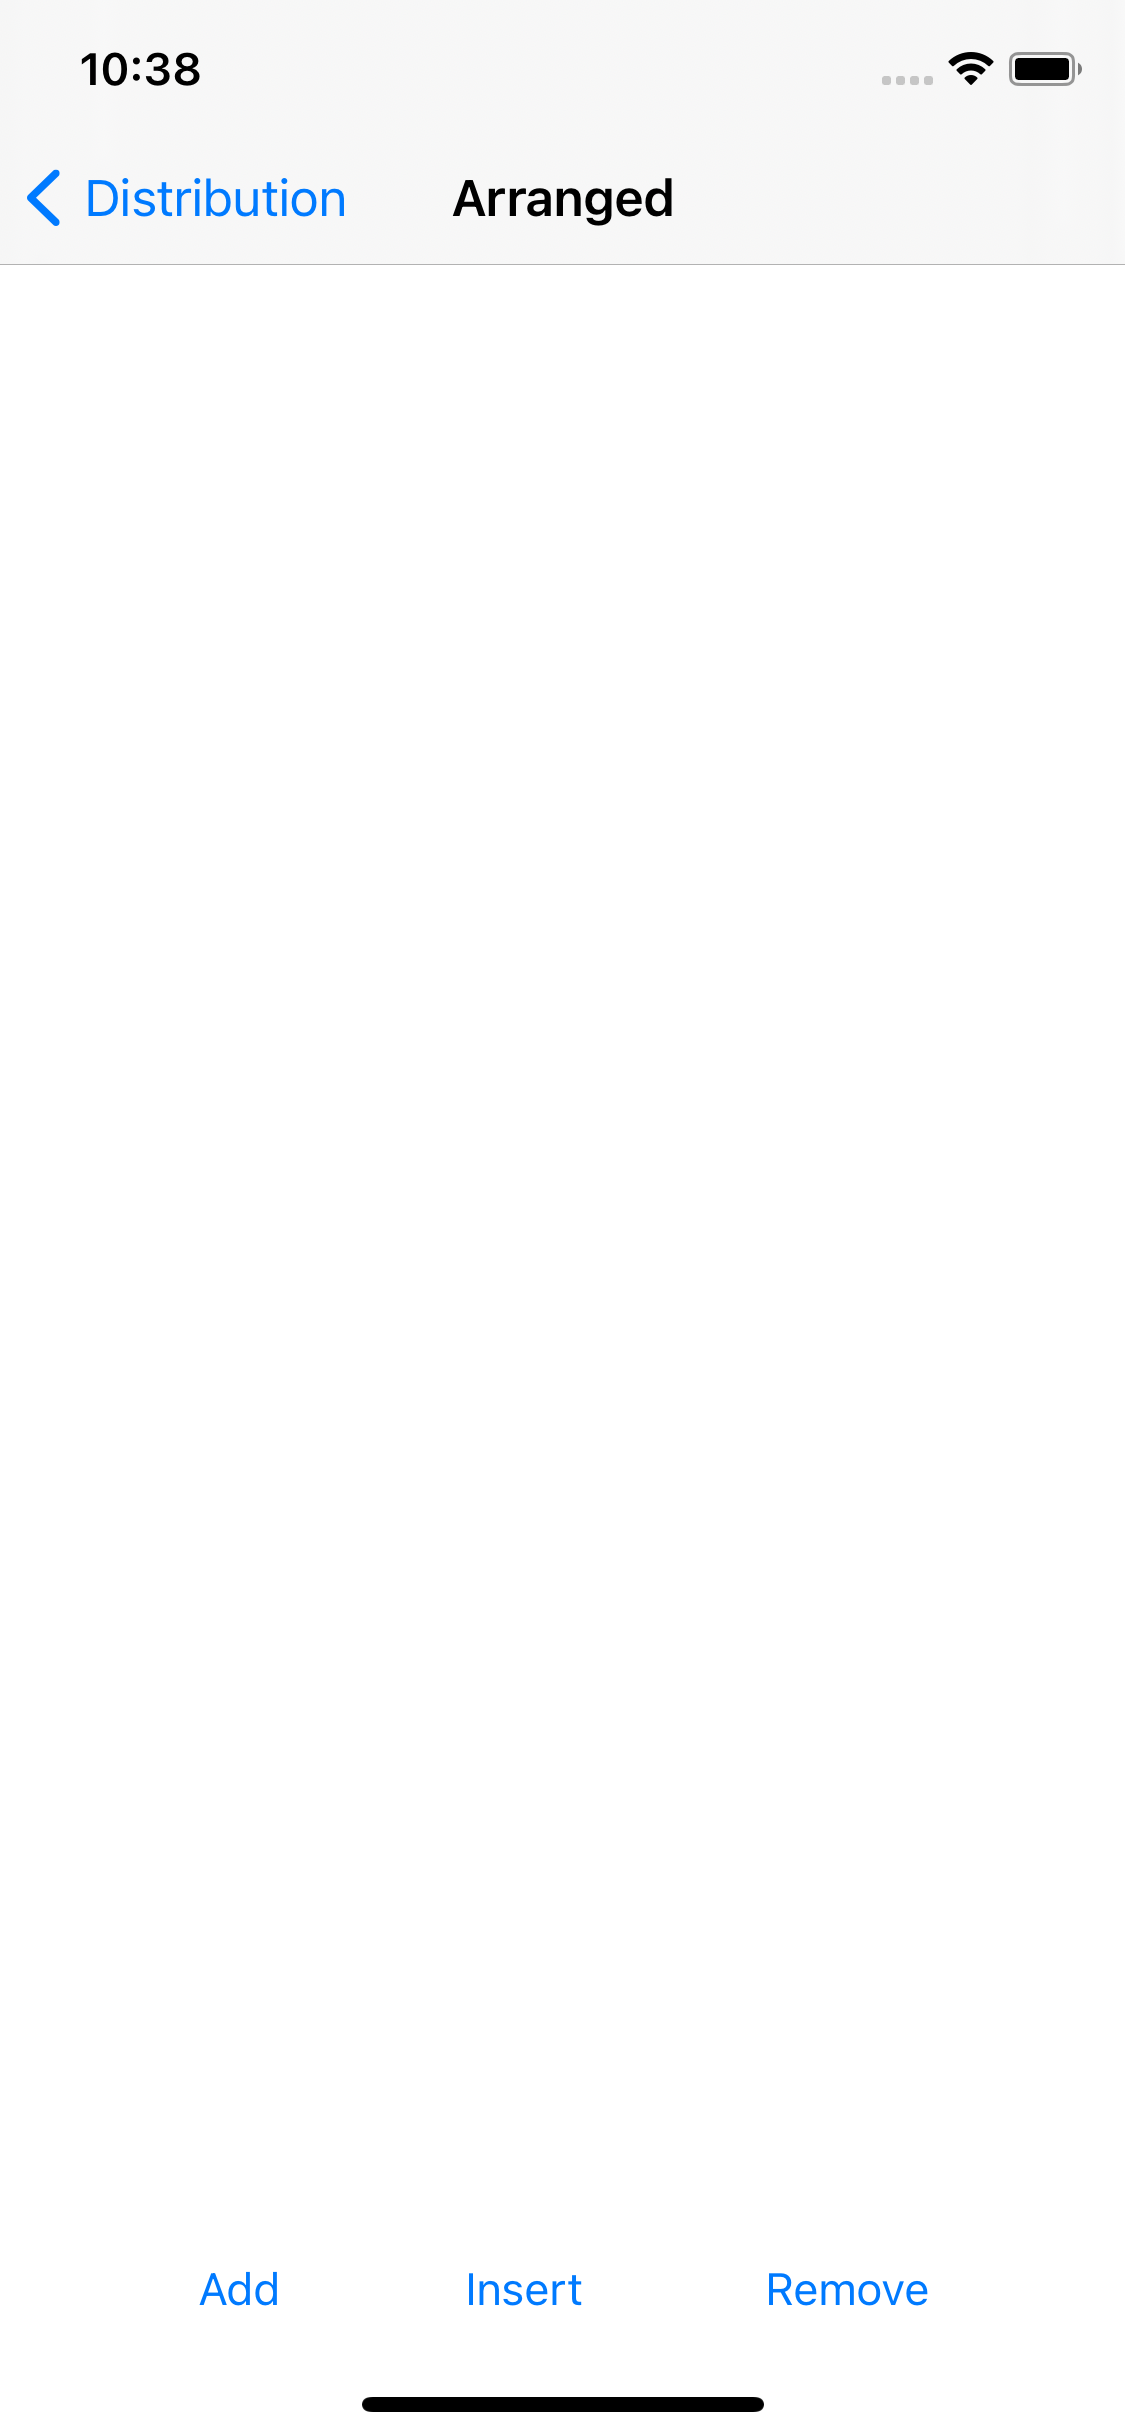
View가 추가되지 않고 빈 화면으로 나오는 것을 확인할 수 있다.
extension ArrangedViewController {
    private func genView() -> UIView {
        let view = UIView()

        let r = CGFloat.random(in: 0.0 ... 256.0) / 255
        let g = CGFloat.random(in: 0.0 ... 256.0) / 255
        let b = CGFloat.random(in: 0.0 ... 256.0) / 255
        view.backgroundColor = UIColor(red: r, green: g, blue: b, alpha: 1.0)

        return view
    }
}
이는 extension에서 구현한 genView 메소드에서 View를 생성할 때 frame을 지정하지 않았기 때문에 발생하는 문제로,
현 상태에서 생성되는 View는 좌표 0에 크기 0인 아주 작은 View가 된다.
ArrangedSubview는 stackView가 직접 관리하지만 SubView는 관리하지 않아 직접 지정해야 한다.
override func viewDidLoad() {
	super.viewDidLoad()
	let newView = genView()
	newView.frame = stackView.bounds
	stackView.addSubview(newView)
}
따라서 위와 같이 메소드 호출 직전 frame을 지정해 줘야만 한다.
이를 기억해 두도록 하자.
Alert Controller

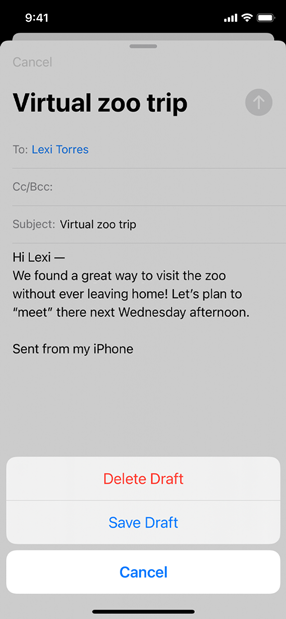
iOS의 경고는 Alert와 ActionSheet 두 가지가 있다.
첫 번째 Alert는 두 가지의 선택지를 제공하고, 이 선택지는 Action이라고 부른다.
두 번째 ActionSheet는 세 개 이상의 선택지를 제공할 때 사용한다.
//
//  AlertViewController.swift
//  controltest
//
//  Created by Martin.Q on 2021/08/16.
//

import UIKit

class AlertViewController: UIViewController {
    @IBAction func alertBtn(_ sender: Any) {

    }


    override func viewDidLoad() {
        super.viewDidLoad()
    }
}
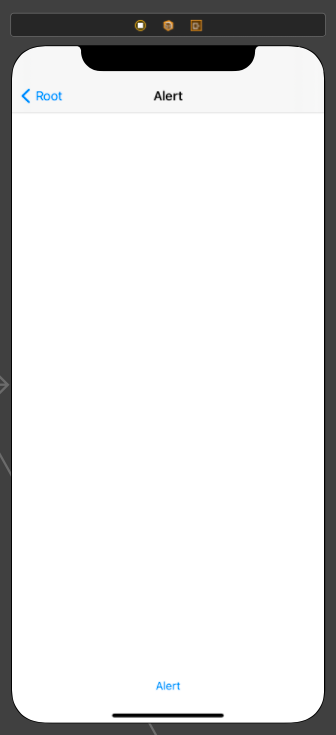
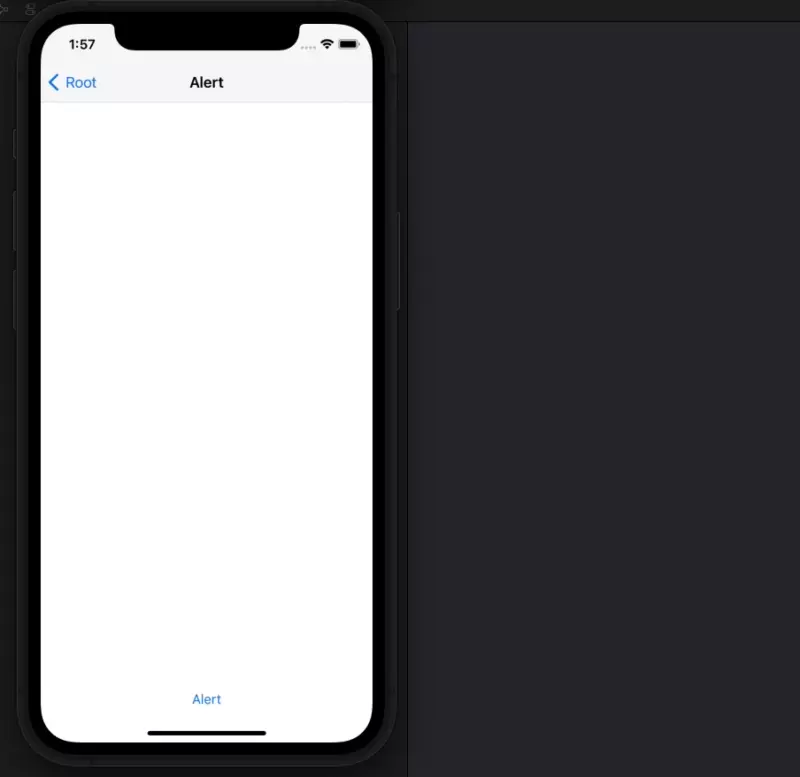
씬의 구성과 연결은 위와 같다.
Alert 추가하기
@IBAction func alertBtn(_ sender: Any) {
	let alert = UIAlertController(title: "AlertTest", message: "Alert Message", preferredStyle: .alert)
}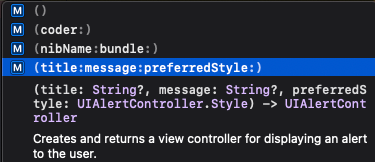
Alert를 구현하기 위해 UIAlertController 인스턴스를 먼저 생성한다.
전달하는 메서드는 title, message, style이며 title과 message는 Optional 형식이므로 nil을 전달할 수 있다.
style은 alert와 actionSheet를 결정하게 된다.
@IBAction func alertBtn(_ sender: Any) {
	let alert = UIAlertController(title: "AlertTest", message: "Alert Message", preferredStyle: .alert)
	present(alert, animated: true, completion: nil)
}
이후 present 메서드를 사용해 디자인한 경고창을 화면에 표시한다.
첫 번째 파라미터는 화면에 표시할 인스턴스를, 두 번째 파라미터는 애니메이션 여부를,
세 번째 파라미터는 완료 후에 동작할 코드를 전달한다.
결과
이렇게 디자인한 경고창이 표시된다.
단, Alert에서 빠져나올 방법이 존재하지 않는다.
Alert 밖의 영역을 터치해도 빠져나올 수 없기 때문에 Alert에는 반드시 하나 이상의 Action이 존재해야 한다.
Alert Action 추가하기
@IBAction func alertBtn(_ sender: Any) {
	let alert = UIAlertController(title: "AlertTest", message: "Alert Message", preferredStyle: .alert)

	let closeBtn = UIAlertAction(title: "Close", style: .default) { (action) in
		print(action.title)
	}

    present(alert, animated: true, completion: nil)
}
Alert에 Action을 추가할 때는 UIAlertAction을 사용해 인스턴스를 생성한다.
첫 번째 파라미터로 버튼의 이름을,
두 번째 파라미터로는 style을 전달하는데 cancel, default, destructive 세 가지의 스타일이 있다.
각각 취소, 기본, 강조 스타일이다.
세 번째 파라미터로는 실행할 클로저를 전달한다.
해당 클로저는 action이 선택되면 자동으로 호출된다.
버튼을 누르면 콘솔에 버튼의 이름이 출력되도록 구현했다.
@IBAction func alertBtn(_ sender: Any) {
	let alert = UIAlertController(title: "AlertTest", message: "Alert Message", preferredStyle: .alert)

	let closeBtn = UIAlertAction(title: "Close", style: .default) { (action) in
		print(action.title)
	}

	alert.addAction(closeBtn)

	present(alert, animated: true, completion: nil)
}
이후 Alert의 addAction 메서드를 사용해 디자인한 action을 추가한다.
결과
추가된 Close 버튼을 누를 때마다 창이 닫히고, 콘솔에 버튼의 이름이 출력된다.
@IBAction func alertBtn(_ sender: Any) {
	let alert = UIAlertController(title: "AlertTest", message: "Alert Message", preferredStyle: .alert)

	let closeBtn = UIAlertAction(title: "Close", style: .default) { (action) in
		print(action.title)
	}
	let cancelBtn = UIAlertAction(title: "Cancel", style: .cancel) { (action) in
		print(action.title)
	}

	alert.addAction(closeBtn)
	alert.addAction(cancelBtn)

	present(alert, animated: true, completion: nil)
}
이번엔 같은 방식으로 Cancel 버튼을 추가한다.
style은 cancel이다.
결과

cancel 스타일을 적용한 버튼은 기본 버튼보다 왼쪽에 표시된다.
@IBAction func alertBtn(_ sender: Any) {
	let alert = UIAlertController(title: "AlertTest", message: "Alert Message", preferredStyle: .alert)

	let closeBtn = UIAlertAction(title: "Close", style: .default) { (action) in
		print(action.title)
	}
	let cancelBtn = UIAlertAction(title: "Cancel", style: .cancel) { (action) in
		print(action.title)
	}
	let destructBtn = UIAlertAction(title: "Destruct", style: .destructive) { (action) in
		print(action.title)
	}

	alert.addAction(closeBtn)
	alert.addAction(cancelBtn)
	alert.addAction(destructBtn)

	present(alert, animated: true, completion: nil)
}
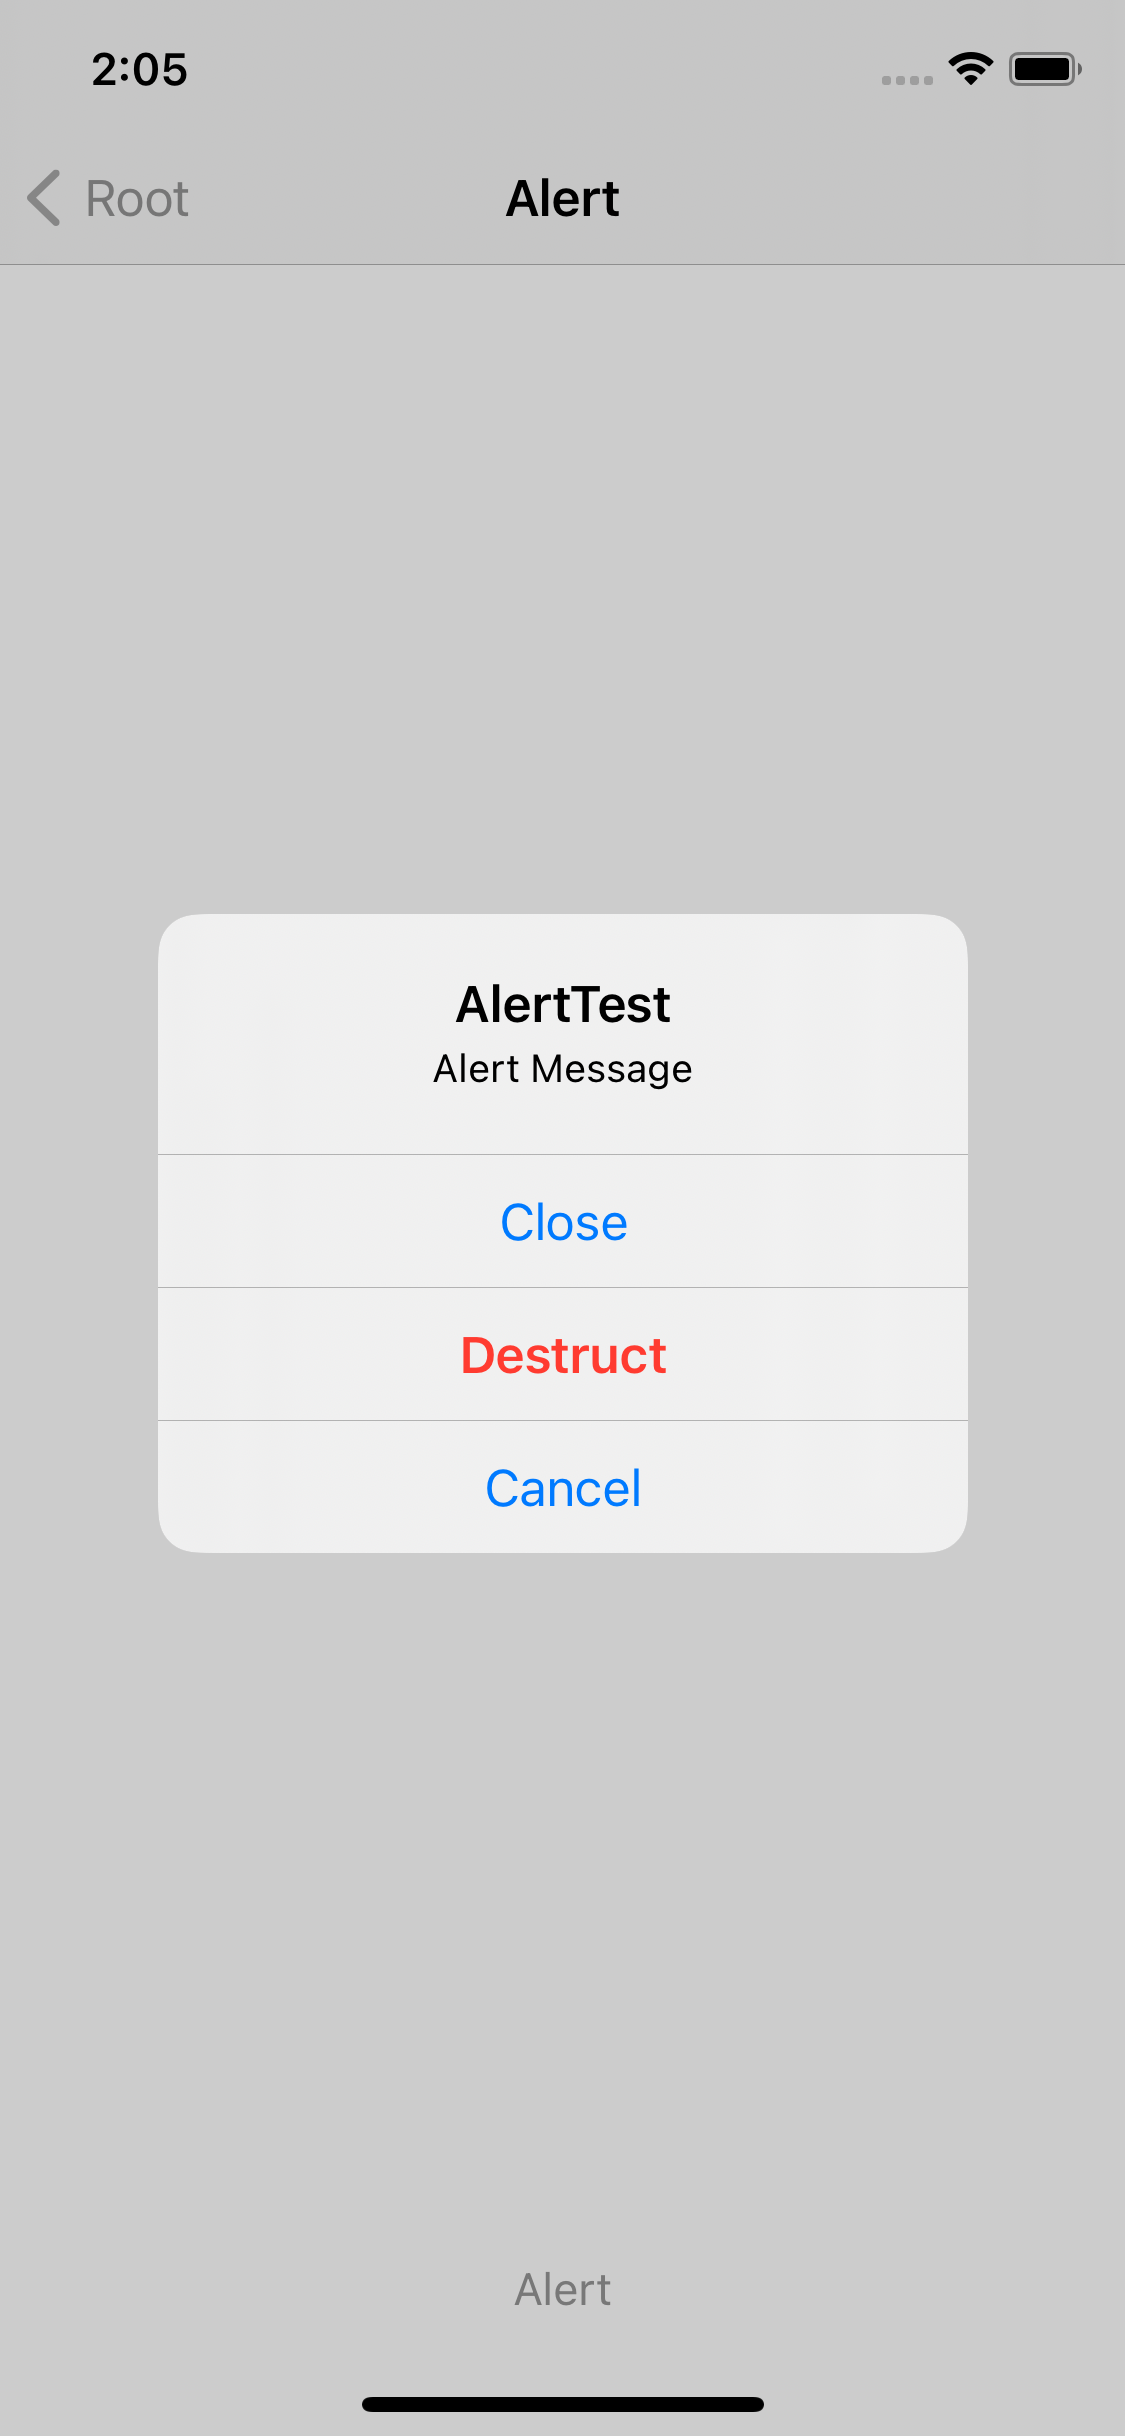
결과
Action이 세 개 이상인 경우 가로배치에서 세로 배치로 변경된다.
Cancel 스타일의 버튼이 가장 아래쪽에, Destructive 스타일의 버튼이 그 위에, 기본 스타일의 버튼이 다시 그 위에 표시된다.
Destructive 스타일을 적용한 버튼은 빨간색으로 표시되는 것을 확인할 수 있다.
또한 Cancel 버튼이 조금 더 굵은 글씨로 강조된 것을 알 수 있는데,
Alert는 기본적으로 Cancel 스타일의 버튼을 강조하도록 되어있다.
이를 preferred Action이라고 한다.
@IBAction func alertBtn(_ sender: Any) {
	let alert = UIAlertController(title: "AlertTest", message: "Alert Message", preferredStyle: .alert)

	let closeBtn = UIAlertAction(title: "Close", style: .default) { (action) in
		print(action.title)
	}
	let cancelBtn = UIAlertAction(title: "Cancel", style: .cancel) { (action) in
		print(action.title)
	}
	let destructBtn = UIAlertAction(title: "Destruct", style: .destructive) { (action) in
		print(action.title)
	}

	alert.addAction(closeBtn)
	alert.addAction(cancelBtn)
	alert.addAction(destructBtn)

	alert.preferredAction = destructBtn

	present(alert, animated: true, completion: nil)
}
Alert를 표시하기 직전 preferredAction 속성에 강조할 버튼을 전달하면
결과
이렇게 해당 버튼이 굵은 글씨로 강조되는 것을 확인할 수 있다.
또한, 해당 버튼의 우선순위가 높아지기 때문에 블루투스 키보드를 통한 return 조작으로 해당 버튼을 실행할 수 있게 된다.
@IBAction func alertBtn(_ sender: Any) {
	let alert = UIAlertController(title: "AlertTest", message: "Alert Message", preferredStyle: .alert)

	let closeBtn = UIAlertAction(title: "Close", style: .default) { (action) in
		print(action.title)
	}
	alert.preferredAction = closeBtn
	let cancelBtn = UIAlertAction(title: "Cancel", style: .cancel) { (action) in
		print(action.title)
	}
	let destructBtn = UIAlertAction(title: "Destruct", style: .destructive) { (action) in
		print(action.title)
	}

	alert.addAction(closeBtn)
	alert.addAction(cancelBtn)
	alert.addAction(destructBtn)

	present(alert, animated: true, completion: nil)
}
단 preferredAction으로 지정하는 순서가 중요한데,
위와 같이 addAction 메서드 전에 사용하게 되면 크래시가 발생한다.
또한, preferredAction은 Alert의 스타일이 alert일 경우에만 사용할 수 있고, actionSheet에선 사용할 수 없다.
Alert에 TextField 추가하기
경고창에 TextField를 추가해 입력값을 받을 수 있다.
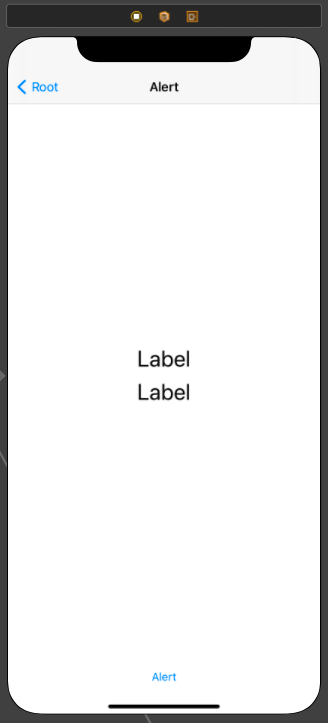
//
//  AlertViewController.swift
//  controltest
//
//  Created by Martin.Q on 2021/08/16.
//

import UIKit

class AlertViewController: UIViewController {
	@IBOutlet weak var input1: UILabel!
	@IBOutlet weak var input2: UILabel!

	@IBAction func alertBtn(_ sender: Any) {
	}


	override func viewDidLoad() {
		super.viewDidLoad()
	}
}
씬 구성과 코드 연결은 위와 같다.
목표는 Alert에 TextField를 추가하고,
해당 TextField로 값을 입력받아 Label에 표시한다.
class AlertViewController: UIViewController {
	@IBOutlet weak var input1: UILabel!
	@IBOutlet weak var input2: UILabel!

	@IBAction func alertBtn(_ sender: Any) {
		let alert = UIAlertController(title: "Input Value", message: "type something", preferredStyle: .alert)

		let submitBtn = UIAlertAction(title: "Submit", style: .default) { (action) in
			self.input1.text = "blabla"
			self.input2.text = "blabla"
		}

		alert.addAction(submitBtn)

		present(alert, animated: true, completion: nil)
	}


	override func viewDidLoad() {
		super.viewDidLoad()
	}
}
위에서 작성했던 코드로 기본 Alert를 디자인한다.
결과

현 상태의 Alert의 모습과 결과는 위와 같다.
class AlertViewController: UIViewController {
	@IBOutlet weak var input1: UILabel!
	@IBOutlet weak var input2: UILabel!

	@IBAction func alertBtn(_ sender: Any) {
		let alert = UIAlertController(title: "Input Value", message: "type something", preferredStyle: .alert)

		alert.addTextField { (inputValue1) in
		}
		alert.addTextField { (inputValue2) in
		}

		alert.addAction(submitBtn)

		present(alert, animated: true, completion: nil)
		}


		override func viewDidLoad() {
		super.viewDidLoad()
	}
}
textField를 추가할 때는 addTextField를 사용한다.
클로저를 전달하고, in 앞에는 textField의 이름을 전달한다.
class AlertViewController: UIViewController {
	@IBOutlet weak var input1: UILabel!
	@IBOutlet weak var input2: UILabel!

	@IBAction func alertBtn(_ sender: Any) {
		let alert = UIAlertController(title: "Input Value", message: "type something", preferredStyle: .alert)

		alert.addTextField { (inputValue1) in
		}
		alert.addTextField { (inputValue2) in
		}

		let submitBtn = UIAlertAction(title: "Submit", style: .default) { [weak self] (action) in
			if let inputList = alert.textFields {
				if let value1 = inputList.first {
					self?.input1.text = value1.text
				}
                if let value2 = inputList.last {
                    self?.input2.text = value2.text
                }
			}
		}

		alert.addAction(submitBtn)

		present(alert, animated: true, completion: nil)
	}

	override func viewDidLoad() {
		super.viewDidLoad()
	}
}
해당 textField에 접근할 때는 Alert의 textFields 속성으로 접근한다.
인덱스 대신 first, last 등의 속성을 사용하면 배열이 비어있을 때 발생할 충돌을 방지할 수 있다.
결과

값을 입력받아 Label을 갱신하게 됐다.
alert.addTextField { (inputValue1) in
	inputValue1.placeholder = "Write Something"
}
alert.addTextField { (inputValue2) in
	inputValue2.placeholder = "Mask Something"
	inputValue2.isSecureTextEntry = true
}
추가한 textField에는 위와 같이 기존처럼 속성에 접근할 수 있다.
따라서 placeholder를 설정하고,
inputValue2는 입력값을 마스킹하도록 수정했다.
결과
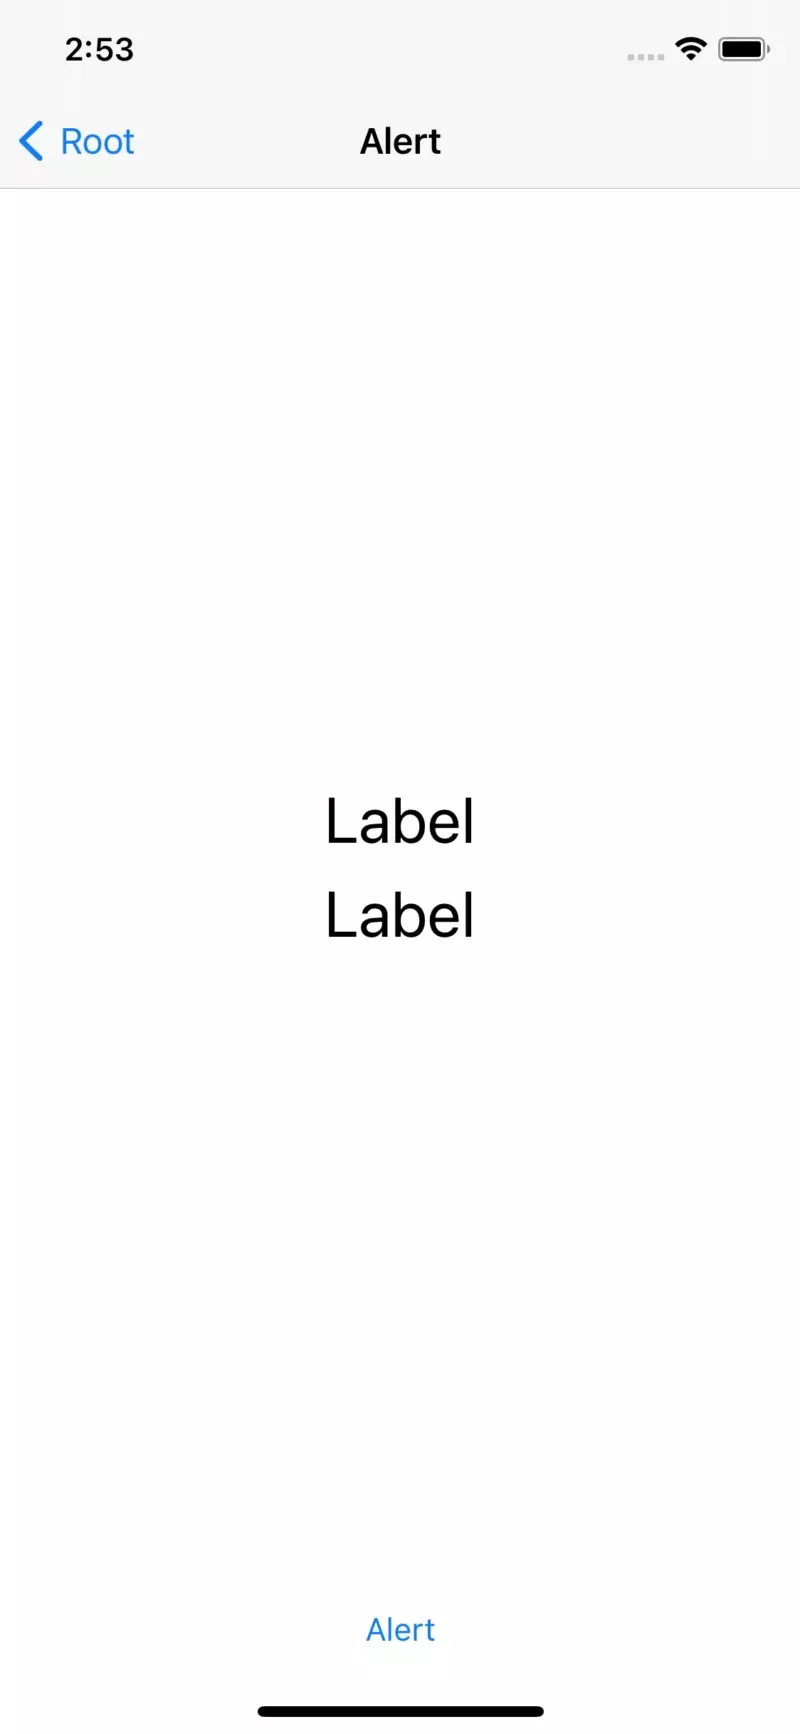
의도한 대로 작동하는 것을 확인할 수 있다.
textField는 Alert의 스타일이 actionSheet일 때는 작동하지 않는다.
Action Sheet
//
//  ActionSheetViewController.swift
//  controltest
//
//  Created by Martin.Q on 2021/08/16.
//

import UIKit

class ActionSheetViewController: UIViewController {
	@IBOutlet weak var label: UILabel!

	@IBAction func sheetBtn(_ sender: Any) {
		let alert = UIAlertController(title: "Alert", message: "somethind", preferredStyle: .actionSheet)

		let number1 = UIAlertAction(title: "Number1", style: .default) { (action) in
			self.label.text = "number1"
		}
		let number2 = UIAlertAction(title: "Number2", style: .default) { (action) in
			self.label.text = "number2"
		}
		let number3 = UIAlertAction(title: "Number3", style: .default) { (action) in
			self.label.text = "number3"
		}
		let number4 = UIAlertAction(title: "Number4", style: .default) { (action) in
			self.label.text = "number4"
		}
		let number5 = UIAlertAction(title: "Number5", style: .default) { (action) in
			self.label.text = "number5"
		}
		let number6 = UIAlertAction(title: "Number6", style: .default) { (action) in
			self.label.text = "number6"
		}
		let number7 = UIAlertAction(title: "Number7", style: .default) { (action) in
			self.label.text = "number7"
		}
		let cancelBtn = UIAlertAction(title: "Cancel", style: .cancel, handler: nil)

		alert.addAction(number1)
		alert.addAction(number2)
		alert.addAction(number3)
		alert.addAction(number4)
		alert.addAction(number5)
		alert.addAction(number6)
		alert.addAction(number7)
		alert.addAction(cancelBtn)

		present(alert, animated: true, completion: nil)
	}


	override func viewDidLoad() {
		super.viewDidLoad()
	}
}
기존과 같은 방식으로 Alert를 구현하고 스타일을 actionSheet으로 변경한다.
결과

iOS 상에서는 문제없이 실행되지만 iPad에선 상황이 다르게 크래시가 발생한다.

에러 내용을 요약하면 iPad에선 ActionSheet를 popOver 형태로 구현하는데,
이 때는 loaction information이 반드시 전달되어야 한다는 것이다.
우린 location information을 전달한 적이 없으므로 당연히 크래시가 발생했다.
class ActionSheetViewController: UIViewController {
	@IBOutlet weak var label: UILabel!

	@IBAction func sheetBtn(_ sender: Any) {
		let alert = UIAlertController(title: "Alert", message: "somethind", preferredStyle: .actionSheet)

		let number1 = UIAlertAction(title: "Number1", style: .default) { (action) in
			self.label.text = "number1"
		}
		let number2 = UIAlertAction(title: "Number2", style: .default) { (action) in
			self.label.text = "number2"
		}
		let number3 = UIAlertAction(title: "Number3", style: .default) { (action) in
			self.label.text = "number3"
		}
		let number4 = UIAlertAction(title: "Number4", style: .default) { (action) in
			self.label.text = "number4"
		}
		let number5 = UIAlertAction(title: "Number5", style: .default) { (action) in
			self.label.text = "number5"
		}
		let number6 = UIAlertAction(title: "Number6", style: .default) { (action) in
			self.label.text = "number6"
		}
		let number7 = UIAlertAction(title: "Number7", style: .default) { (action) in
			self.label.text = "number7"
		}
		let cancelBtn = UIAlertAction(title: "Cancel", style: .cancel, handler: nil)

		alert.addAction(number1)
		alert.addAction(number2)
		alert.addAction(number3)
		alert.addAction(number4)
		alert.addAction(number5)
		alert.addAction(number6)
		alert.addAction(number7)
		alert.addAction(cancelBtn)

		if let pc = alert.popoverPresentationController {
			pc.sourceView
			pc.sourceRect
		}

		present(alert, animated: true, completion: nil)
	}


	override func viewDidLoad() {
		super.viewDidLoad()
	}
}
Alert를 표시하기 전에 alert의 popoverPresentationController에 접근해 sourceView와 sourceRect를 모두 전달해야 한다.
만약 BarButton을 대상으로 popover가 표시된다면 barButtonItem만 전달하면 된다.
if let pc = alert.popoverPresentationController {
	pc.sourceView = view
	pc.sourceRect = sender.frame
}
sourceRect는 popover의 위치를 전달한다.
따라서 우리가 선택할 버튼의 frame을 전달한다.
sourceView는 popover가 표시될 container를 설정한다.
popover를 표시할 충분히 넓은 공간을 전달해야 한다. 보통은 rootView를 전달한다.
결과
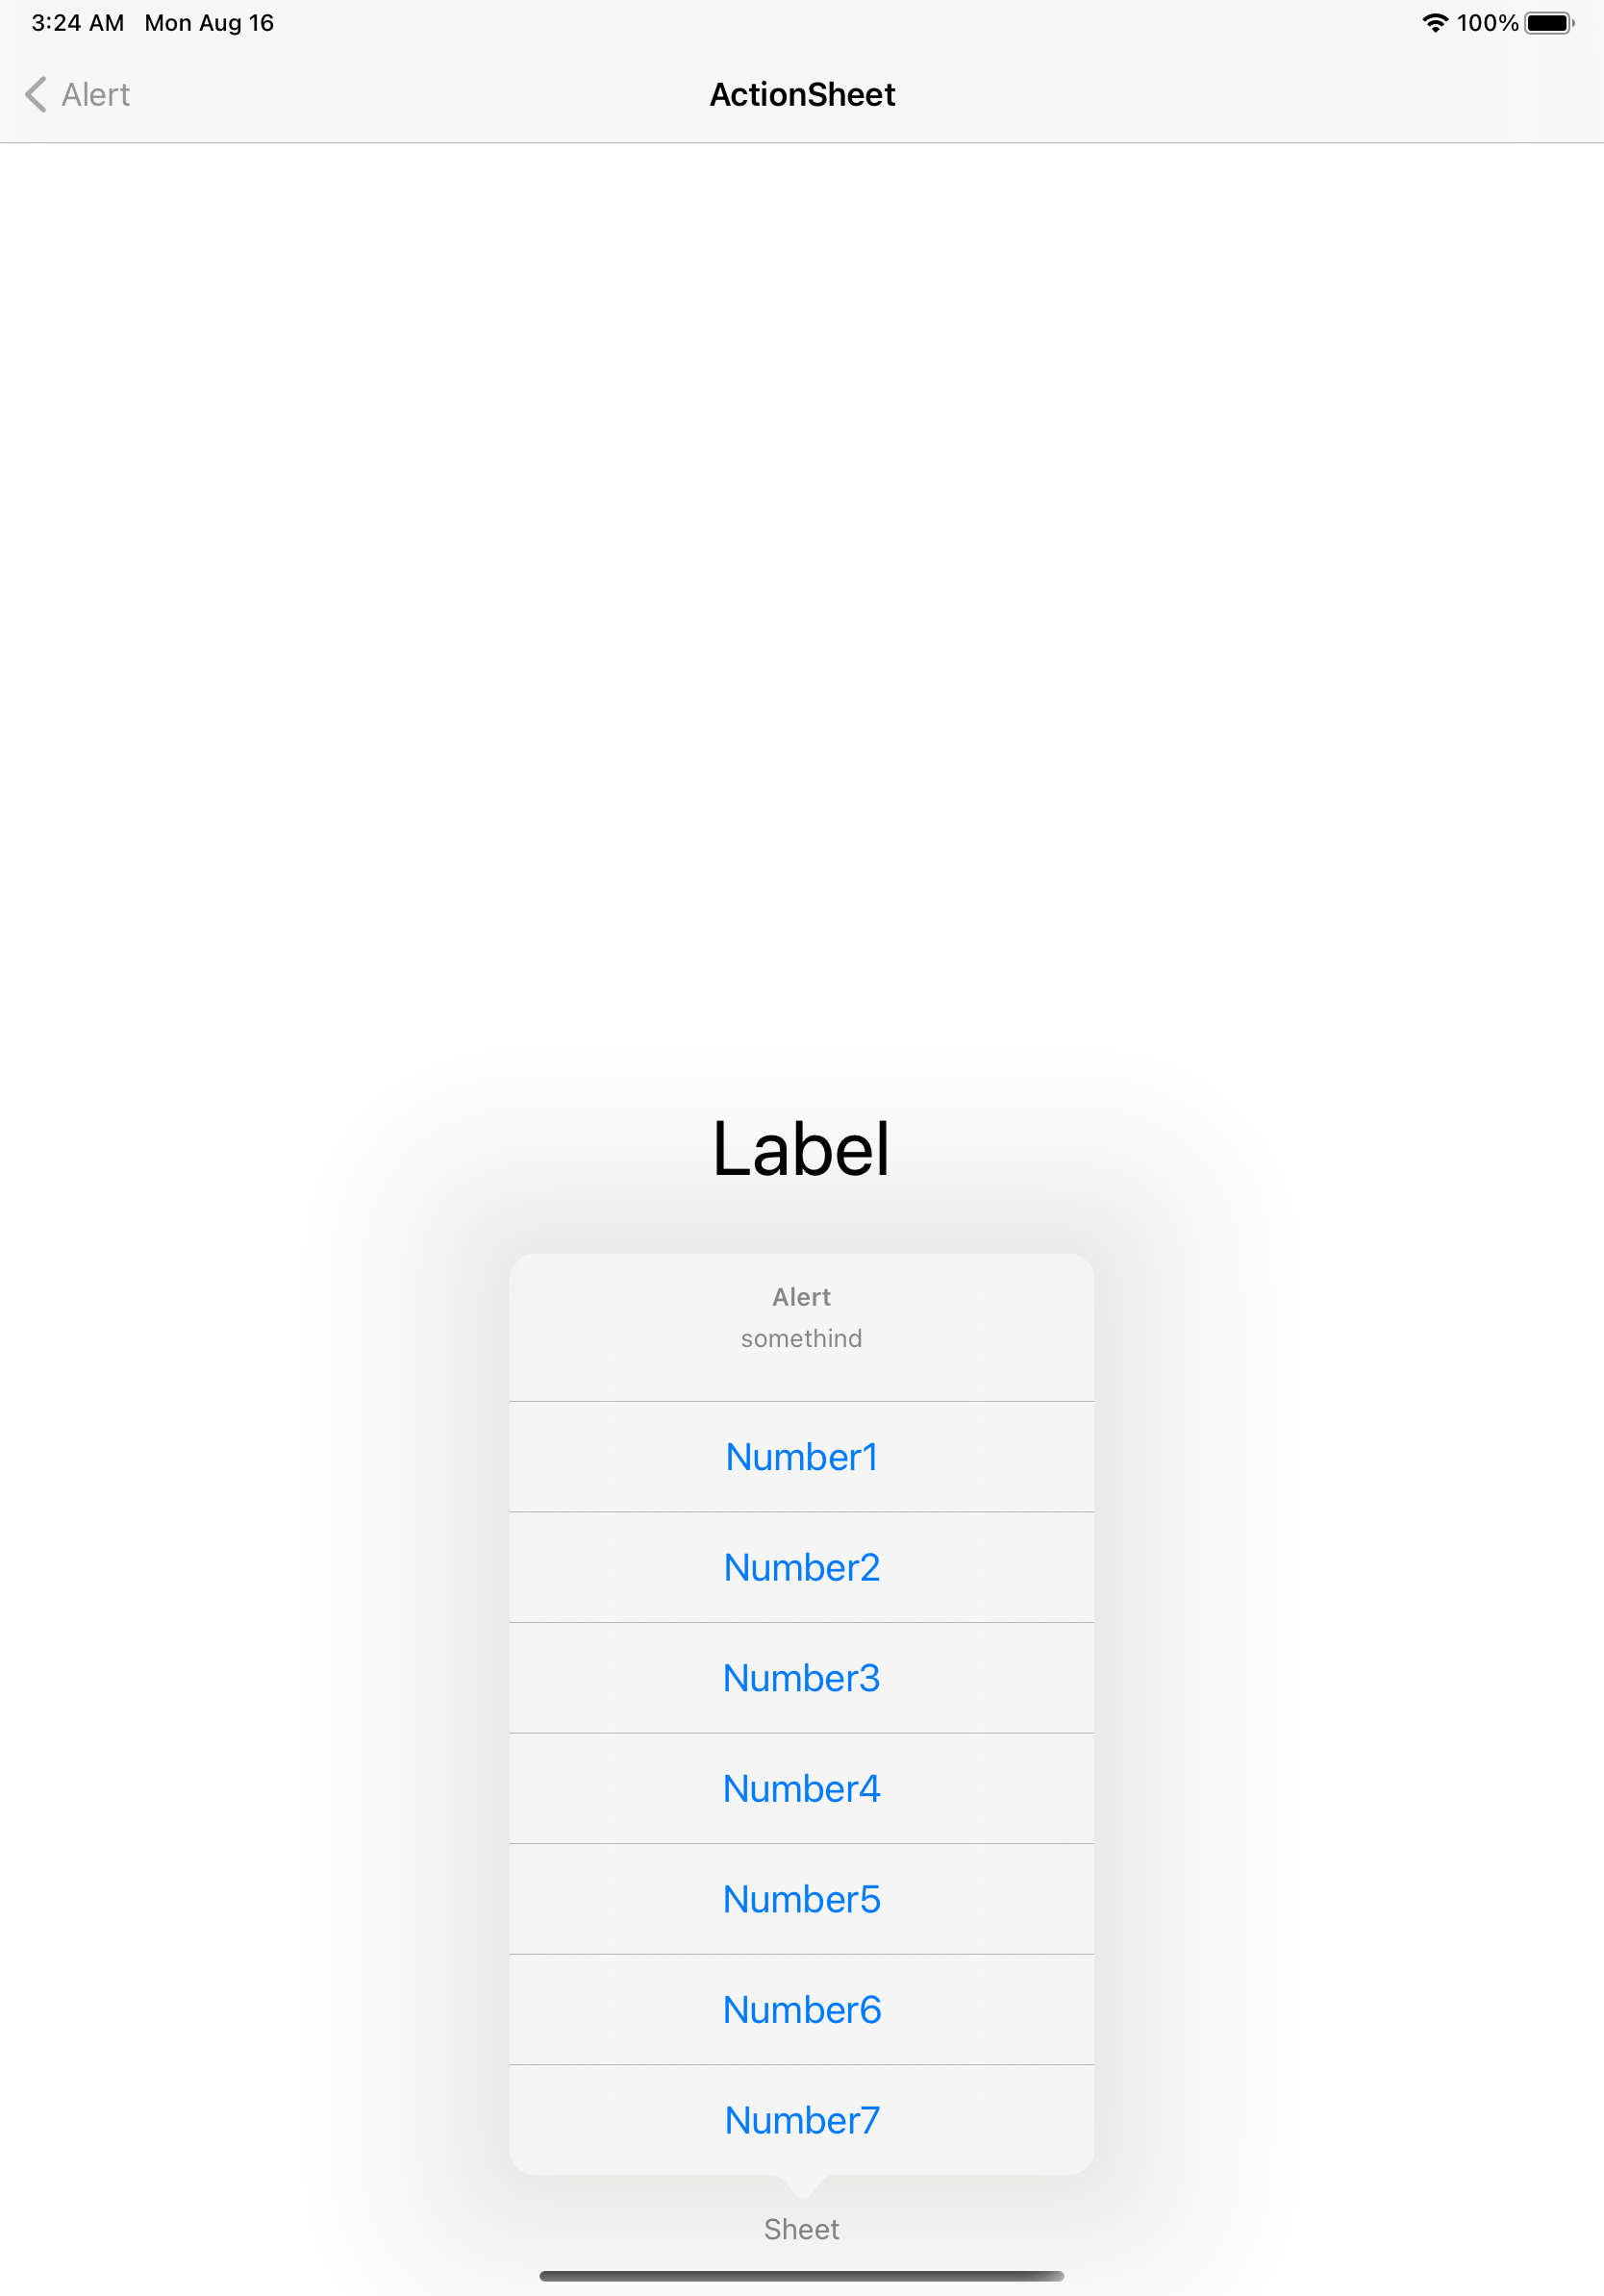
단, 이 경우엔 cancel로 설정한 항목이 표시되지 않으므로 ipad와 iphone모두를 지원하는 universal 앱을 개발한다면,
반드시 고려해야 한다.
'학습 노트 > iOS (2021)' 카테고리의 다른 글
| 043 ~ 052. Label, Text Field, Text View and Text Input (0) | 2021.08.23 |
|---|---|
| 036 ~ 042. Image and Color (0) | 2021.08.19 |
| 020 ~ 025. Slider, Segment Control, Switch and Stepper (0) | 2021.08.11 |
| 014 ~ 019. Button, Picker and Page Control (0) | 2021.08.11 |
| 007 ~ 013. View & Window (뷰와 윈도우)) (0) | 2021.08.06 |


