Stack
Stack은 정해진 한 방향으로 View를 나열하여 배치한다.
방향에 따라 V, H, Z Stack이 존재하며, 그림으로 나타내면 다음과 같다.

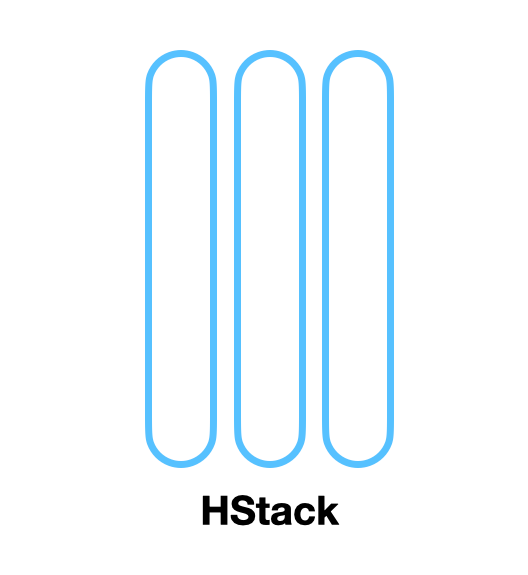
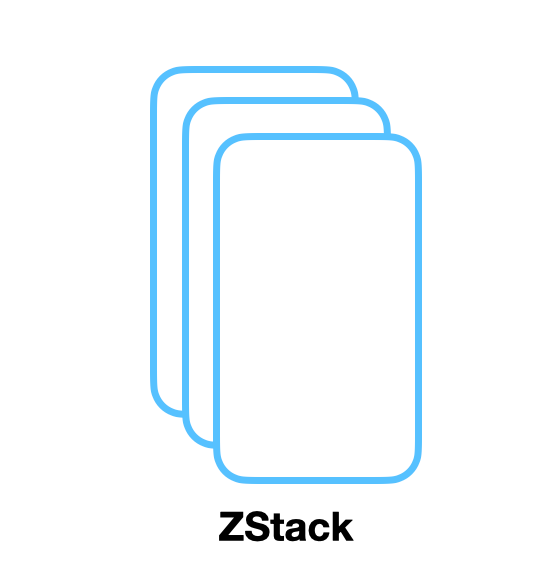
Stack은 기본적으로 Embed 돼있는 View들을 모두 표시할 수 있는 최소한의 크기를 가진다.
View들은 별도로 지정하지 않는 한 기본 여백을 자동으로 가지고, 가운데 정렬 방식으로 정렬된다.
VStack
struct ContentView: View {
    var body: some View {
        VStack(alignmnet: .leading) {
            Text("text1")
            Text("text2")
            Text("text3")
            Text("text4")
        }
    }
}
VStack의 V는 Virtical을 의미한다.
추가된 View부터 위쪽에 표시하고, 추가된 View는 아래로 표시된다.
추가된 View들은 따로 지정하지 않았음에도 화면의 가운데에 표시되고, 각각의 여백을 가지고 있다.
VStack의 alignment 속성을 leading으로 변경했으므로 상대적으로 길이가 짧은 text1이 왼쪽으로 치우친 것을 확인할 수 있다.
화면의 왼쪽으로 붙어 정렬되지 않는 이유는 Stack에 포함된 View들은 콘텐츠를 표시할 최소의 공간을 가지기 때문이다.
HStack
struct ContentView: View {
    var body: some View {
		HStack {
			Text("text1")
			Text("text2")
			Text("text3")
			Text("text4")
		}
    }
}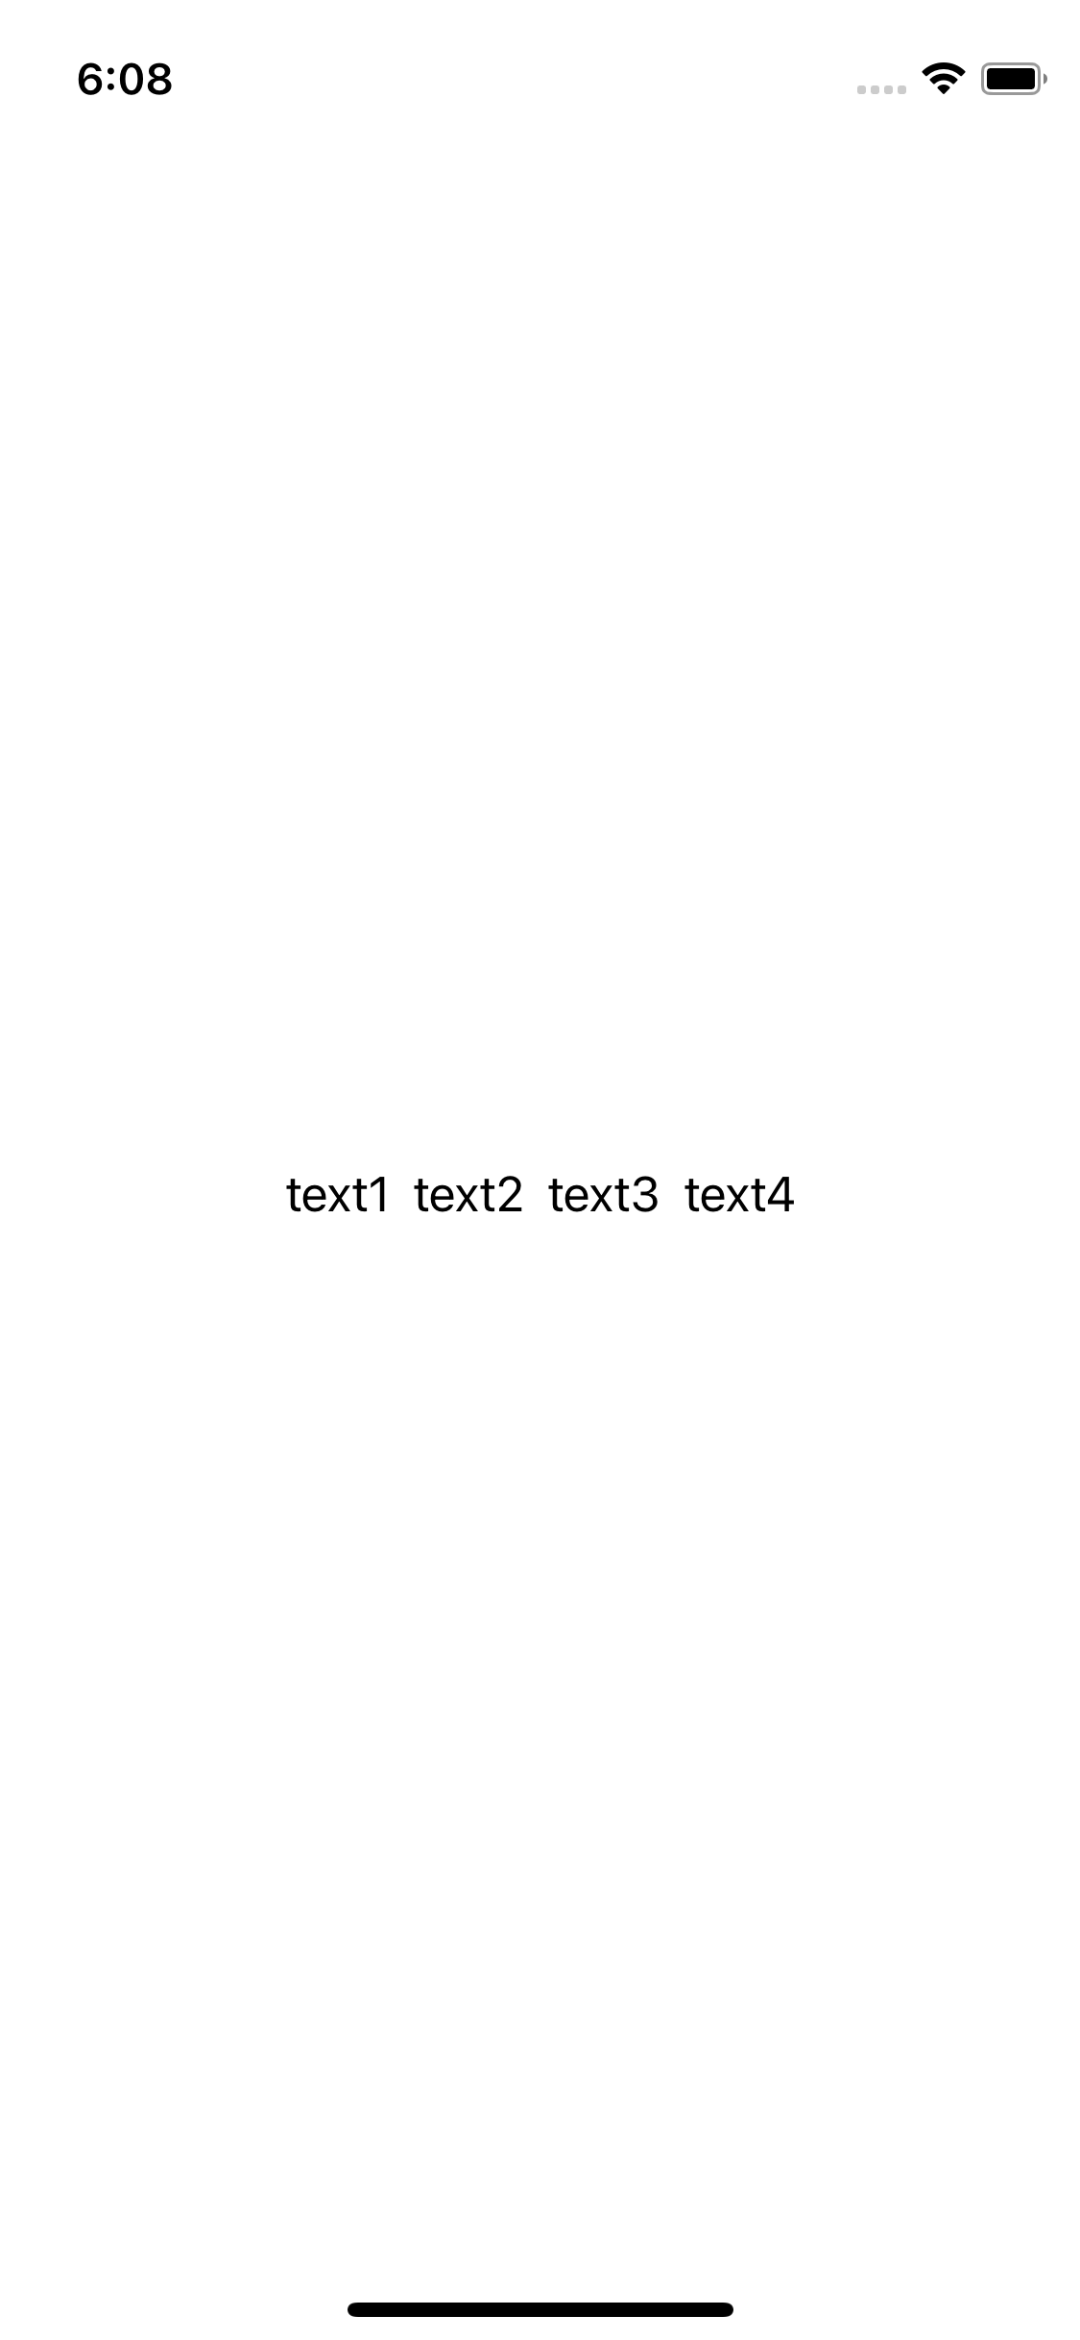
HStack의 H는 Horizontal을 의미한다.
추가된 View 부터 왼쪽에 표시한다.
VStack과 마찬가지로 콘텐츠를 표시할 최소한의 크기로 표시하고, 기본 여백도 가진다.
ZStack
struct ContentView: View {
    var body: some View {
        ZStack {
            RoundedRectangle(cornerRadius: 15.0)
                .frame(width: 300, height: 300)
                .foregroundColor(.red)
            RoundedRectangle(cornerRadius: 15.0)
                .frame(width: 200, height: 200)
                .foregroundColor(.blue)
                .opacity(0.7)
            RoundedRectangle(cornerRadius: 15.0)
                .frame(width: 100, height: 500)
                .foregroundColor(.yellow)
                .opacity(0.7)
    	}
    }
}
ZStack은 Embed된 View를 Layer 방식으로 배치한다.
먼저 추가된 View가 뒤에, 나중에 추가된 View가 앞에 표시된다.
Stack의 정렬

struct ContentView: View {
    var body: some View {
        VStack {
            Text("text1")
            Text("text2")
            Text("text3")
            Text("text4")
        }
        .frame(alignment: .leading)
    }
}
Stack은 View를 표시할 때 콘텐츠 표시를 위한 최소한의 크기로 가운데에 우선 배치한다.
따라서 VStack의 alignment 모디파이어를 사용해도 포함하고 있는 Text View의 위치는 변하지 않는다.
이러한 Stack들의 특성 때문에 정렬에는 Spacer를 적극적으로 활용하는 것이 중요하다.
struct ContentView: View {
    var body: some View {
        HStack {
            VStack {
                Text("text1")
                Text("text2")
                Text("text3")
                Text("text4")
            }
            Spacer()
        }
    }
}
수정된 코드는 VStack을 HStack에 넣어 오른쪽에 Spacer를 사용해 강제로 띄워 주는 방식이다.
Stack과 Spacer의 특성을 적절히 사용한 이러한 방식은 SwiftUI에서 유용하게 사용된다.
LazyStack
struct ContentView: View {
    var body: some View {
        VStack {
            RoundedRectangle(cornerRadius: 15)
                .frame(width: 200, height: 300)
                .foregroundColor(.red)
            RoundedRectangle(cornerRadius: 15)
                .frame(width: 200, height: 300)
                .foregroundColor(.green)
            RoundedRectangle(cornerRadius: 15)
                .frame(width: 200, height: 300)
                .foregroundColor(.blue)
            RoundedRectangle(cornerRadius: 15)
                .frame(width: 200, height: 300)
                .foregroundColor(.black)
            RoundedRectangle(cornerRadius: 15)
                .frame(width: 200, height: 300)
                .foregroundColor(.pink)
            RoundedRectangle(cornerRadius: 15)
                .frame(width: 200, height: 300)
                .foregroundColor(.yellow)
            RoundedRectangle(cornerRadius: 15)
                .frame(width: 200, height: 300)
                .foregroundColor(.purple)
            RoundedRectangle(cornerRadius: 15)
                .frame(width: 200, height: 300)
                .foregroundColor(.gray)
            RoundedRectangle(cornerRadius: 15)
                .frame(width: 200, height: 300)
                .foregroundColor(.orange)
        }
    }
}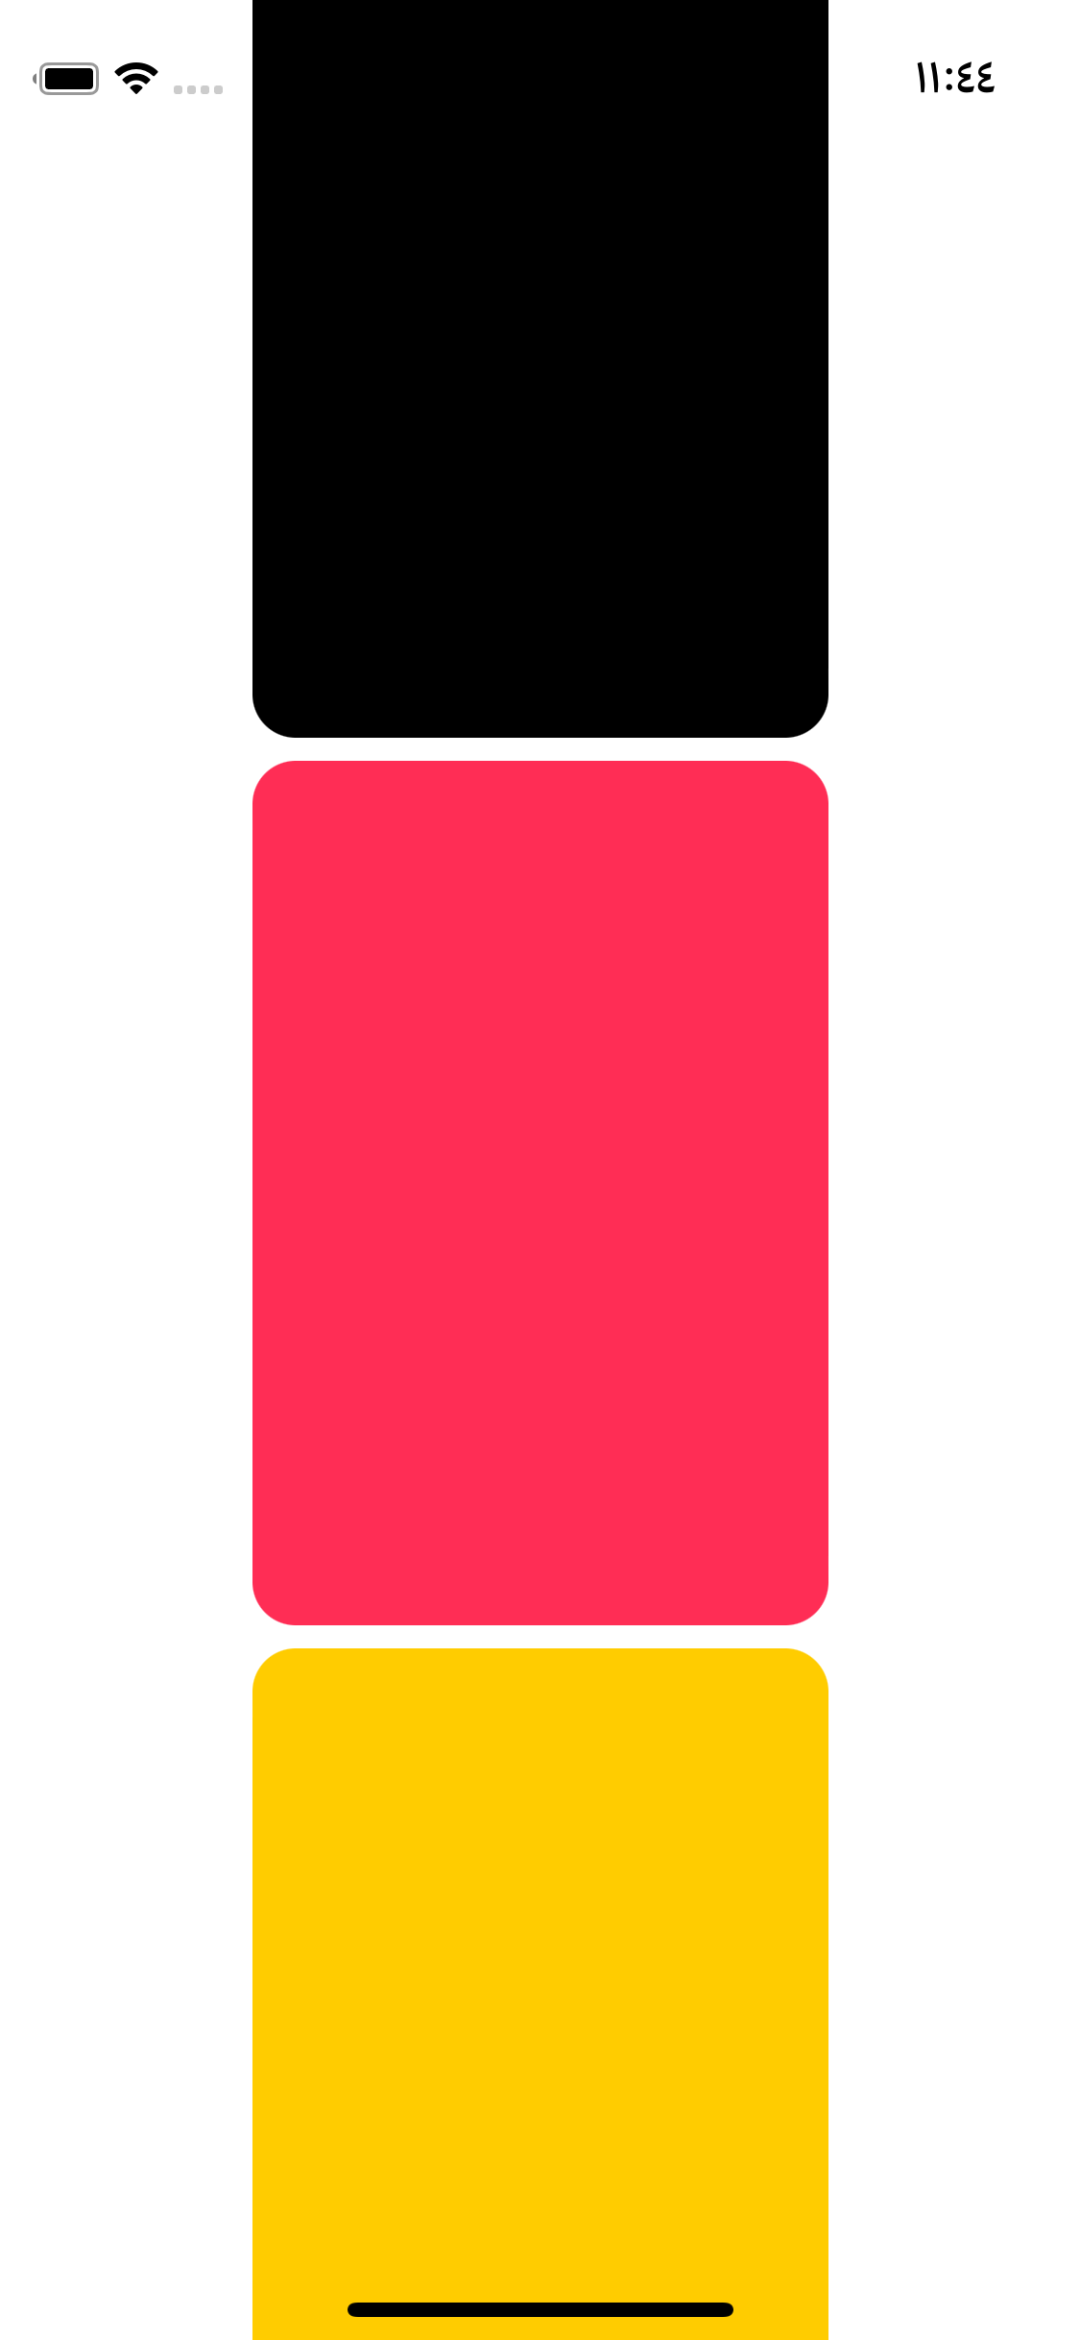
Stack에 추가되는 데이터가 많아지게 되면 언젠가는 위와 같이 화면 안에 전부 채울 수 없는 경우가 생긴다.
이러한 경우 ScrollView를 사용할 수 있는데,
struct ContentView: View {
    var body: some View {
        ScrollView {
            VStack {
                RoundedRectangle(cornerRadius: 15)
                    .frame(width: 200, height: 300)
                    .foregroundColor(.red)
                RoundedRectangle(cornerRadius: 15)
                    .frame(width: 200, height: 300)
                    .foregroundColor(.green)
                RoundedRectangle(cornerRadius: 15)
                    .frame(width: 200, height: 300)
                    .foregroundColor(.blue)
                RoundedRectangle(cornerRadius: 15)
                    .frame(width: 200, height: 300)
                    .foregroundColor(.black)
                RoundedRectangle(cornerRadius: 15)
                    .frame(width: 200, height: 300)
                    .foregroundColor(.pink)
                RoundedRectangle(cornerRadius: 15)
                    .frame(width: 200, height: 300)
                    .foregroundColor(.yellow)
                RoundedRectangle(cornerRadius: 15)
                    .frame(width: 200, height: 300)
                    .foregroundColor(.purple)
                RoundedRectangle(cornerRadius: 15)
                    .frame(width: 200, height: 300)
                    .foregroundColor(.gray)
                RoundedRectangle(cornerRadius: 15)
                    .frame(width: 200, height: 300)
                    .foregroundColor(.orange)
            }
        }
    }
}
위와 같이 화면에 미처 표시하지 못한 View들을 Scroll을 사용해 표시할 수 있다.
Stack은 Embed된 View를 전부 생성하고, 이를 화면에 표시한다.
따라서 9개의 색깔 View가 전부 생성이 된 상태에서 ScrollView가 동작하게 된다.
지금이야 9개의 가벼운 View만 표시하고 있지만,
사진, 동영상 등의 무거운 데이터를 표시하는 경우 메모리 낭비가 심하다.
이럴 때 사용하는 것이 LazyStack이다.
struct ContentView: View {
    var body: some View {
        ScrollView {
            LazyVStack {
                RoundedRectangle(cornerRadius: 15)
                    .frame(width: 200, height: 300)
                    .foregroundColor(.red)
                RoundedRectangle(cornerRadius: 15)
                    .frame(width: 200, height: 300)
                    .foregroundColor(.green)
                RoundedRectangle(cornerRadius: 15)
                    .frame(width: 200, height: 300)
                    .foregroundColor(.blue)
                RoundedRectangle(cornerRadius: 15)
                    .frame(width: 200, height: 300)
                    .foregroundColor(.black)
                RoundedRectangle(cornerRadius: 15)
                    .frame(width: 200, height: 300)
                    .foregroundColor(.pink)
                RoundedRectangle(cornerRadius: 15)
                    .frame(width: 200, height: 300)
                    .foregroundColor(.yellow)
                RoundedRectangle(cornerRadius: 15)
                    .frame(width: 200, height: 300)
                    .foregroundColor(.purple)
                RoundedRectangle(cornerRadius: 15)
                    .frame(width: 200, height: 300)
                    .foregroundColor(.gray)
                RoundedRectangle(cornerRadius: 15)
                    .frame(width: 200, height: 300)
                    .foregroundColor(.orange)
            }
        }
    }
}
간단하게 Stack 앞에 'Lazy'를 붙이는 것으로 사용할 수 있고, 결과도 이전과 크게 다르지 않다.

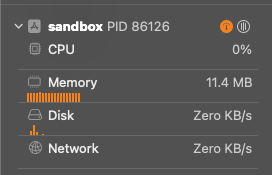
하지만 메모리 사용량은 최초 진입 시 2MB나 줄어든 것을 확인할 수 있다.
- 일반 Stack으로 구현하고 이후 필요에 따라 간단하게 LaxyStack을 사용하면 된다.
- LazyStack이 한 번에 초기화하는 양은 화면과 View의 크기에 따라 유동적으로 달라진다.
- ScrollView와 LasyStack의 조합보다는 둘의 상위 호환인 LazyGrid의 사용 빈도가 더 높다.
Section
struct ContentView: View {
    var body: some View {
        ScrollView {
            LazyVStack {
                Section {
                    RoundedRectangle(cornerRadius: 15)
                        .frame(width: 200, height: 300)
                        .foregroundColor(.red)
                    RoundedRectangle(cornerRadius: 15)
                        .frame(width: 200, height: 300)
                        .foregroundColor(.green)
                    RoundedRectangle(cornerRadius: 15)
                        .frame(width: 200, height: 300)
                        .foregroundColor(.blue)
                    RoundedRectangle(cornerRadius: 15)
                        .frame(width: 200, height: 300)
                        .foregroundColor(.black)
                    RoundedRectangle(cornerRadius: 15)
                        .frame(width: 200, height: 300)
                        .foregroundColor(.pink)
                } header: {
                    HStack {
                        Text("Section A")
                        Spacer()
                    }
                    .padding()
                    .background(.gray)
                }

                Section {
                    RoundedRectangle(cornerRadius: 15)
                        .frame(width: 200, height: 300)
                        .foregroundColor(.yellow)
                    RoundedRectangle(cornerRadius: 15)
                        .frame(width: 200, height: 300)
                        .foregroundColor(.purple)
                    RoundedRectangle(cornerRadius: 15)
                        .frame(width: 200, height: 300)
                        .foregroundColor(.gray)
                    RoundedRectangle(cornerRadius: 15)
                        .frame(width: 200, height: 300)
                        .foregroundColor(.orange)
                } header: {
                    HStack {
                        Text("Section A")
                        Spacer()
                    }
                    .padding()
                    .background(.gray)
                }
            }
        }
        .frame(width: .infinity)
    }
}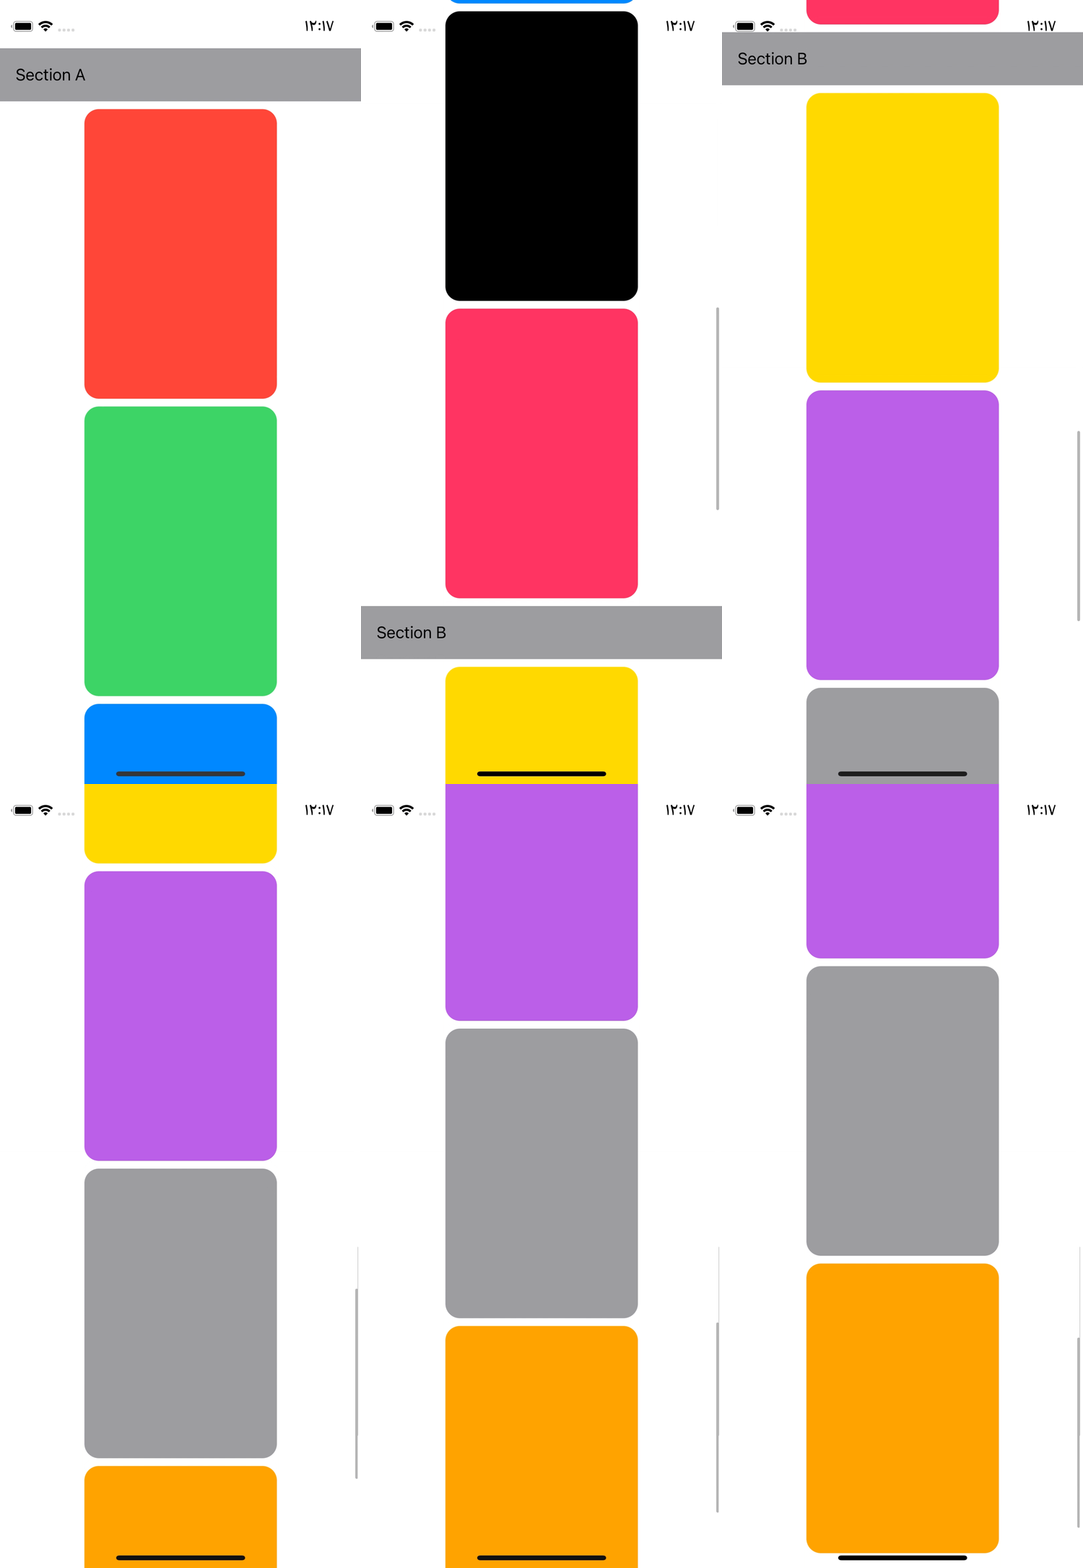
VStack은 Section으로 Embed 된 View를 구분해 관리할 수 있다.
Section에는 Header와 Footer를 추가할 수 있고, 자유롭게 커스텀이 가능해 이들을 별도의 View로 대체하는 것도 가능하다.
struct ContentView: View {
    var body: some View {
        ScrollView {
            LazyVStack(pinnedViews: .sectionHeaders) {
                Section {
                    RoundedRectangle(cornerRadius: 15)
                        .frame(width: 200, height: 300)
                        .foregroundColor(.red)
                    RoundedRectangle(cornerRadius: 15)
                        .frame(width: 200, height: 300)
                        .foregroundColor(.green)
                    RoundedRectangle(cornerRadius: 15)
                        .frame(width: 200, height: 300)
                        .foregroundColor(.blue)
                    RoundedRectangle(cornerRadius: 15)
                        .frame(width: 200, height: 300)
                        .foregroundColor(.black)
                    RoundedRectangle(cornerRadius: 15)
                        .frame(width: 200, height: 300)
                        .foregroundColor(.pink)
                } header: {
                    HStack {
                        Text("Section A")
                        Spacer()
                    }
                    .padding()
                    .background(.gray)
                }

                Section {
                    RoundedRectangle(cornerRadius: 15)
                        .frame(width: 200, height: 300)
                        .foregroundColor(.yellow)
                    RoundedRectangle(cornerRadius: 15)
                        .frame(width: 200, height: 300)
                        .foregroundColor(.purple)
                    RoundedRectangle(cornerRadius: 15)
                        .frame(width: 200, height: 300)
                        .foregroundColor(.gray)
                    RoundedRectangle(cornerRadius: 15)
                        .frame(width: 200, height: 300)
                        .foregroundColor(.orange)
                } header: {
                    HStack {
                        Text("Section B")
                        Spacer()
                    }
                    .padding()
                    .background(.gray)
                }
            }
        }
        .frame(width: .infinity)
    }
}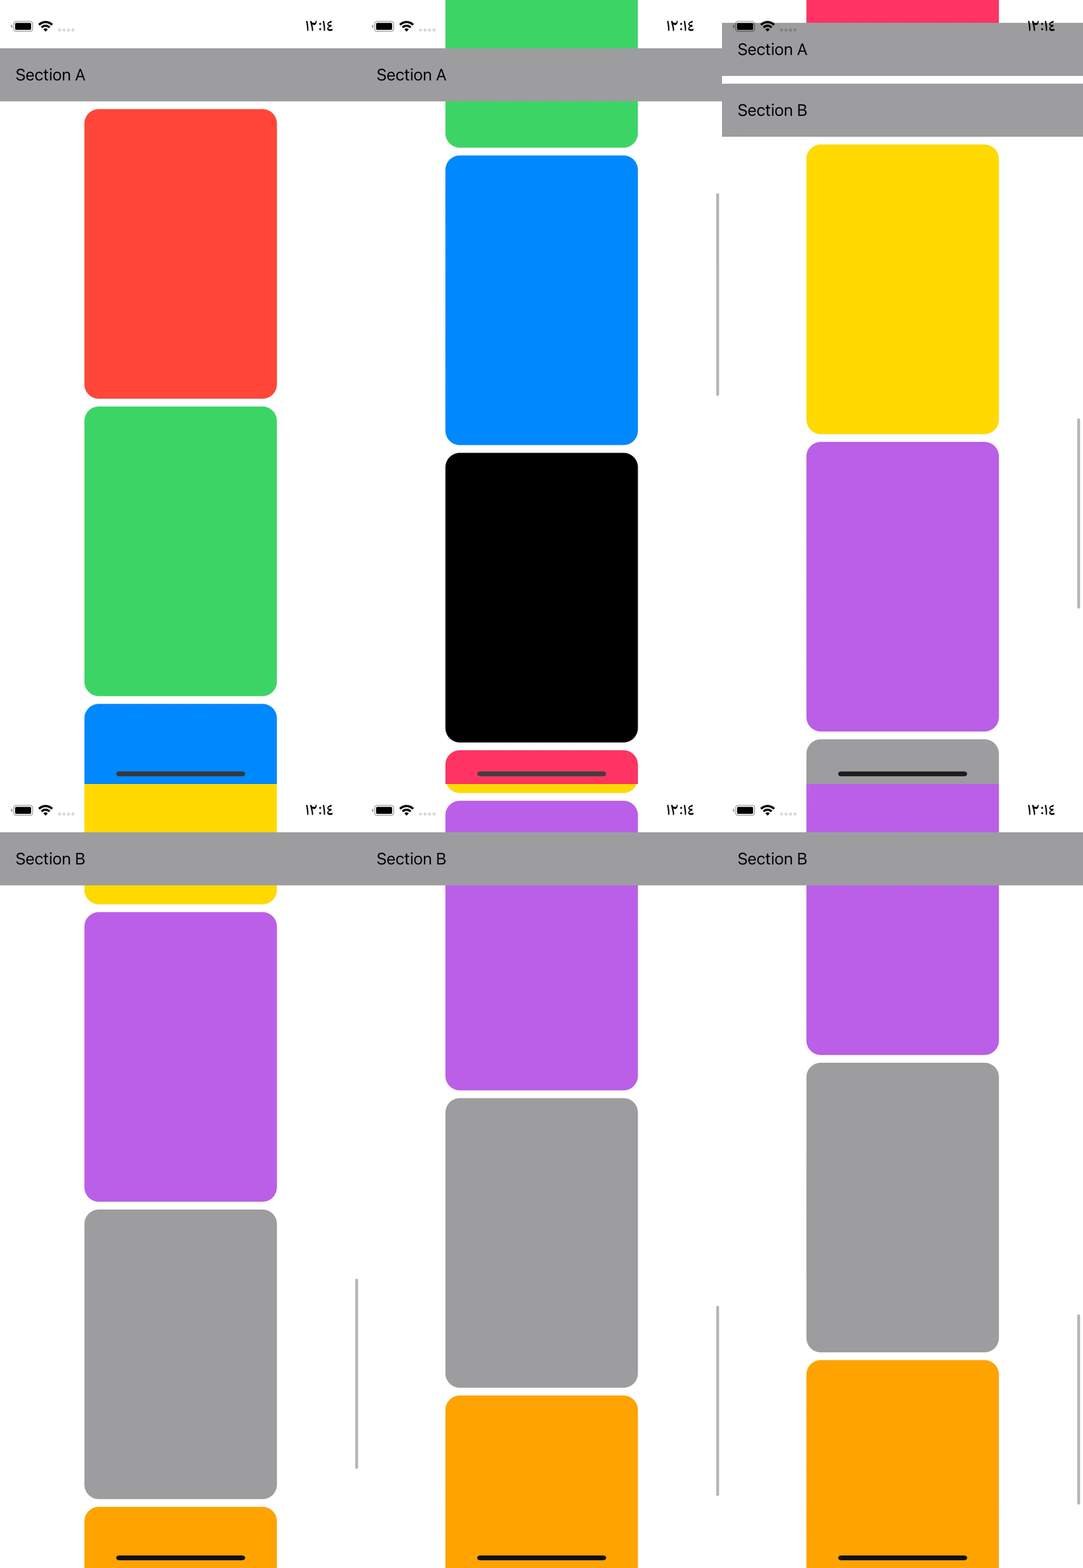
또한 VStack의 pinnedView에 header나 footer를 지정해 StickyView를 쉽게 구현할 수 있다.
'학습 노트 > Swift UI (2022)' 카테고리의 다른 글
| 08 ~09. Alert & Confirmation Dialog (0) | 2022.09.23 |
|---|---|
| 07. Overlay (0) | 2022.09.22 |
| 05 ~ 06. Scroll View & Form (0) | 2022.09.22 |
| 03 ~ 04. Spacer & Group (0) | 2022.09.22 |
| 01. Swift UI (0) | 2022.09.13 |


